
Video guide
Prefer to watch? This video walks through the whole flow — from opening the form to submitting your clip for review.
This guide walks you through putting a new clip on your store, from picking the file on your computer all the way to seeing it go live. You don’t need any technical knowledge — every button mentioned here is in your Store Manager.
There are three ways to get your video onto Lewdden:
- Upload from your browser — the simplest option. It works for almost everyone and handles files up to 26 GB.
- Bulk upload many files at once — drop a pile of clips and trailers on the Bulk upload page (the blue button above the form). They upload one by one and then appear in the “choose an existing clip / trailer” lists on this page.
- Upload by FTP — for files bigger than 26 GB or a large back-catalogue. You drop files into a folder with a free app, and they show up on your clip form by themselves. More on this below — skip it if you’re just doing a normal upload.
You can mix them. Some creators drop a big file in by FTP overnight, then come back the next morning, fill in the details and add a trailer with one click.
1. Before you start
You need three things:
- A finished video. MP4, MOV, M4V and WEBM all work. Filmed in VR180? That works too — see “VR clips” in step 3.
- An account that’s ready to go. You need to be signed in, with your identity verified and at least one approved performer on your account. If your Add Clip button is greyed out, finish those steps first — see the Creator onboarding guide.
- A title and a short description for the clip. You’ll type both on the form.
Tip — fill out your profile first. Before your first few clips, spend a few minutes on your profile: country, languages, body type, hair, eyes, height, piercings, tattoos and so on. Fans filter the clip pages by these, so every box you fill in is another way they find your clips.
2. Open the new clip form
- Sign in to Lewdden.
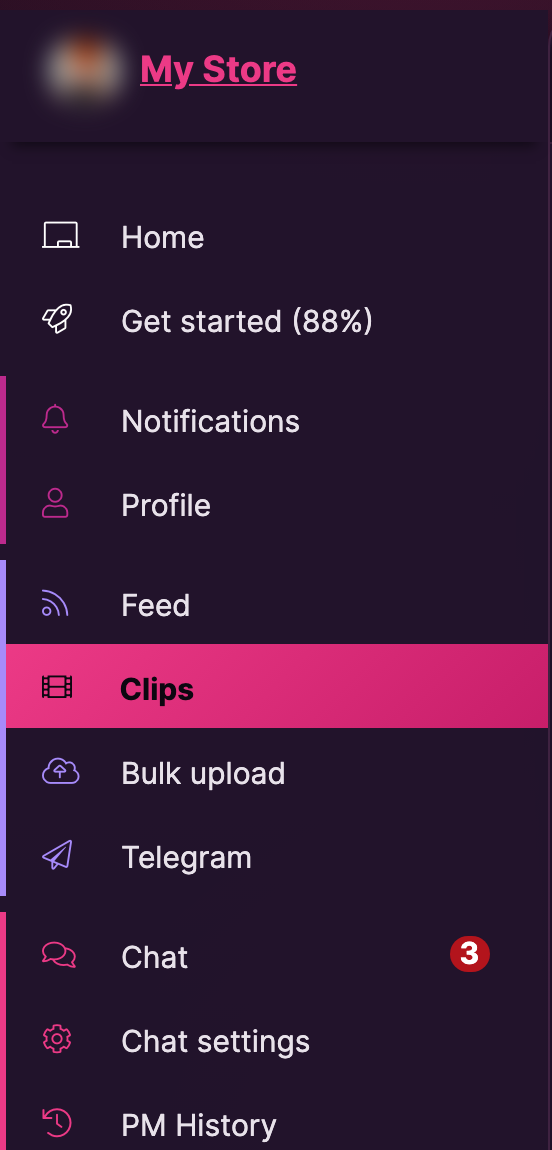
- In your Store Manager menu on the left, click Clips. You see the list of all your clips.
- Click the Add Clip button. The new clip form opens.
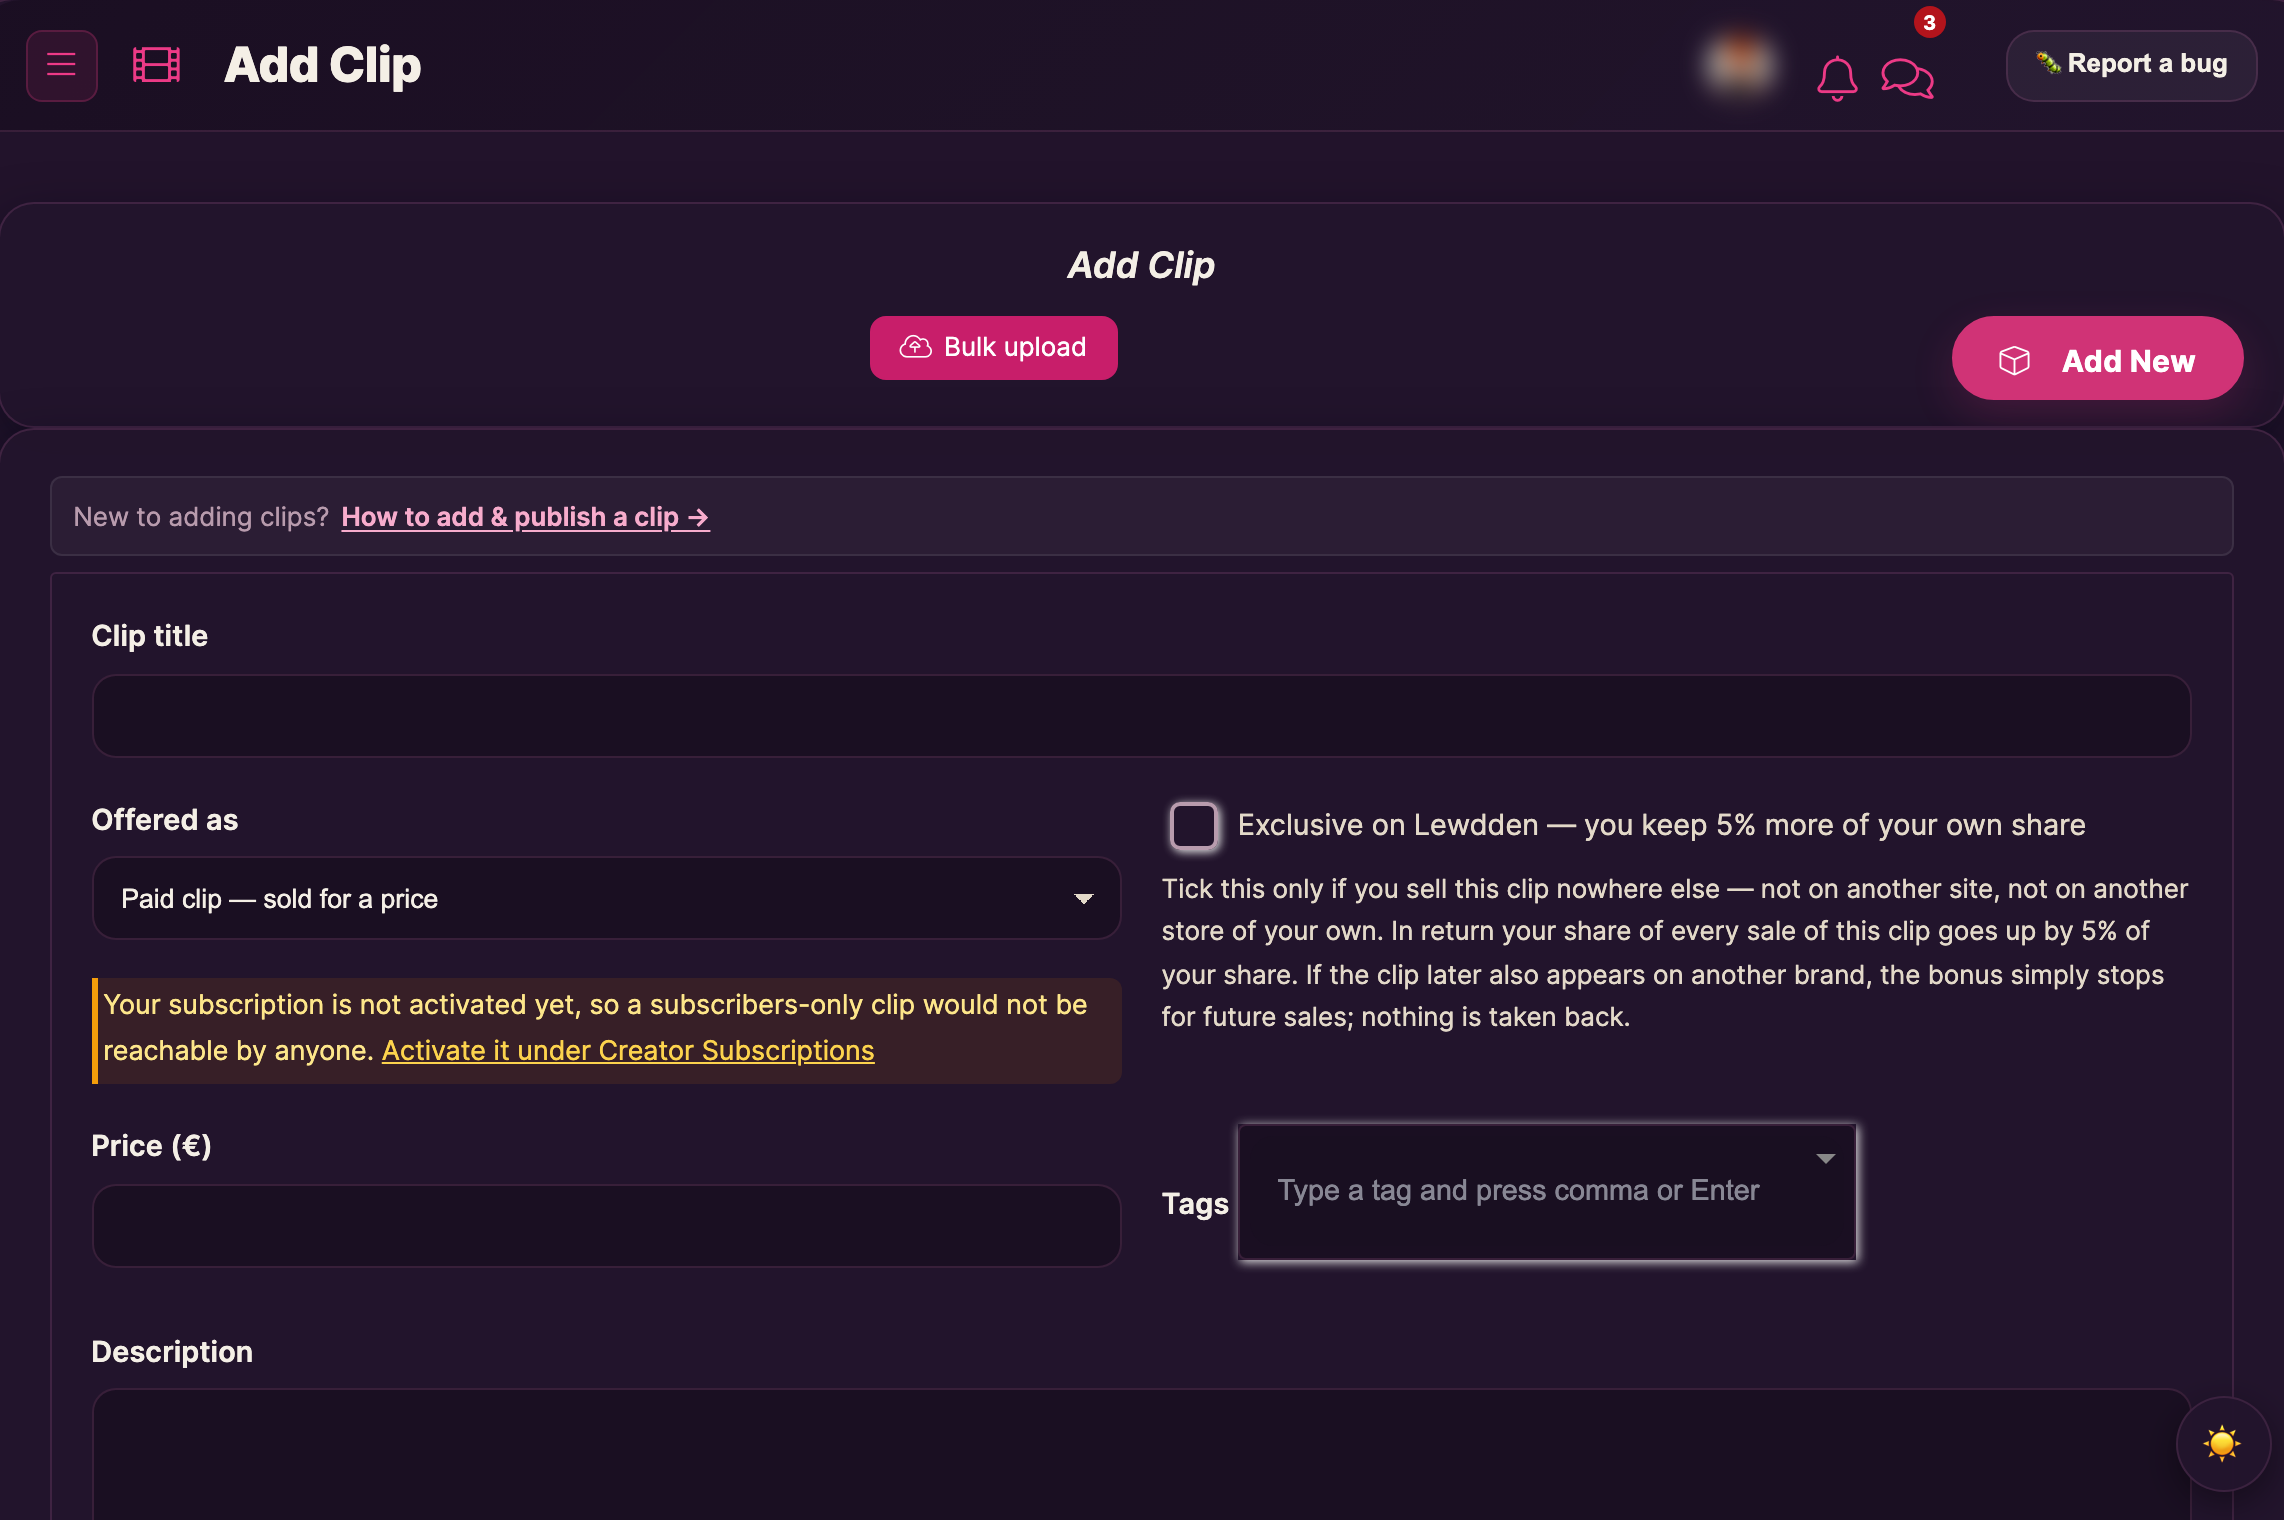
It’s one long page. From the top: a link to this guide, the clip details, the VR switch, the upload boxes and the trailer, performers and a few optional extras, the release schedule, and at the very bottom the save button with a checklist of what’s still missing.
3. Fill in the details
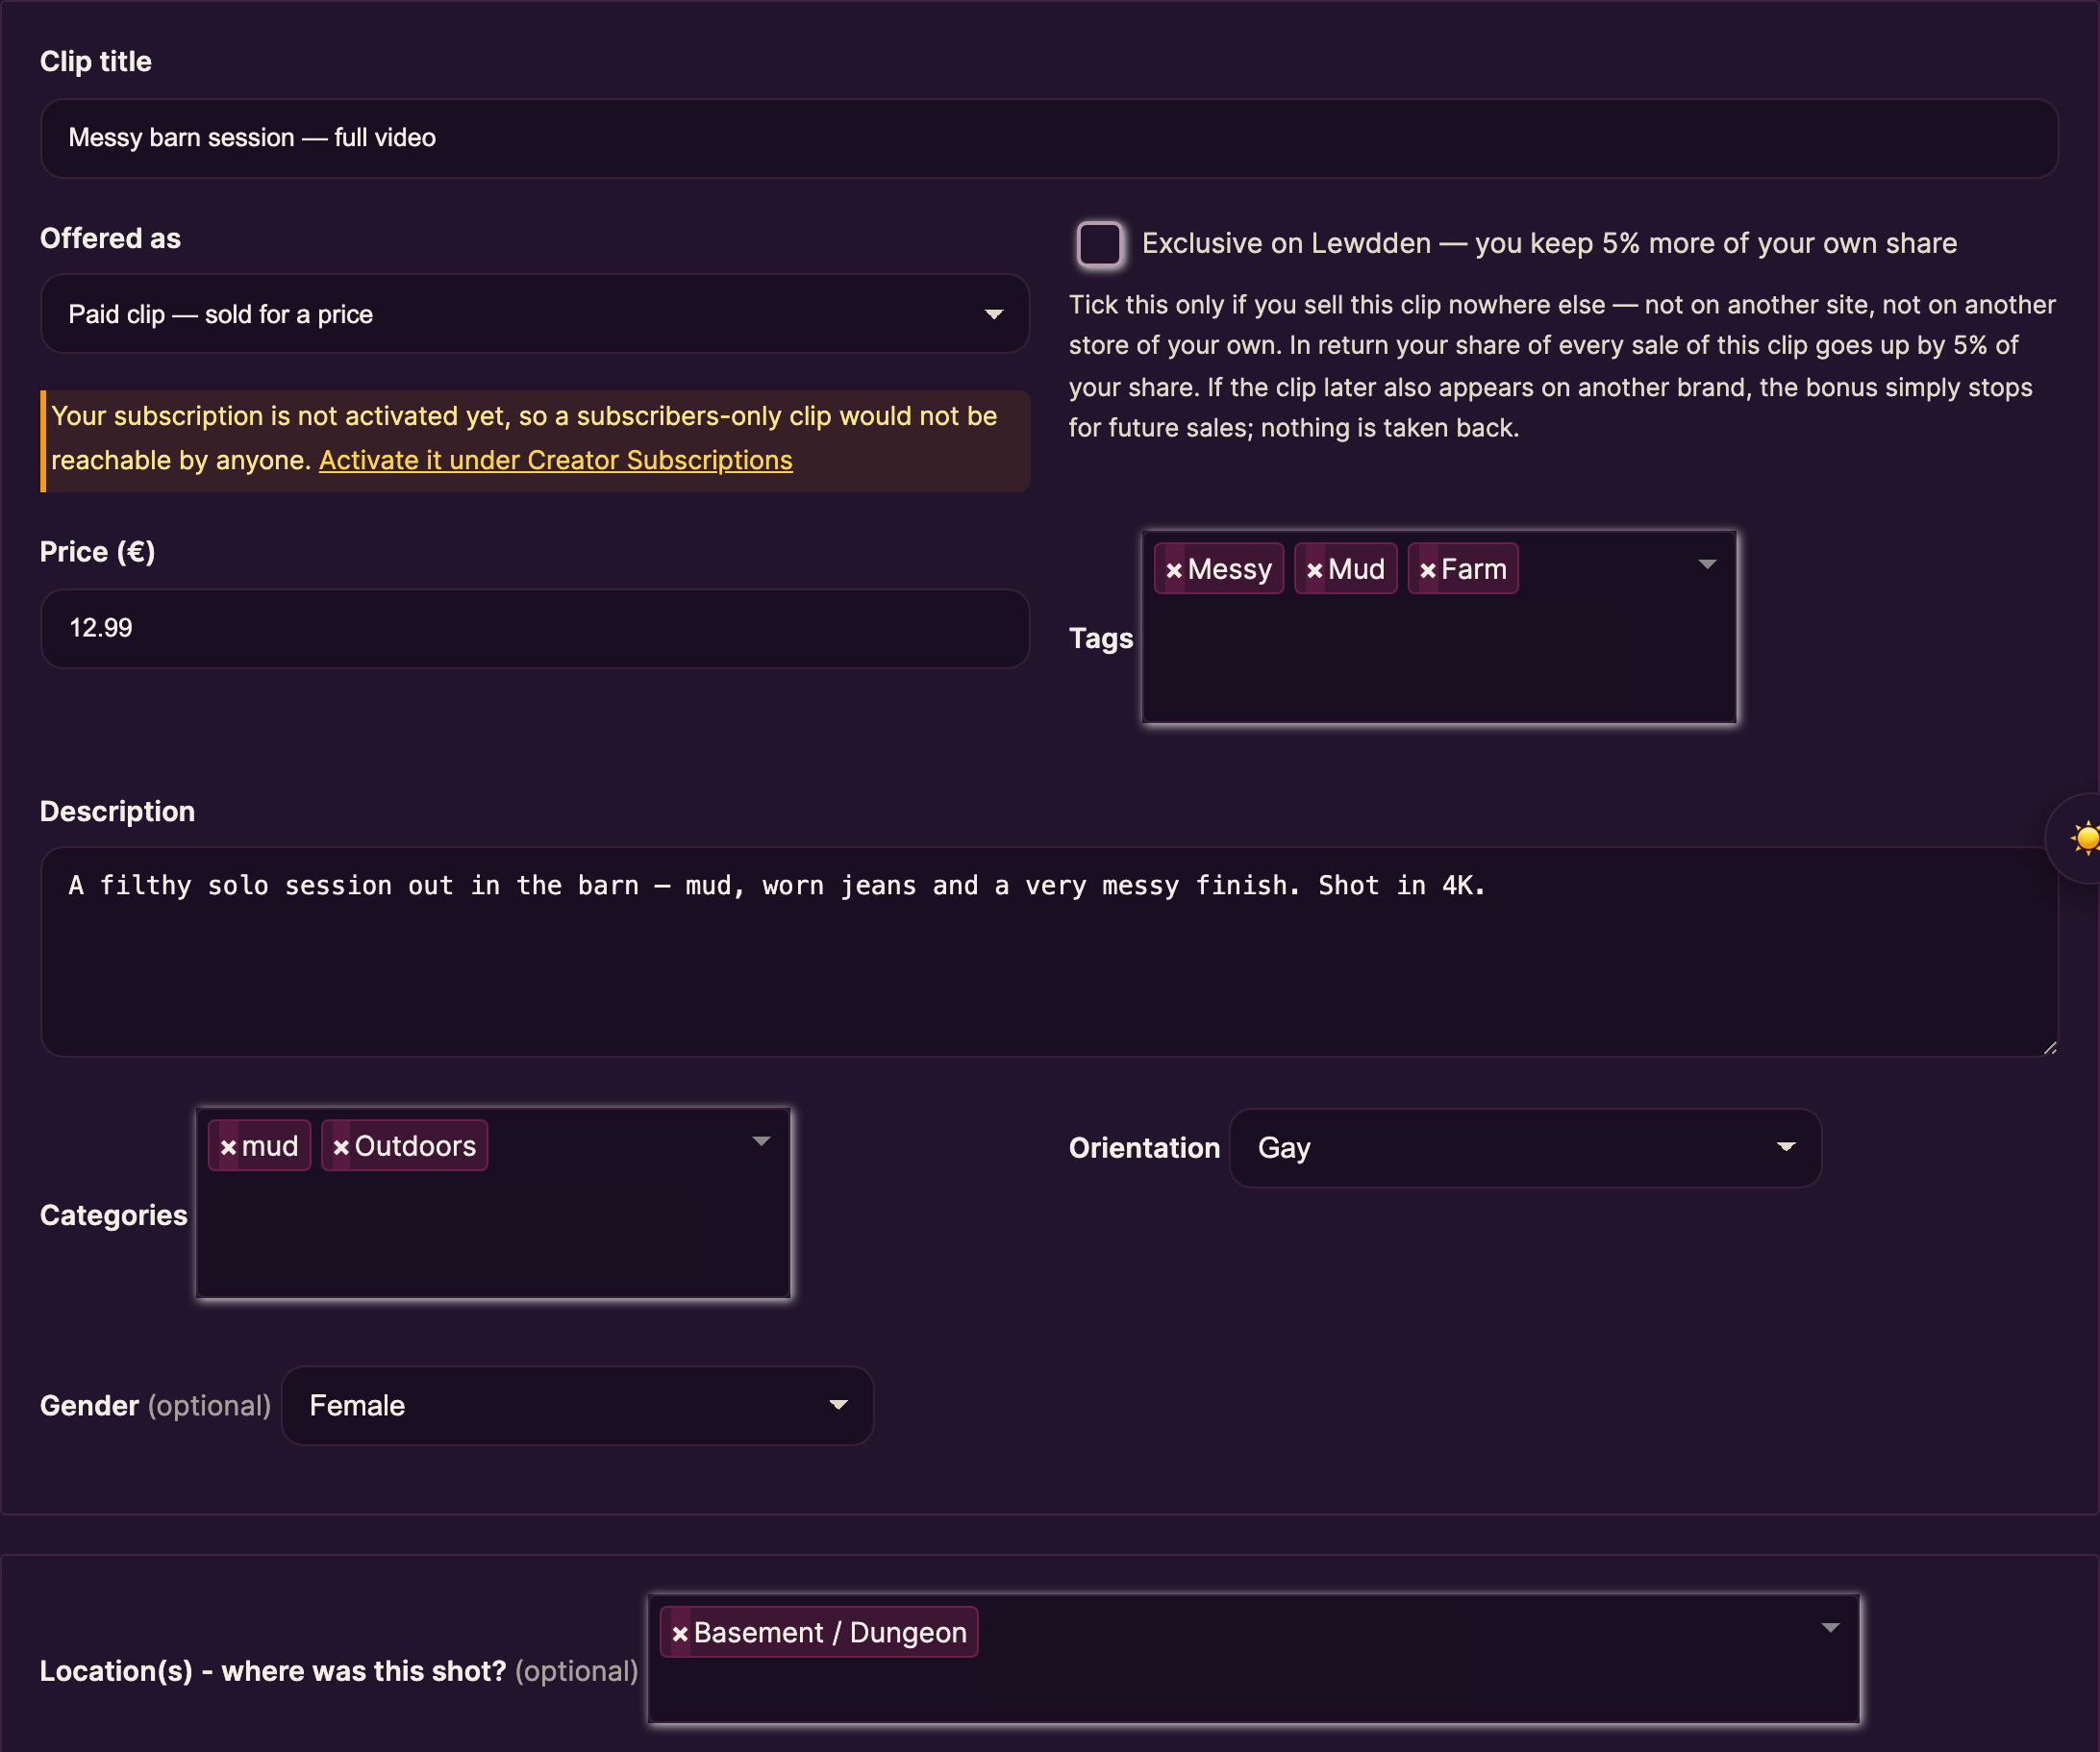
The first box has the basics. Nothing’s locked in — you can change all of it later, right up until you submit.
- Clip title — what fans see in your store and in search. Required.
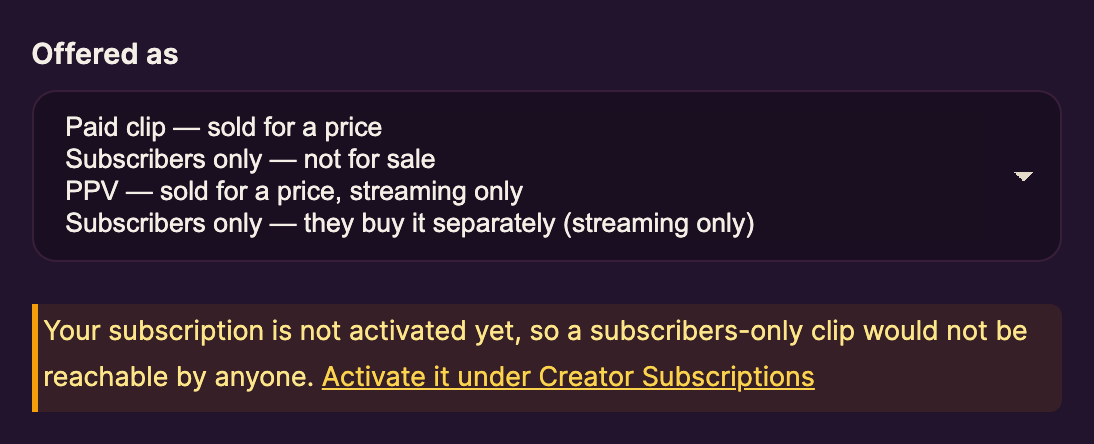
- Offered as — how fans get the clip: bought, included in your subscription, or streaming only. The four options are explained just below.
- Exclusive on Lewdden — tick this only if the clip is sold nowhere else. Explained below.
- Price (€) — the lowest you can set is €4.99. It is not used when the clip is “Subscribers only — not for sale”.
- Tags — type a word and press Enter or a comma to add it. Add at least one — tags help fans find your clip.
- Description — a few sentences about what’s in the clip.
- Categories — pick at least one. Required.
- Orientation — pick the one that fits. Required.
- Gender (optional) — leave it on Use my profile gender, or pick another one if this clip is different.
- Location(s) — where was this shot? — optional. Pick one or more places, for example Barn / Farm or Bathroom. Fans can filter clips by location.
Offered as — four ways to sell a clip
The Offered as menu decides who can watch the clip, whether it is sold, and whether buyers can download the file. The short note under the menu always explains the option you picked.
| Option in the menu | Who can watch | Price | Buyers get |
|---|---|---|---|
| Paid clip — sold for a price (the default) | Anyone who buys it | Required, at least €4.99 | Streaming and download |
| Subscribers only — not for sale | Your active subscribers, as part of the subscription | Not used | Streaming, as long as they stay subscribed |
| PPV — sold for a price, streaming only | Anyone who buys it | Required, at least €4.99 | Streaming only — no file |
| Subscribers only — they buy it separately (streaming only) | Only your active subscribers, and only after buying it | Required, at least €4.99 | Streaming only — no file |
- Paid clip is the normal case. Fans buy it for your price and can stream and download it. You can still add it to your subscription under Creator Subscriptions.
- Subscribers only — not for sale is not sold at all. The clip is always included in your subscription and is posted to your feed automatically. Everyone else is asked to subscribe to watch it.
- PPV is sold for your price, but buyers can only stream it — they never get a downloadable file. Good for material you don’t want to leave the platform.
- Subscribers only — they buy it separately can only be bought by your active subscribers, and they pay your price on top of the subscription. Being subscribed doesn’t unlock it — it only allows them to buy it. Streaming only.
The subscribers-only options need an active subscription. If yours isn’t switched on yet, a note under the menu says so, with a link to Creator Subscriptions, where you activate it.
Pricing tips, subscriber discounts and examples for each option are in Pricing your clips.
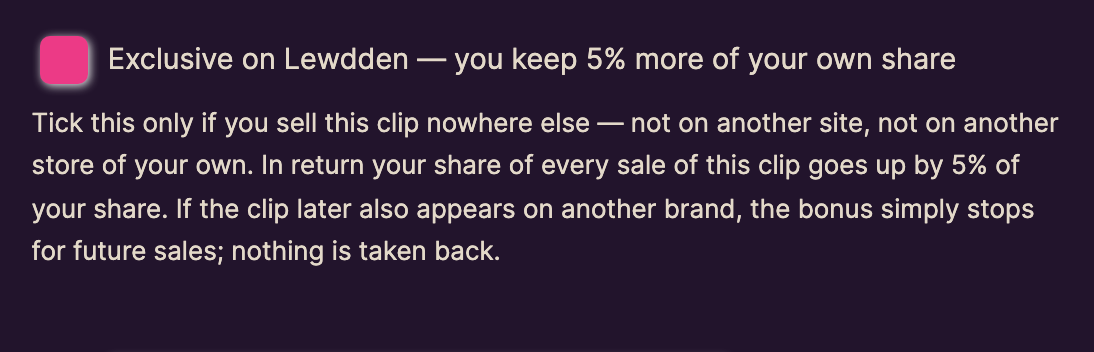
Exclusive on Lewdden — you keep 5% more of your own share
Next to Offered as is the checkbox Exclusive on Lewdden — you keep 5% more of your own share.
- Only tick it if this clip is sold nowhere else — not on another site, and not in another store of your own.
- What you get in return: your share of every sale of this clip goes up by 5% of your share. The bonus comes on top of your normal share and is paid out with it.
- If the clip later also appears on another brand, the bonus simply stops for future sales. Nothing you have already earned is taken back.
- Our team checks it. If a clip marked as exclusive is also on sale somewhere else, moderation can remove the mark or block it for that clip.
- Fans see it: the clip card and the clip page show that the clip is exclusive to Lewdden. In your own clip list the clip shows Exclusive on Lewdden — or Exclusivity not active, with the reason, if the bonus isn’t being paid.
VR clips — “This is a VR clip (VR180 side-by-side)”
Below the details is the switch This is a VR clip (VR180 side-by-side). Leave it off for normal videos.
- Switch it on before you upload. A VR file is prepared for headsets as soon as the upload finishes, so the switch has to be on first.
- The file must be VR180 side-by-side: left eye on the left, and twice as wide as it is tall (for example 5760 × 2880 or 7680 × 3840). If a file marked as VR has a different shape, the upload is stopped with an explanation.
- A VR clip needs a VR trailer. The free teaser is what sells it. You can auto-generate it like any other trailer — for VR this takes about 2–3 minutes.
- In the lists of uploaded files, VR files carry a VR180 label with their resolution, for example VR180 8K.
- Two optional VR fields appear further down the form when the switch is on: Premiere (VR) — until that date and time fans can pre-order the clip; from then on the full clip plays in VR, with a countdown on the clip card before that — and Toy script (.funscript), which lets fans with a paired Lovense toy feel the clip in VR.

Camera, framing, resolution and everything else about shooting VR: Recording and selling VR.
4. Add your main clip
Scroll to the Main clip upload box.
The simple way — upload from your browser
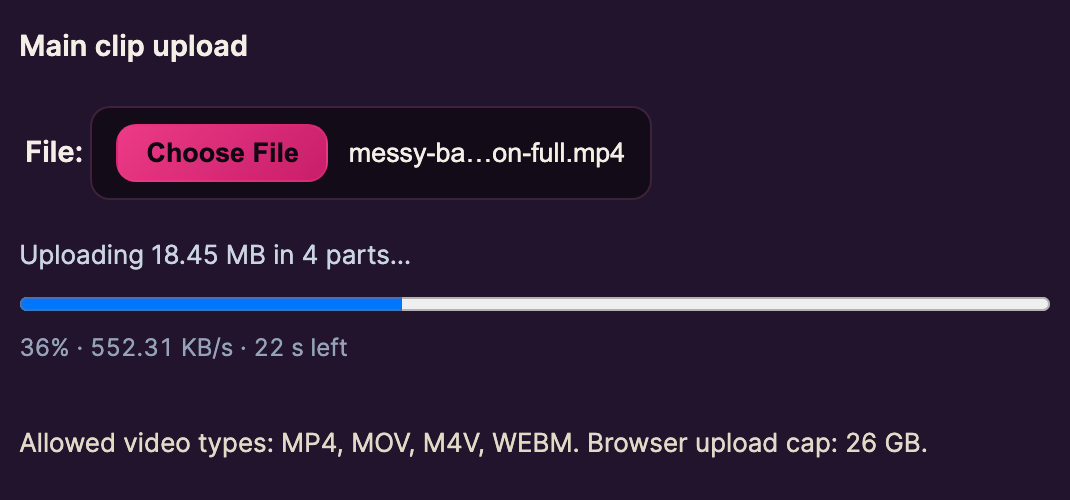
- Click Choose File and pick your video. The upload starts by itself.
- A bar shows how far it is, how fast it goes and how long it still needs. Leave the tab open until it finishes — closing it cancels the upload.
- When the upload is complete, your file is saved. It is then prepared for streaming in the background; the checklist at the bottom of the form ticks off Main clip finished encoding when that’s done.
Allowed are MP4, MOV, M4V and WEBM, up to 26 GB.
Already uploaded? Pick it from the list
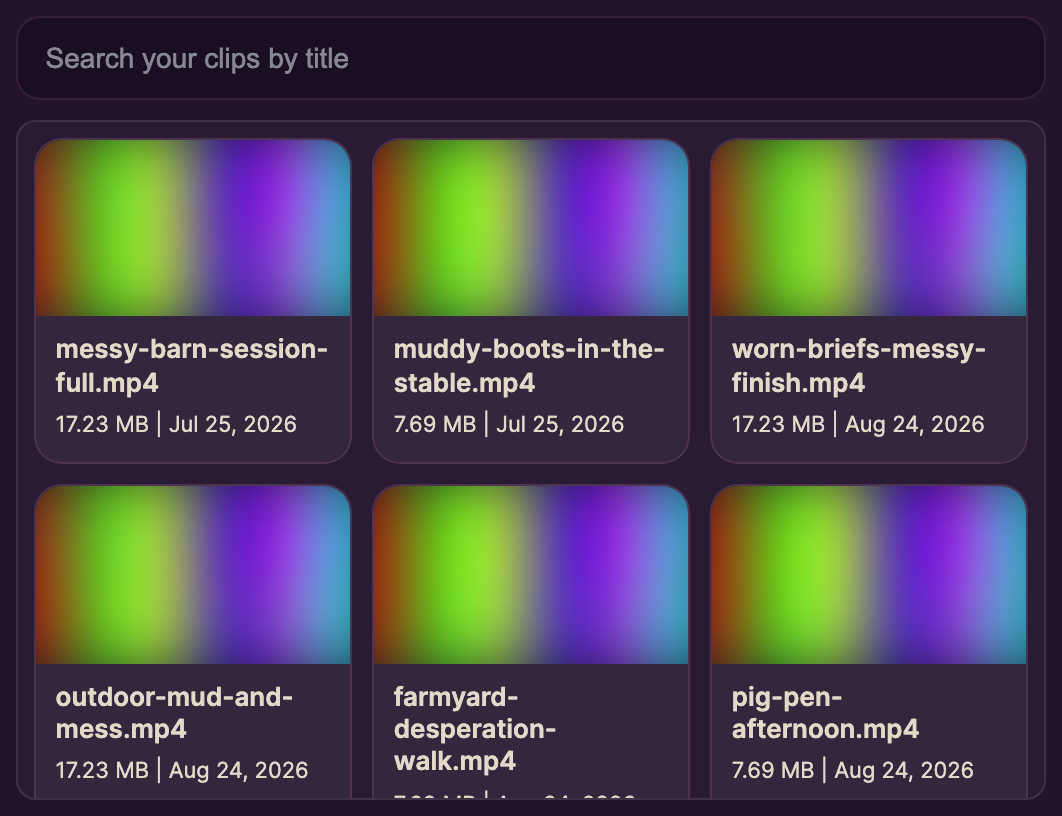
Everything you have uploaded before — in the browser, with Bulk upload or by FTP — appears under Or select existing uploaded main clip: a grid of cards with a search box. Type a few letters of the file name and click its card. No re-uploading.
The advanced way — upload by FTP
This is for files bigger than 26 GB or lots of files at once. If you’re not sure, just use the browser upload or Bulk upload.
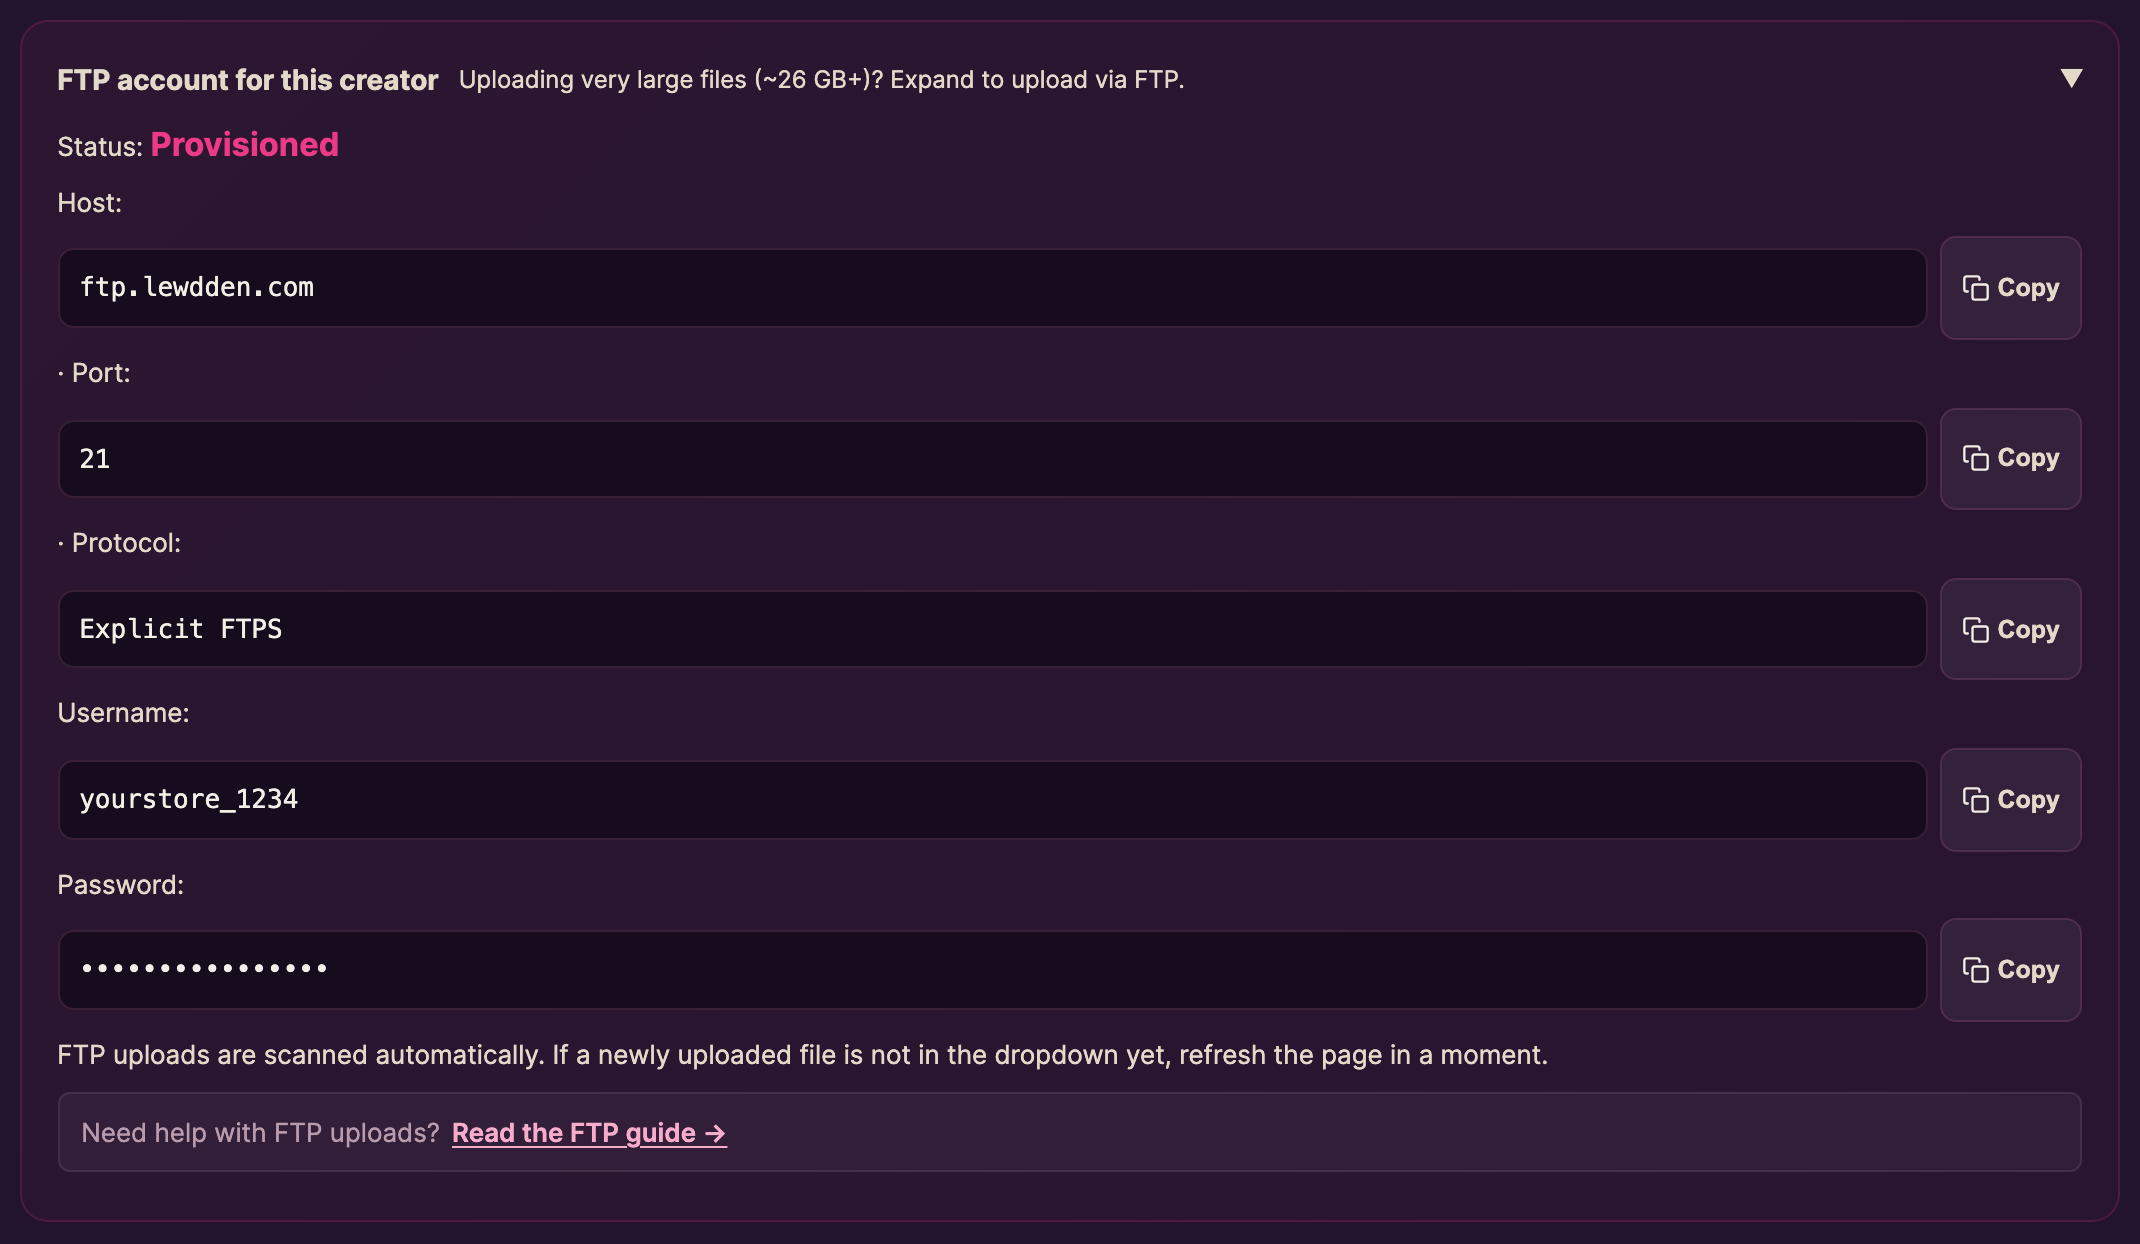
1. Find your FTP details. Further down the form is a bar called FTP account for this creator. Click it to open it. Once your account is verified, your details are there automatically — Host, Port, Protocol, Username and Password, each with a Copy button. Nothing to request.
2. Get a free FTP app. FileZilla is free and works on Windows and Mac.
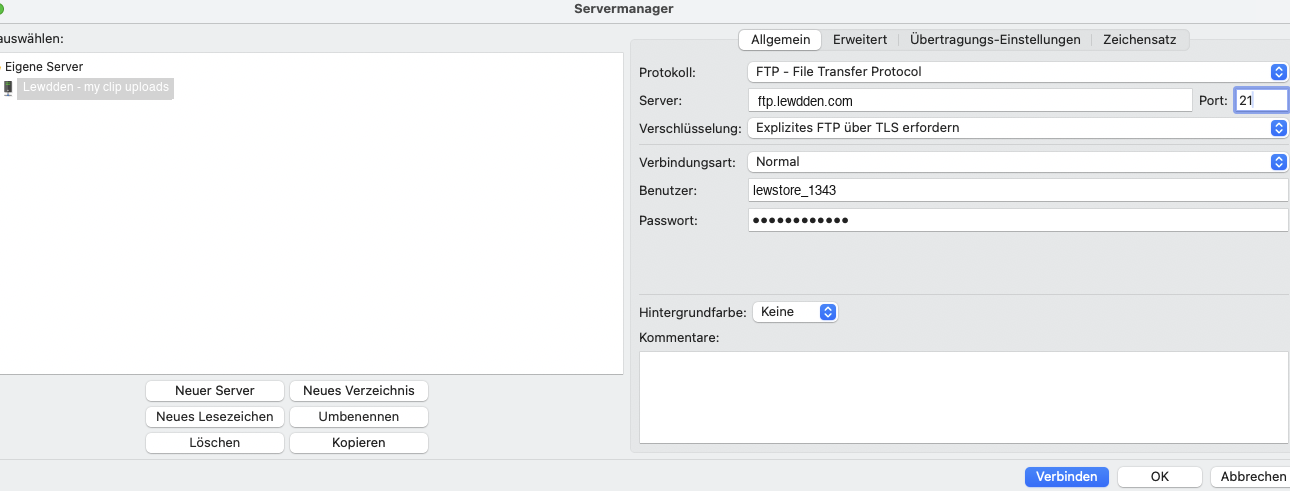
3. Connect. In FileZilla, open File → Site Manager → New Site and copy your details across:
| In FileZilla | What to enter |
|---|---|
| Protocol | FTP — File Transfer Protocol |
| Host | the Host from the form |
| Port | 21 |
| Encryption | Require explicit FTP over TLS |
| Logon Type | Normal |
| User | the Username from the form |
| Password | the Password from the form |
Click Connect and accept the security certificate if you’re asked.
Heads up: don’t pick “SFTP” — it looks similar but won’t work. Use FTP — File Transfer Protocol with Require explicit FTP over TLS.
4. Drop your files in. On the right side of FileZilla you see two folders: clip/ for main clips and trailer/ for trailers. Drag your videos from the left (your computer) into the matching folder.
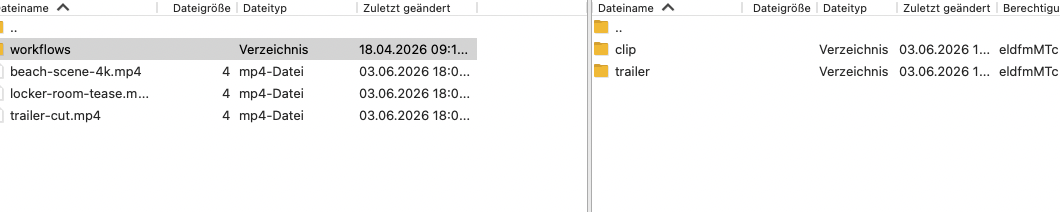
5. Back on the Add Clip page, refresh. FTP uploads are picked up automatically, and your file appears under Or select existing uploaded main clip. Not there yet? Wait a moment and refresh again.
5. Add a trailer
Every clip needs a short trailer — the free preview fans watch before they buy. There are three ways to get one: let Lewdden make it with one click, pick the exact part yourself in the trailer generator, or upload your own. For a VR clip, use a VR trailer.
The one-click way — auto-generate
Once your main clip is uploaded, a banner appears: Don’t want to fiddle? Auto-generate 20s trailer. Click it and Lewdden picks a good section of your clip and builds the trailer for you — no timeline, no markers. It usually takes around 20–30 seconds, and you can keep filling in the rest of the form while it works.
When the preview appears, watch it:
- Happy with it? Click Keep this trailer — done.
- Want a different cut? Click Try a different segment and Lewdden picks another part of the clip.
- Nearly right? Click Open scrubber for fine-tune and adjust it in the trailer generator.
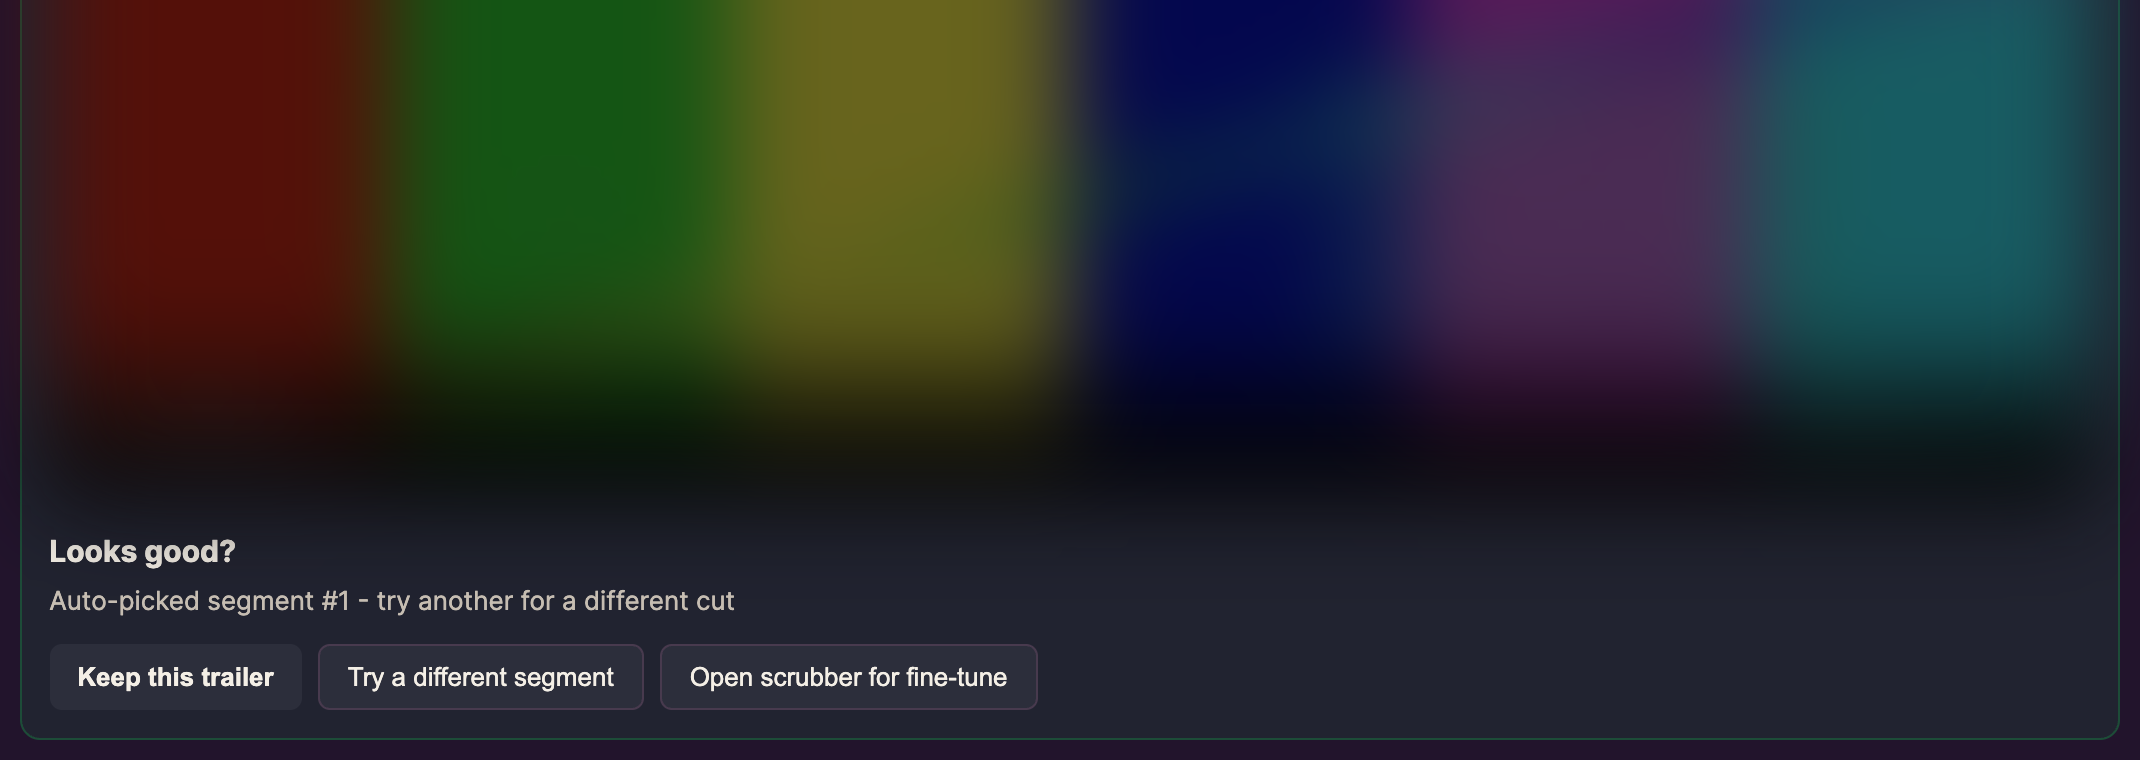
This is the fastest way to publish — most creators never need anything else.
Pick the exact part — the trailer generator
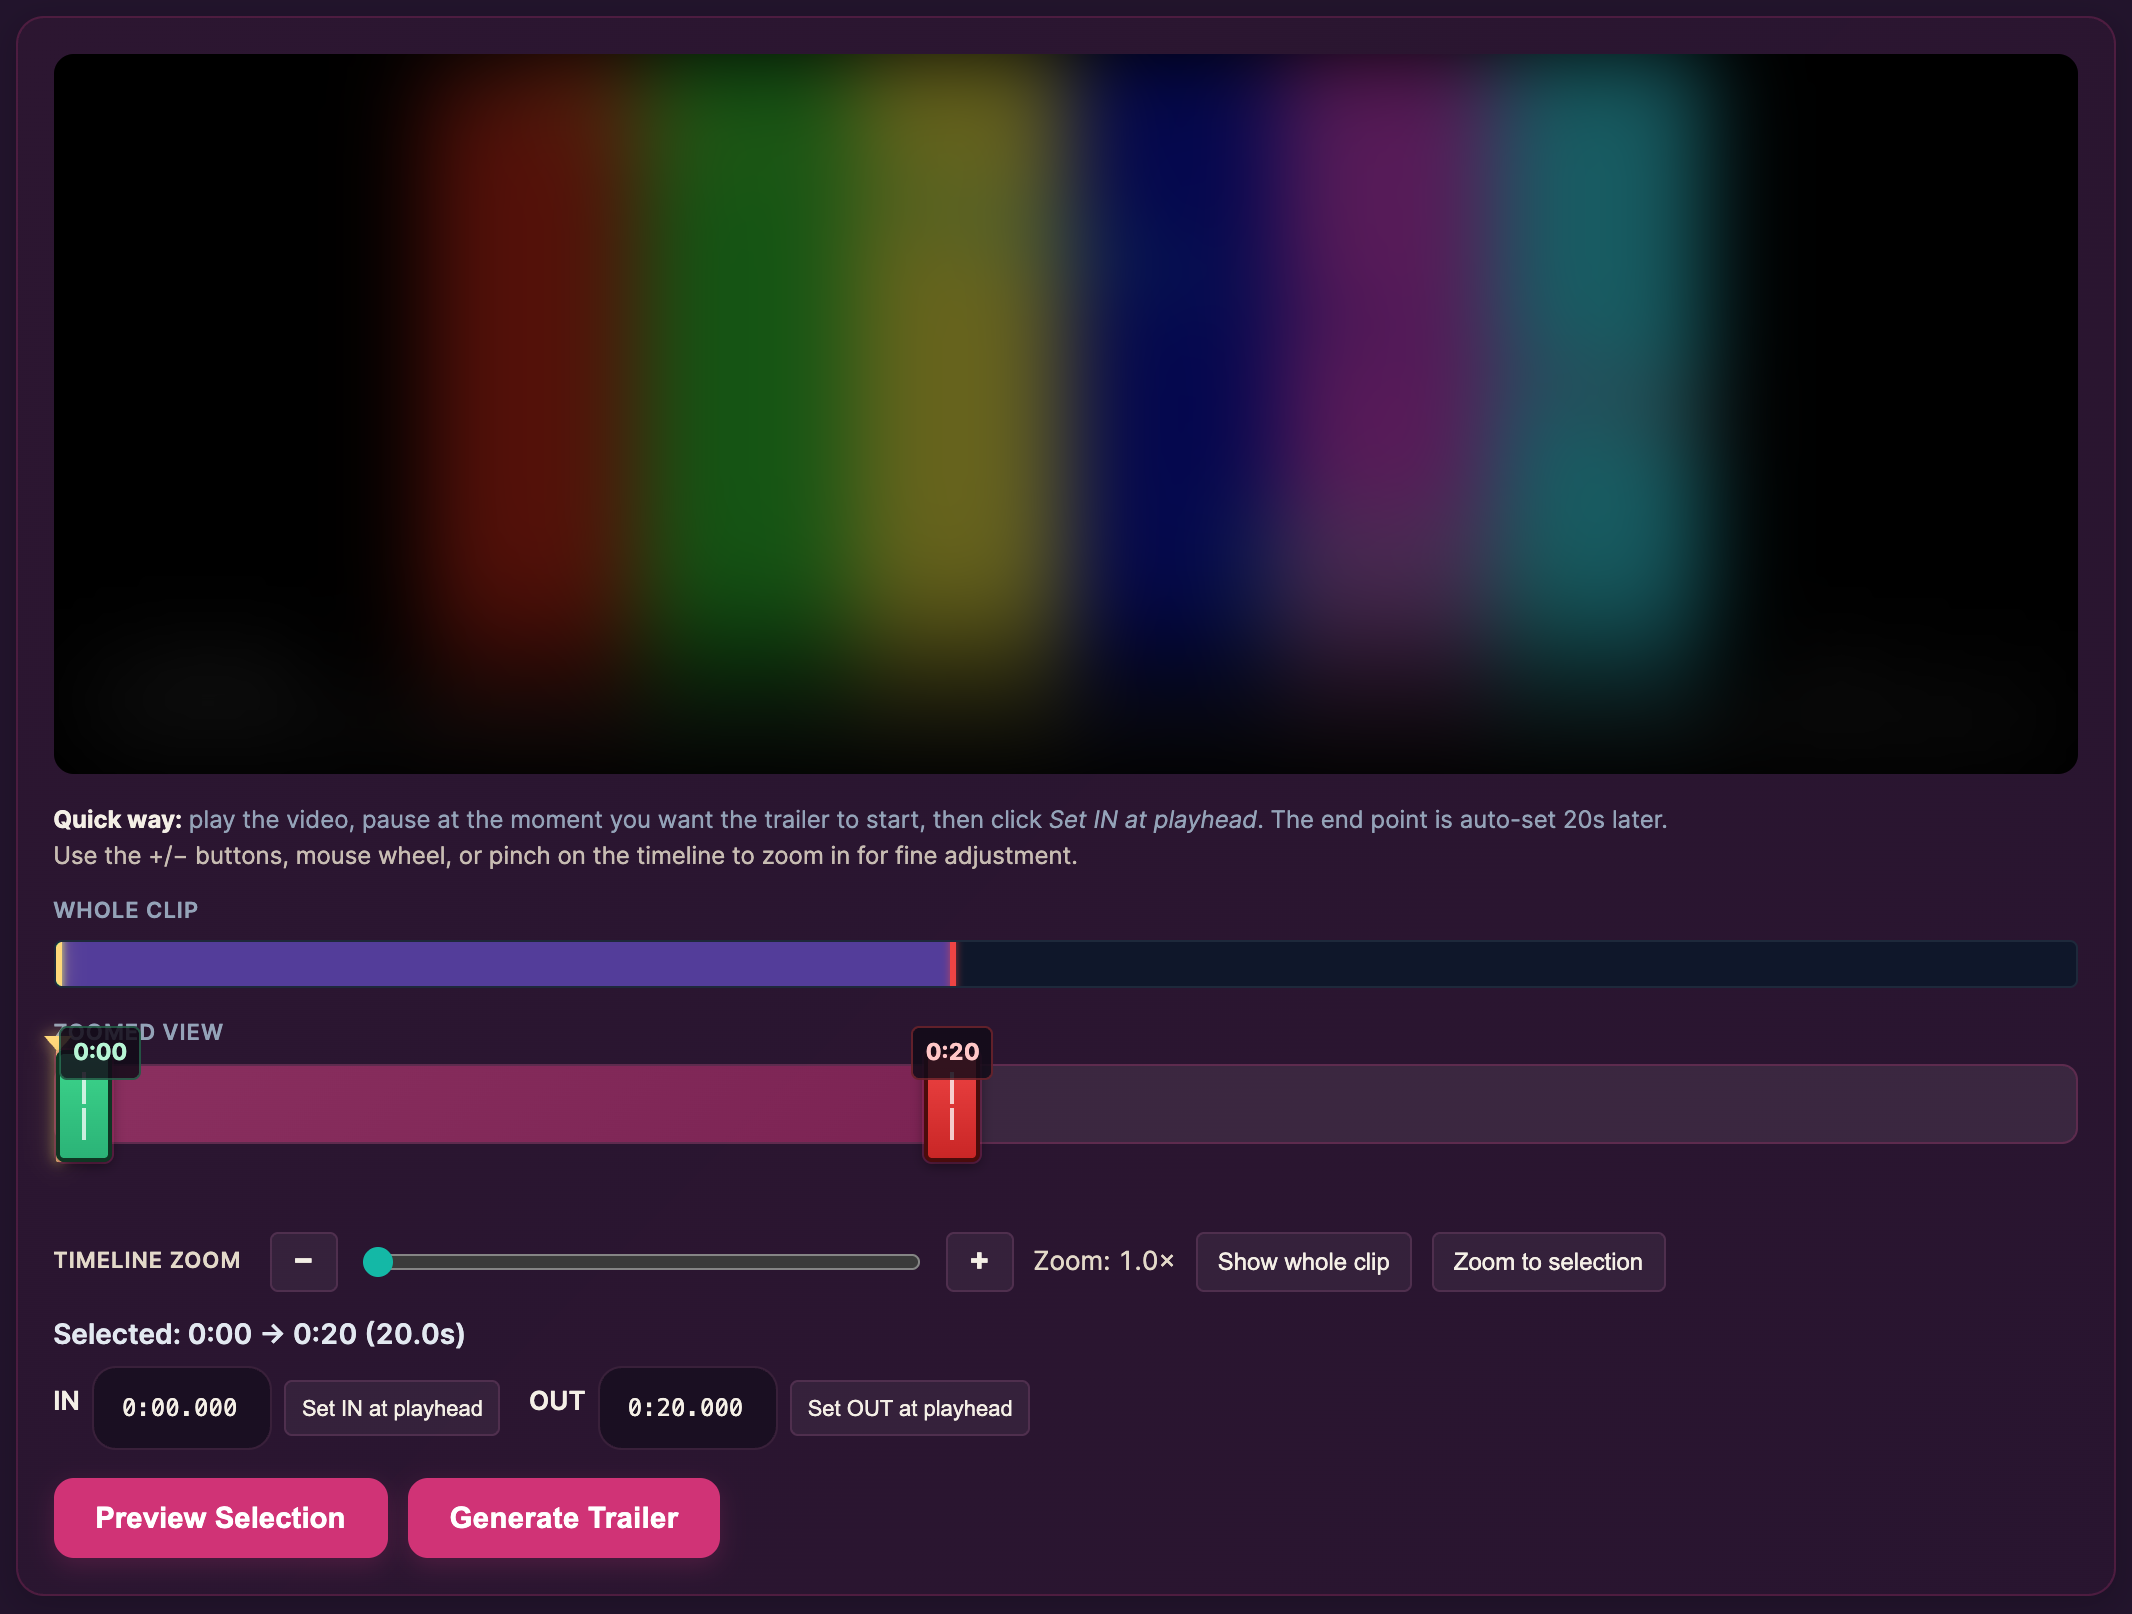
Once your main clip is uploaded, click Open trailer generator. Your clip loads on a timeline.
- Choose the part you want. Drag the green marker to where the trailer should start and the red marker to where it ends — up to 20 seconds. Or play the clip, pause where you want it to begin and click Set IN at playhead — the end is set 20 seconds later for you.
- Click Preview Selection to watch exactly what you picked.
- Happy with it? Click Generate Trailer.
That’s it — Lewdden makes the trailer and a preview image from the part you chose. On a phone it works the same way: drag the markers with your finger and pinch to zoom, like in your photos app.
Or upload your own
Already made a trailer in your editing app? In the Trailer upload box, click Choose File and pick it (up to 150 MB). Or find one you uploaded before under Or select existing uploaded trailer — same as the main-clip list: type the name, click the card.
6. Performers and optional extras
- Performers (you are always included) — you are counted as a performer in your own clip automatically. If anyone else is in the video, add them here. They must be approved performers on your account first — the link under the field takes you there.
- Detected clip duration — fills in by itself once your main clip is uploaded.
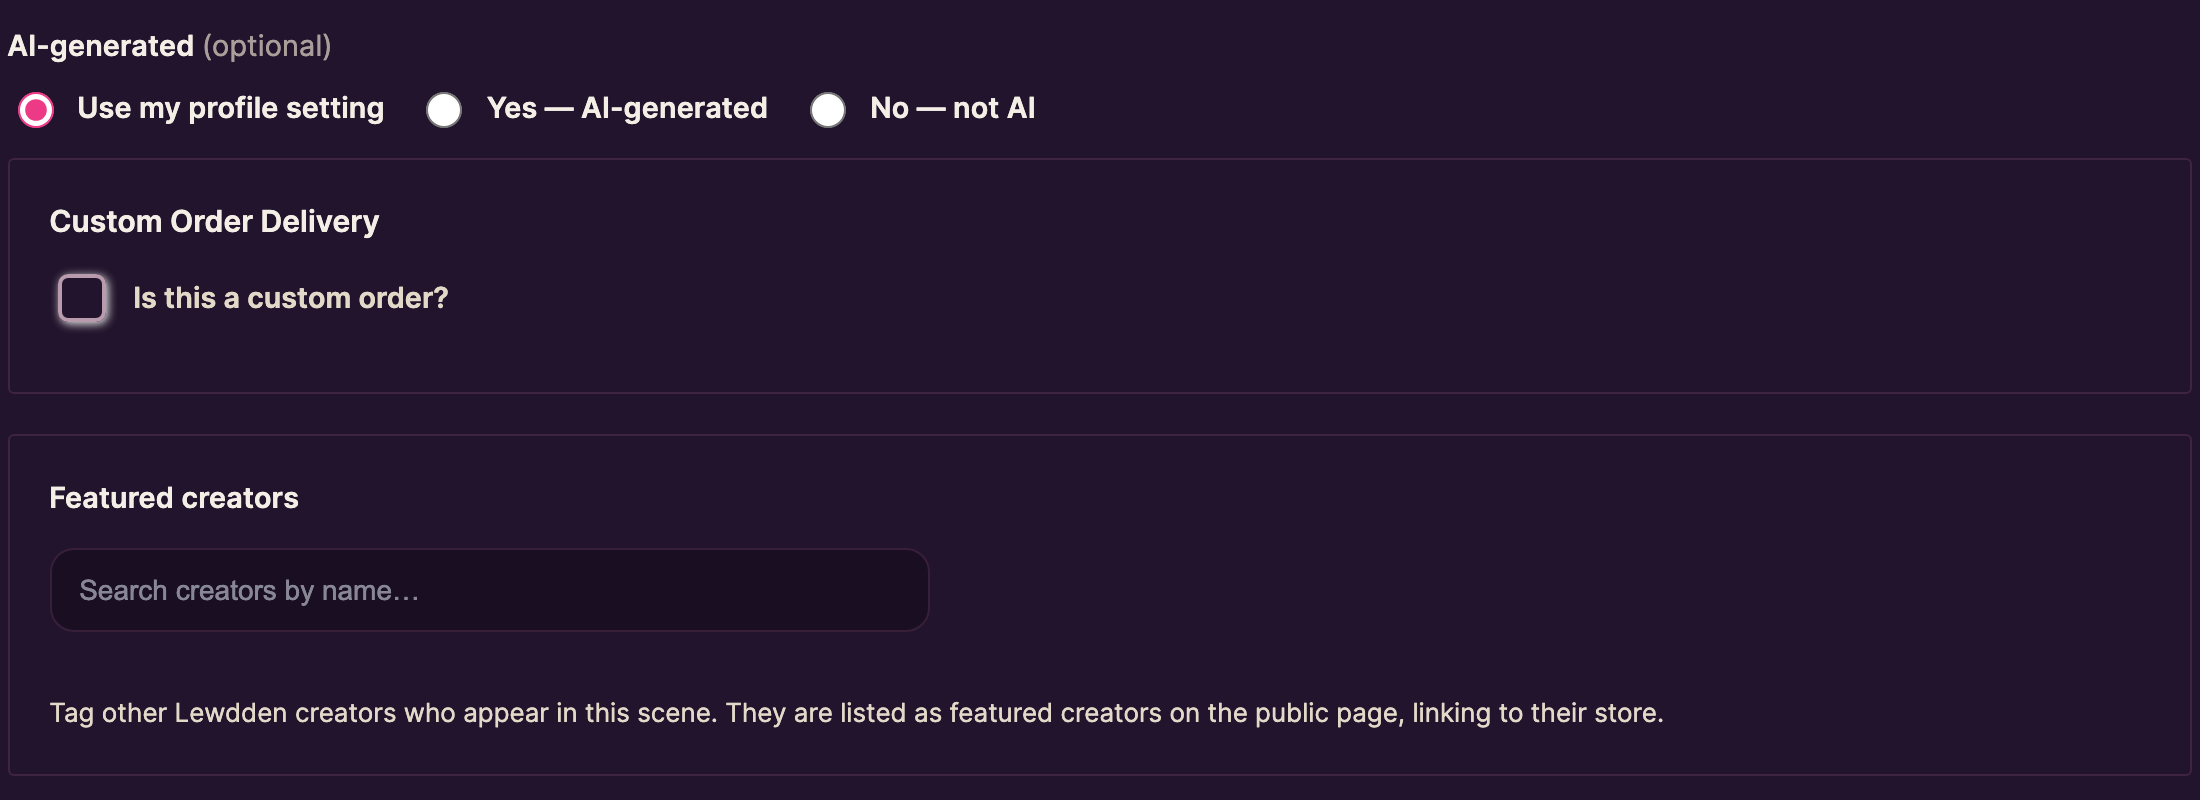
- AI-generated (optional) — leave it on Use my profile setting unless this one clip is different. Yes — AI-generated gives the clip an “AI” label; No — not AI leaves the label off this clip even if your profile is set to AI content.
- Custom Order Delivery — only appears while you have open custom orders. Tick Is this a custom order?, choose the order under Select Custom Order, and tick Exclusive custom (only the customer gets this clip) if nobody else should get it. More in How custom orders work.
- Telegram — if you run a Telegram sales channel, tick the channels this clip should also be posted to, or Do not post this to Telegram. Nothing ticked means you decide later in the Telegram inbox. Subscribers-only clips can only go into a private channel.
- Featured creators — tag other Lewdden creators who appear in this scene. They are listed on the clip page with a link to their store, and they are told that you featured them. More in Featuring other creators.

7. Optional: schedule the release
Want the clip to go on sale at a set time? Fill in Planned release date and Planned release time — any exact time works, for example 18:07. Leave both empty and the clip goes on sale as soon as it’s approved.
Scheduling doesn’t skip review — your clip is still checked first. Once it’s approved, we hold it until your time and then put it on sale automatically.

8. Save a draft or submit for review
At the bottom of the form is a checklist, Complete these to publish your clip. It counts up as you work (for example 5 / 8):
- Upload or select a main clip
- Main clip finished encoding
- Add a trailer (upload, pick, or generate)
- Add a title
- Set a price (4.99 minimum) — ticked by itself for “Subscribers only — not for sale”
- Choose the clip sexuality
- Pick at least one category
- Add at least one tag
While anything is still open, the button says Save Draft. It saves what you have so far — you can come back later, add or generate the trailer and submit then.
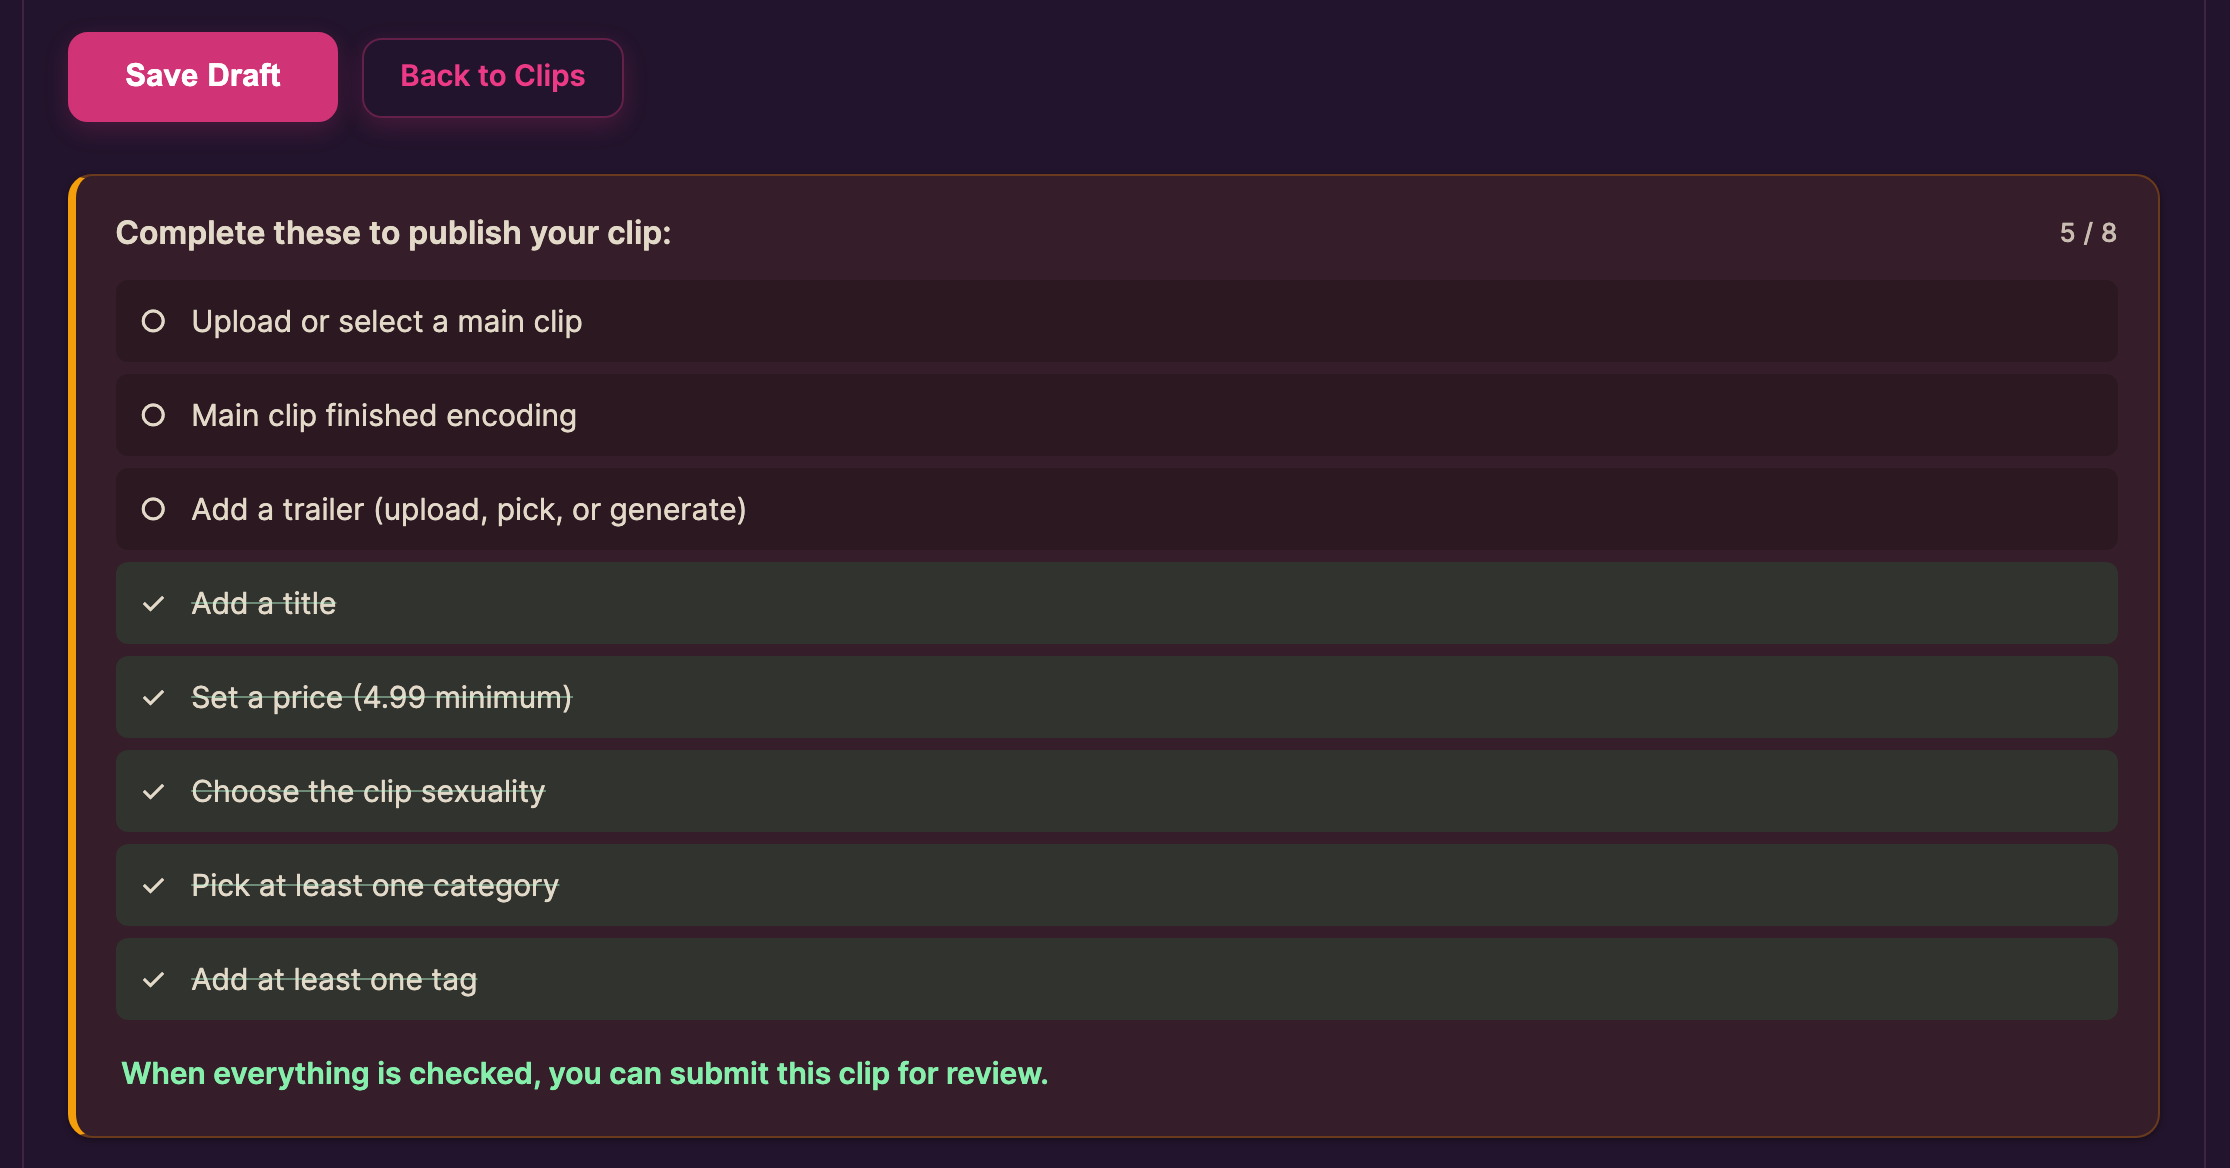
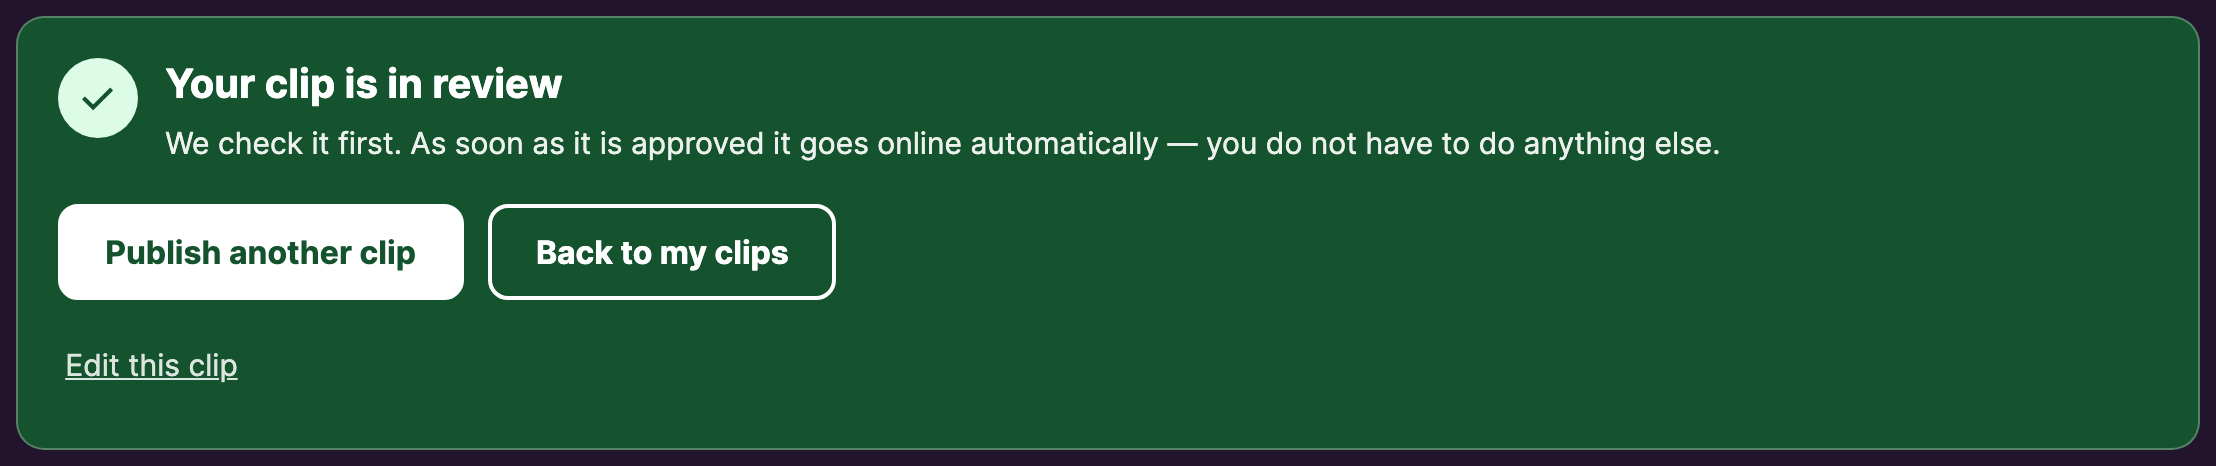
As soon as all eight are ticked, the button changes to Submit clip for review. Click it, and a green box confirms Your clip is in review — as soon as it is approved, it goes online automatically. That’s you done: start the next one with Publish another clip, or go Back to my clips. (Want to keep a finished clip back for now? Then a Save as draft button appears next to the submit button.)
If our team has marked your account as trusted, the button says Publish Clip (or Publish Scheduled Clip when you’ve set a release time) instead — your clip then goes live without waiting for review.
9. What happens next
- Someone reviews your clip to check it follows our rules and that all performers are approved.
- One of three things happens:
- Approved — your clip goes on sale, or waits for your scheduled time if you set one.
- Changes needed — you get a short message saying what to fix. Make the change and submit again.
- Not approved — the clip can’t go live, and the message explains why.
- You see that message at the top of the clip’s edit page the next time you open it, and we email you too — so you don’t have to keep checking.

10. Editing a clip later
You can always update the small things — price, description, tags, categories, performers, release time — and the clip goes back for a quick re-check. How that works in detail: Editing or deleting a clip.
One thing you can’t change: once a clip has been approved, the main video and trailer are locked, so customers always get exactly what was approved. If you really need to swap the video, contact support and we’ll sort it out.

11. Common questions
How soon can I submit after uploading?
As soon as your main clip has finished encoding — usually a few minutes — and the checklist shows 8 / 8. You don’t have to wait on the page: click Save Draft and come back later.
Which “Offered as” option should I pick?
If you’re unsure, keep the default Paid clip. Choose Subscribers only — not for sale for content that should make your subscription worth it, and the streaming-only options when buyers shouldn’t be able to download the file.
Can I tick “Exclusive” if the clip is also on my own website?
No. Exclusive means the clip is sold nowhere else — not on another site and not in another store of your own.
My VR upload stops with a message about the size.
A VR180 side-by-side file is exactly twice as wide as it is tall, because it holds one square image per eye. Check that your camera was set to 180° side-by-side, export again and upload the new file.
My browser upload failed halfway. What now?
Refresh the page and try again. If it keeps failing, Bulk upload or FTP are more reliable for very large files.
Can I upload several clips at once?
Yes — with Bulk upload in your browser, or by dropping them into clip/ by FTP. They all show up in the Or select existing uploaded main clip list. You fill in one Add Clip form per clip.
My FTP file isn’t showing up in the list.
Refresh the page after a moment. Check you put it in the right folder (clip/ for main clips, trailer/ for trailers) and that it’s an allowed video type. Still missing? Open a support ticket.
Can I delete a clip?
Yes — open it, scroll to the bottom and click Delete clip. Fans who already bought it lose access, so think before you delete.
What’s the difference between the main clip and the trailer?
The main clip is what fans get after they pay (or subscribe). The trailer is the free preview anyone can watch. Both are required.
Why is there a €4.99 minimum?
It keeps your earnings worthwhile after fees. You can price higher whenever you like.
Need more help?
If you get stuck at any step, open a support ticket from your Store Manager → Support and we’ll help you finish.