
Video guide
Prefer to watch? This video walks through the bulk uploader — the two tabs, choosing Main clips or Trailers, VR files, the upload queue and your media library.
You can upload many clips and trailers at once, straight from your browser — no FTP client, no setup. Drop a pile of files, leave the tab open, and each one uploads on its own. When they finish, you pick them from the normal menus while adding a clip or a feed post. This guide shows you where the bulk uploader lives, how to use it for clips, trailers and VR files, how your media library works, and what happens if an upload is interrupted — even one that runs for days.
No minimum — one file is enough
There is no minimum number of clips or trailers here. Upload a whole back catalogue or a single file — this page works exactly the same either way, and nothing is ever rejected for being too few. A trailer is optional as well: you can upload only main clips, only trailers, or both.
It is also one shared library, not a separate pile. Anything you upload on the Add Clip page appears here too, and anything you upload here can be picked on the Add Clip page and in the feed-post editor. So it does not matter which of the two pages you used — all your uploads end up in the same place.
1) Where to find it
There are three ways to open the bulk uploader — use whichever you notice first:
- The Bulk upload item in your store-manager menu, right under Clips.
- The Bulk upload button next to Add Clip on your Clips page, and next to New post on the Feed page.
- The Browser bulk upload — no FTP needed box with the Open bulk uploader button on the Add Clip page and in the feed-post editor.
They all open the same page at /store-manager/bulk-upload/.
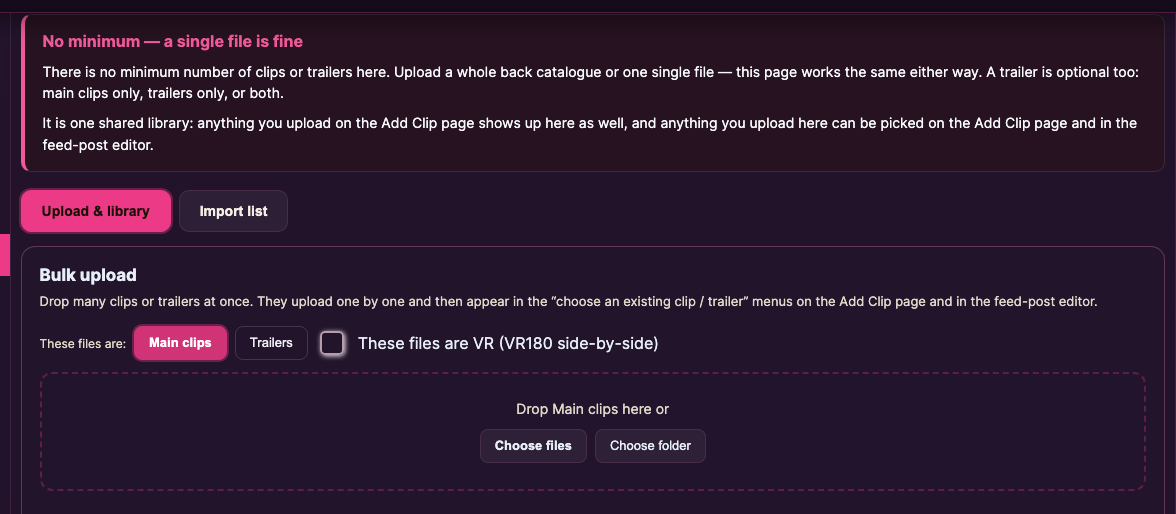
2) Two tabs: Upload & library and Import list
The page has two tabs. Upload & library is where you upload files and manage everything you have uploaded — that is what this guide is about. Import list is for the next step: once your files are uploaded, you can load a spreadsheet with titles, prices and dates and turn many uploads into clips at once. That tab has its own guide: Importing clips from a spreadsheet.
3) Choose Main clips or Trailers
Next to These files are:, choose the type of files you are about to drop: Main clips or Trailers. The selected button is highlighted, and the drop-zone label changes to match (“Drop Main clips here or” / “Drop Trailers here or”). Upload your main videos first, then switch to Trailers and drop those.
You do not have to choose between Clips and Feed here — your uploads are shared. Every finished file can be used for a clip and for a feed post, so you decide where each one goes later, when you actually create the clip or the feed post.
4) VR files
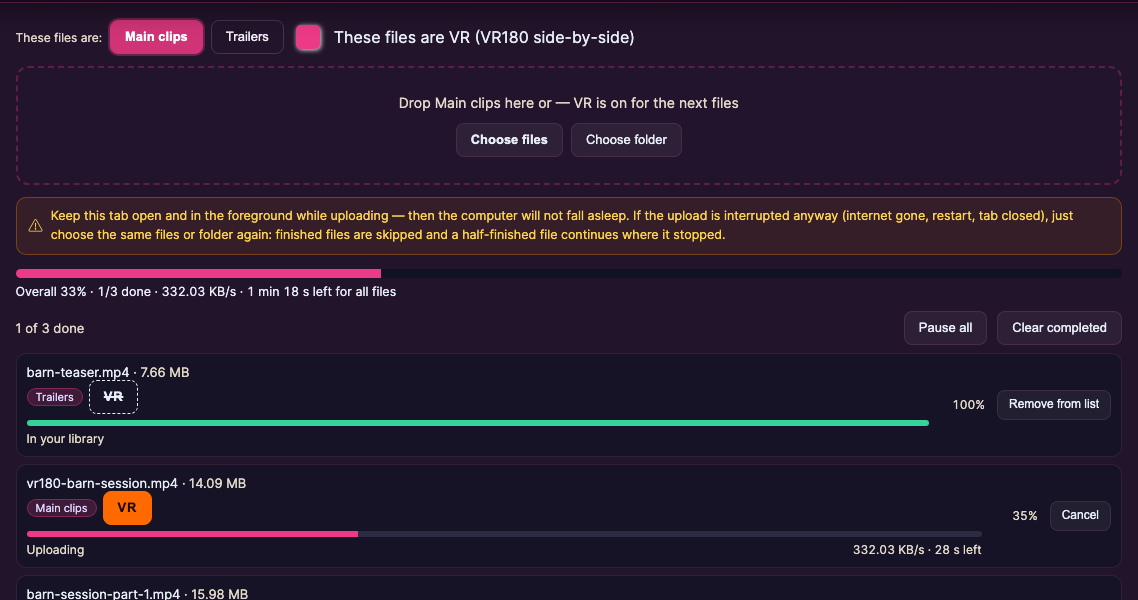
Filmed in VR? Turn on These files are VR (VR180 side-by-side) before you choose the files. The drop zone then reminds you that VR is on for the next files, and every file you add while it is on gets an orange VR tag in the queue (a crossed-out VR means the file is uploaded as a normal, flat video). A VR file is side-by-side: left eye on the left, twice as wide as it is tall. It is prepared for headsets straight after the upload.
Mixed a flat file in by mistake? As long as a file is still waiting in the queue, click its VR tag to switch that one file between VR and flat. If a file marked as VR does not have the VR shape, the queue shows the reason instead of saving it.
5) Drop your files
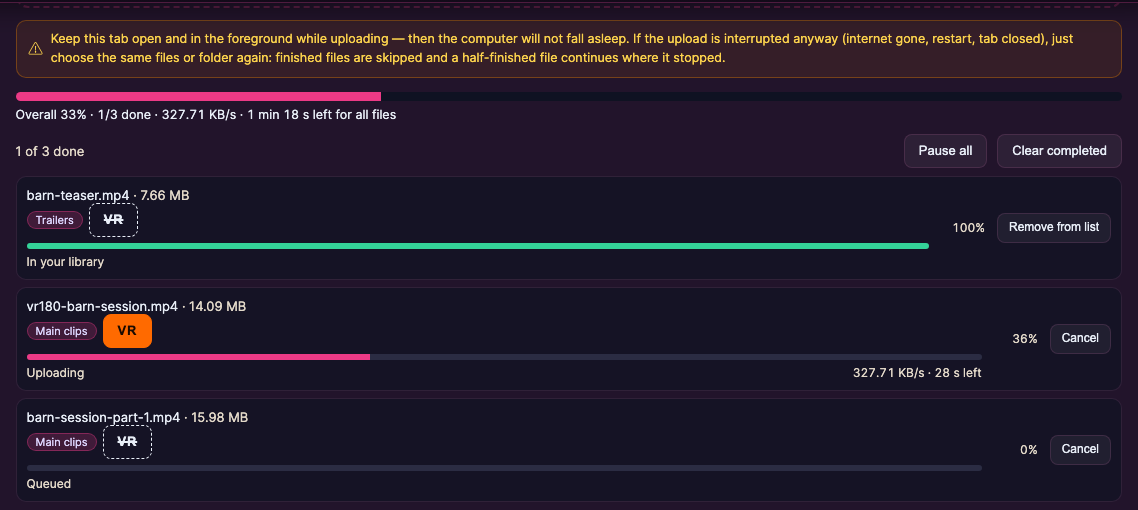
Drag files onto the drop zone, or use Choose files / Choose folder. Files upload one at a time, so each one gets the full bandwidth and a steady progress bar. Each row shows its own speed and time left, and the Overall bar shows progress and the time left for all files.
- Pause all / Resume all stops and restarts the whole queue.
- Cancel stops one file; Retry (or Retry failed for all of them) starts a failed file again.
- Remove from list and Clear completed only tidy up the list — the uploaded files stay in your library.
Before each file starts, the page checks whether you have already uploaded it. A file that is already in your library is not uploaded twice — its row simply says Already uploaded — skipped.
6) Where your uploads show up afterwards
The bulk uploader is only an uploader — it does not create clips or feed posts for you, and it never asks for titles or prices. Instead your uploads become available to pick:
- For clips: on the Add Clip page, your uploaded files appear under “Or select existing uploaded main clip” and “Or select existing uploaded trailer”. Pick one, add your title, price and details, and submit it.
- For the feed: in the feed-post editor, your uploads appear under “Choose an existing video” (main clips) and “Choose an existing trailer” (trailers), once they have finished encoding.
- For many clips at once: the Import list tab (see above).
A finished row says In your library. Every upload keeps its original file name, so you can recognise each file in the menus later.
7) Your media library — on the same page
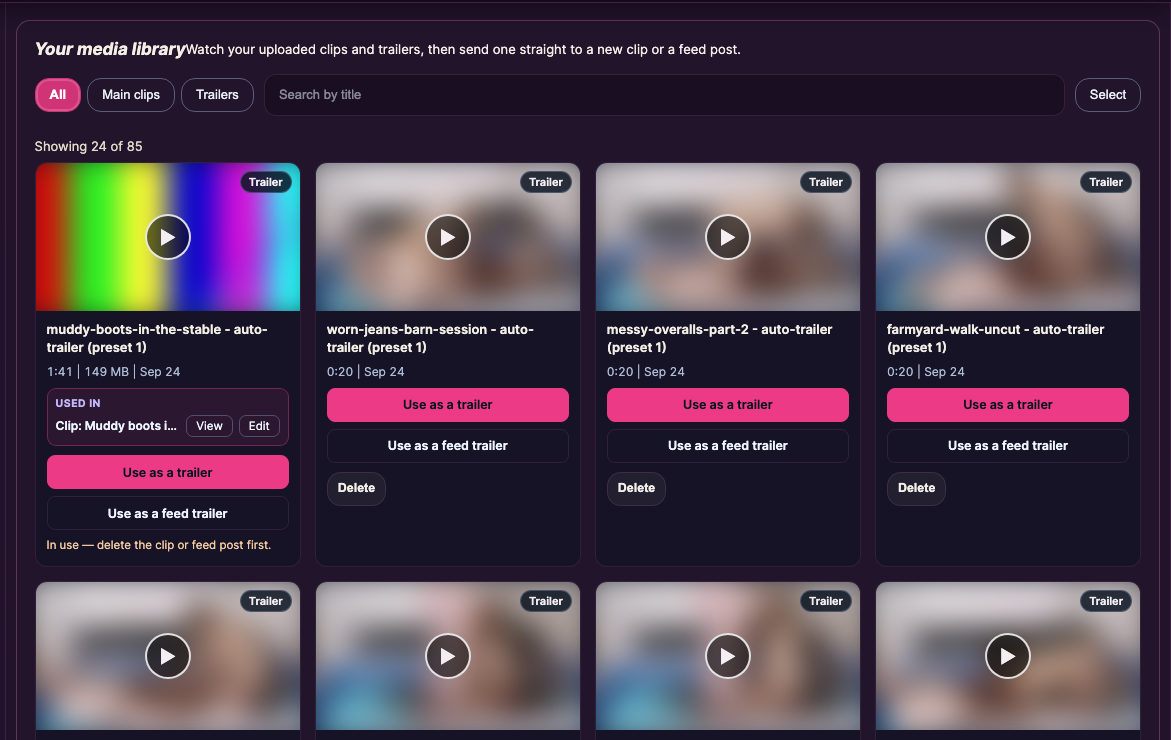
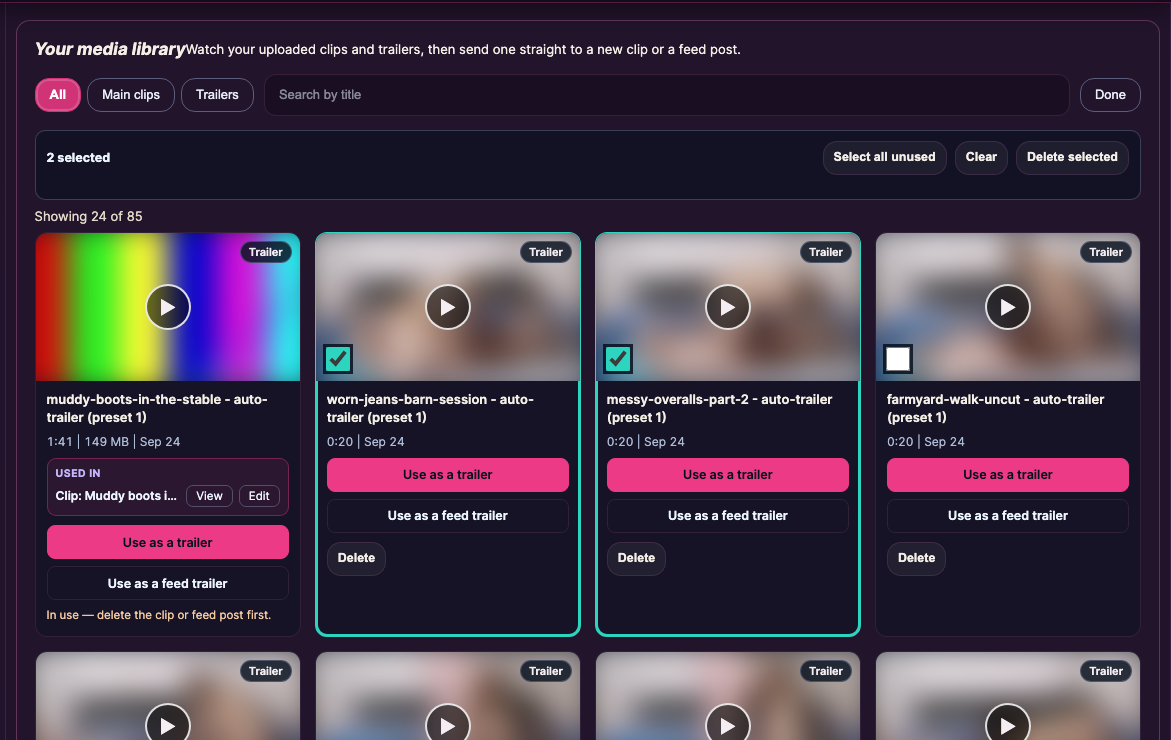
Below the uploader you will find Your media library: every clip and trailer you have uploaded, as a card with a preview picture and a small player.
- All / Main clips / Trailers filter the list, and Search by title finds a file by its name. The page shows 24 at a time — Show more loads the next ones.
- Each card shows the type (Main clip or Trailer, plus VR for VR files), the name, the length, the size and the upload date. Trailers made with the trailer generator carry the generated name, for example “
my-clip - auto-trailer (preset 1)”. - While a file is still encoding, the card says so and shows about how long it will take.
- Use as a clip, Use in a feed post, Use as a trailer or Use as a feed trailer take you to the right form with the file already selected.
- If a file is already used, the card shows Used in with the clip or feed post and the buttons View and Edit.
8) Deleting uploads
You can delete uploads you no longer need. Only files that are not used in any clip or feed post can be deleted — a file in use says In use — delete the clip or feed post first.
- One file: Delete on its card, then confirm.
- Several files: click Select, tick the videos (or Select all unused), then Delete selected. Clear removes the ticks.
Deleting is permanent and cannot be undone, so the page always asks first.
9) Long uploads and interruptions
Uploads are resumable — no finished part is ever thrown away. Keep the tab open and in the foreground while uploading; then your computer will not fall asleep.
- Internet gone for a moment (Wi-Fi switch, router restart): the page shows that there is no connection and carries on by itself as soon as the internet is back.
- Signed out: sign in again in a new tab, then click Resume all on the bulk-upload page.
- Tab closed, reload, restart or crash: open the page again and choose the same files or the same folder again. Files that are already finished are skipped automatically, and a half-finished file continues where it stopped — only the missing parts are uploaded.
This also works for very large batches that take several days: just pick the same folder again whenever the upload was interrupted.
10) When to use FTP instead
The browser bulk uploader is the easiest option for most back-catalogue uploads. FTP is still worth it if you are moving very large files (several GB each) straight from an editing computer or NAS, or want a server-to-server transfer. See Bulk-uploading a back catalogue via FTP.