Video guide
Prefer to watch? This video walks through the whole physical-item form — images, the basics, category and the sizes grid, price, inventory, the optional extras, shipping and publishing.
Physical items are anything you ship to a fan: worn clothing, props from your shoots, signed prints, custom soaps or candles, polaroids, food items, lingerie, even one-of-a-kind keepsakes. The form on Lewdden is built around the word item — not merch — because creators sell all kinds of stuff, and the platform doesn’t assume you’re running a t-shirt store. This article walks through the listing form section by section so you can post your first item with confidence.
The matching shipping setup and order-fulfilment flows live in Setting up shipping and Fulfilling physical orders — once an item is published, those two articles cover what happens when someone buys it.
1. Where the form lives
Open Store Manager → Products. Click Add new product. The page loads with the heading Create Physical Item at the top — that’s the right form. If you’re editing an existing item the heading reads Edit Physical Item.
Identity verification is required before you can post a physical item. If you haven’t finished verification, the page shows a card titled “Physical product creation is locked” with a button back to your products list. Finish verification first — the form unlocks automatically.
2. Item image(s)
The first card is Item image(s). You upload one cover photo and up to three gallery shots. The form spells out the rule directly: “Preview: buyers see 1 cover + up to 3 gallery images in the item card.”
Click Upload cover photo for the main shot, then Upload on the three gallery slots for additional angles. Use the cover for your single most flattering, well-lit photo of the item — that’s what shows in search and on your storefront. The gallery is for detail shots: tags, fabric texture, signature, the back, the sole, anything specific to that item.
Crop the cover roughly square if you can — the cards look best that way. Avoid blurry phone shots; daylight and a plain background go a long way.
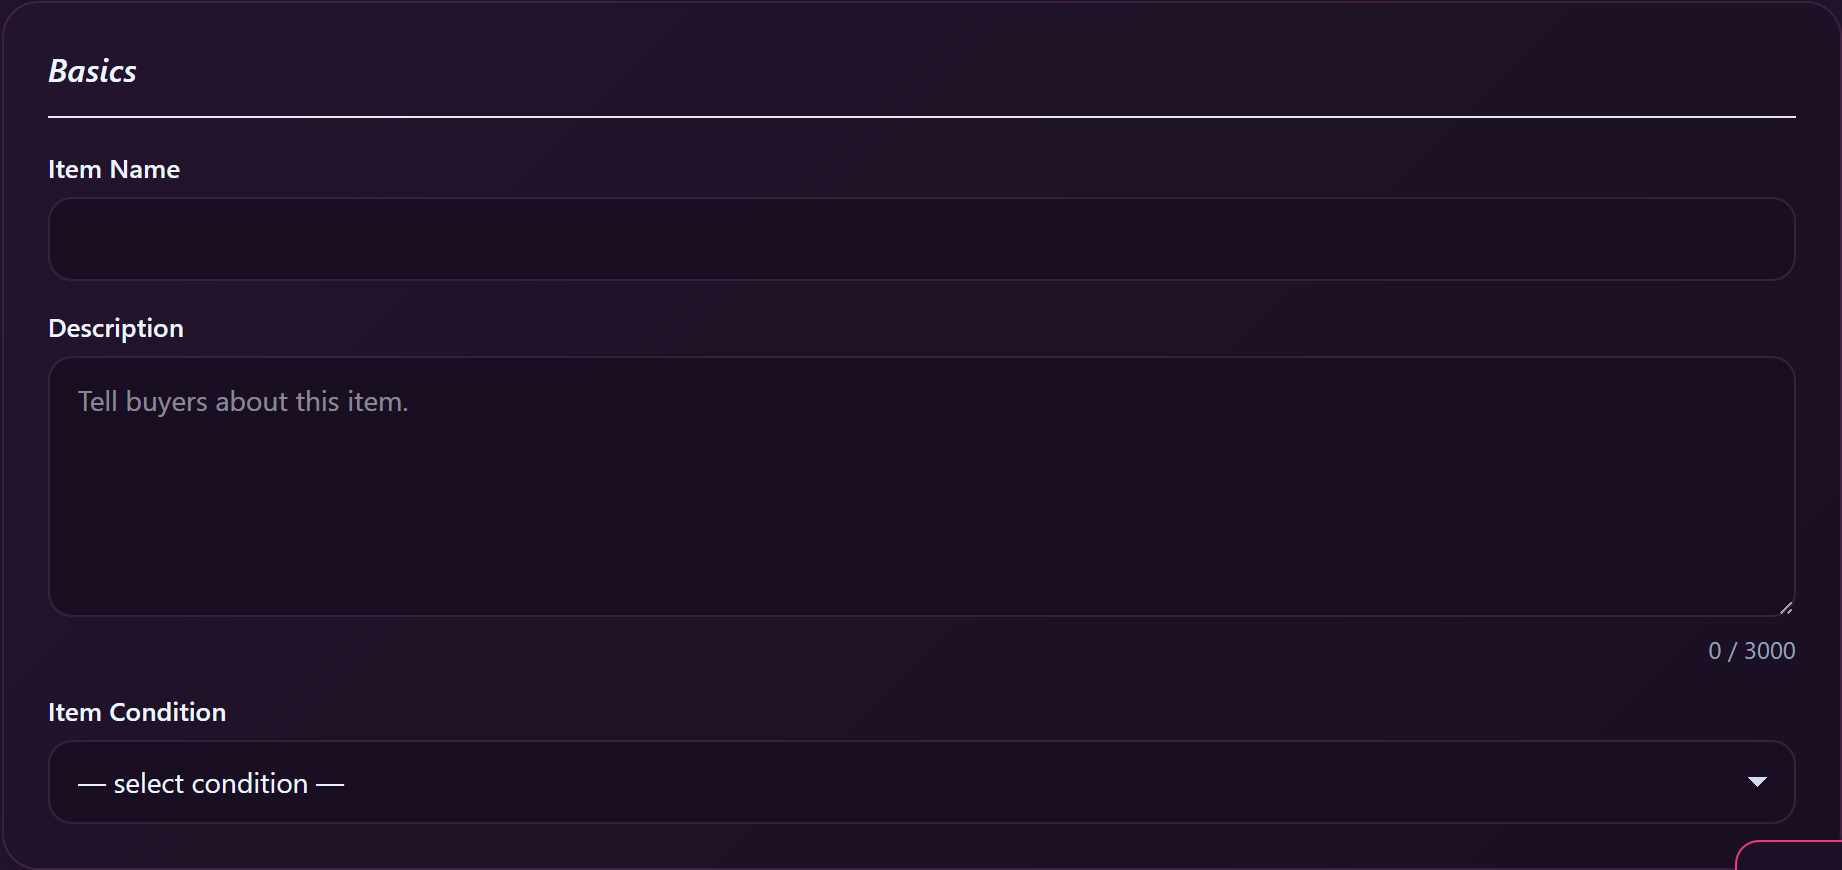
3. Basics — name, description, condition
The Basics card has three fields:
- Item Name — short and specific. “Black mesh briefs (size M)” beats “Hot underwear”. Buyers scan the name, then the photo.
- Description — up to 3,000 characters. The placeholder is “Tell buyers about this item.” Cover the things a photo can’t: how long you wore it, the fabric or material, fit notes, scent (if relevant), what makes it interesting. Honesty here saves you from refund requests later.
- Item Condition — pick from the dropdown (the empty option reads “— select condition —”). Categories include New / Worn / Used / Vintage / and so on, depending on your item type. If nothing fits, pick the closest match and clarify in the description.
4. Select a Category
The Select a Category card has a single dropdown with placeholder “— select category —”. Pick whichever fits best — the category shapes the rest of the form. Some categories enable a sizes grid (clothing, lingerie, footwear), some don’t (signed prints, props, food items). If you pick a category that has sizes, a new card called Set Quantities appears below.
If you can’t find a category that’s quite right, pick the broadest match and use the description to clarify what the item really is.
5. Set Quantities (sizes grid)
This card only appears for sized categories. You’ll see eight columns from XXS through XXXL with a small number input under each. Type a quantity for the sizes you actually have in stock; leave the rest at 0. The total updates live in the corner labelled Total:.
Per-size stock is the recommended setup for clothing — buyers see only the sizes you’ve actually got. If your item is one-of-a-kind and there’s only one size, just put 1 in that size’s box and leave the others empty.
If your item isn’t really a “size X” thing (e.g. a pair of unique boots) you can switch to total-stock tracking instead — see the next section.
6. Item Price — regular and sale
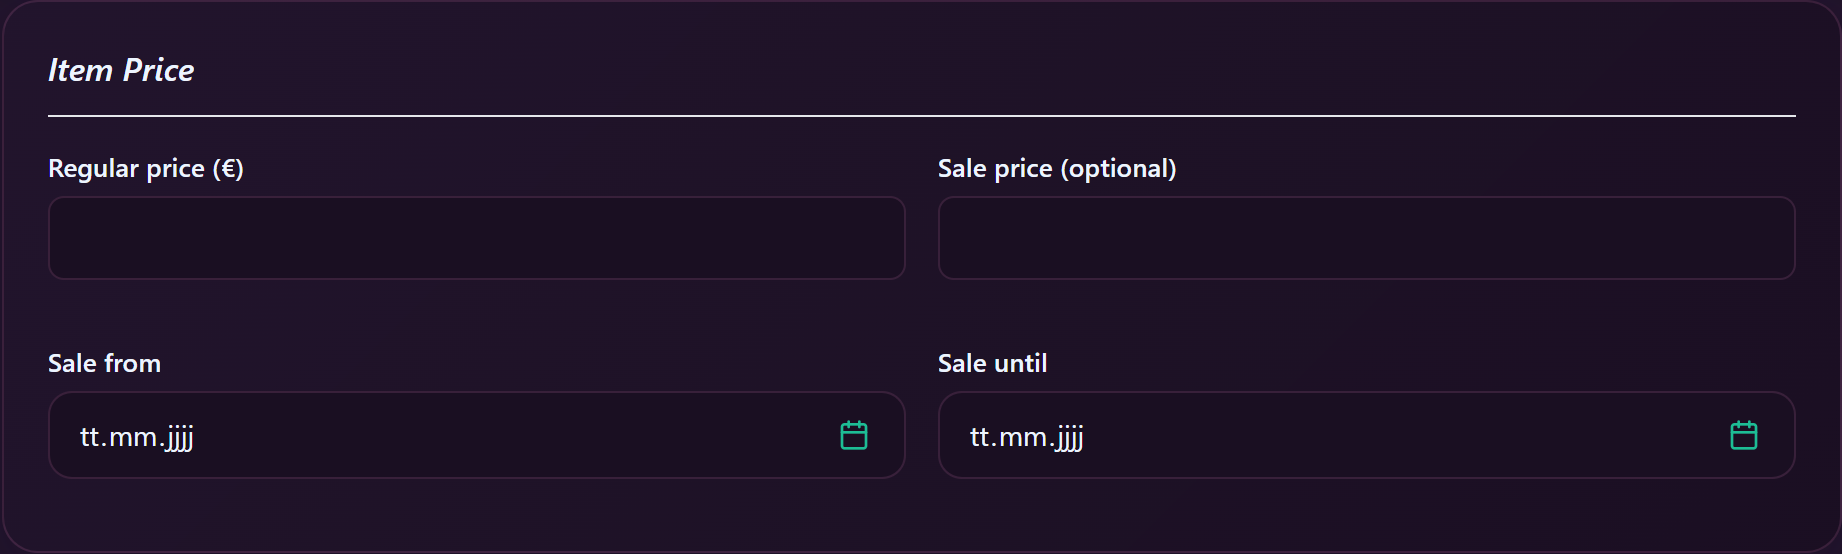
The Item Price card has four fields:
- Regular price (the currency symbol shows in the label, usually €) — the everyday price.
- Sale price (optional) — fill this only if you want to run a temporary sale. Leave blank otherwise.
- Sale from / Sale until — date pickers. If you set a sale price, you can either run it indefinitely (leave dates blank) or tie it to specific dates.
Tip: scarcity matters more than discounts on physical items. A higher regular price for a one-of-a-kind item generally outperforms a 30% sale on a generic listing.
7. Inventory — total stock and SKU
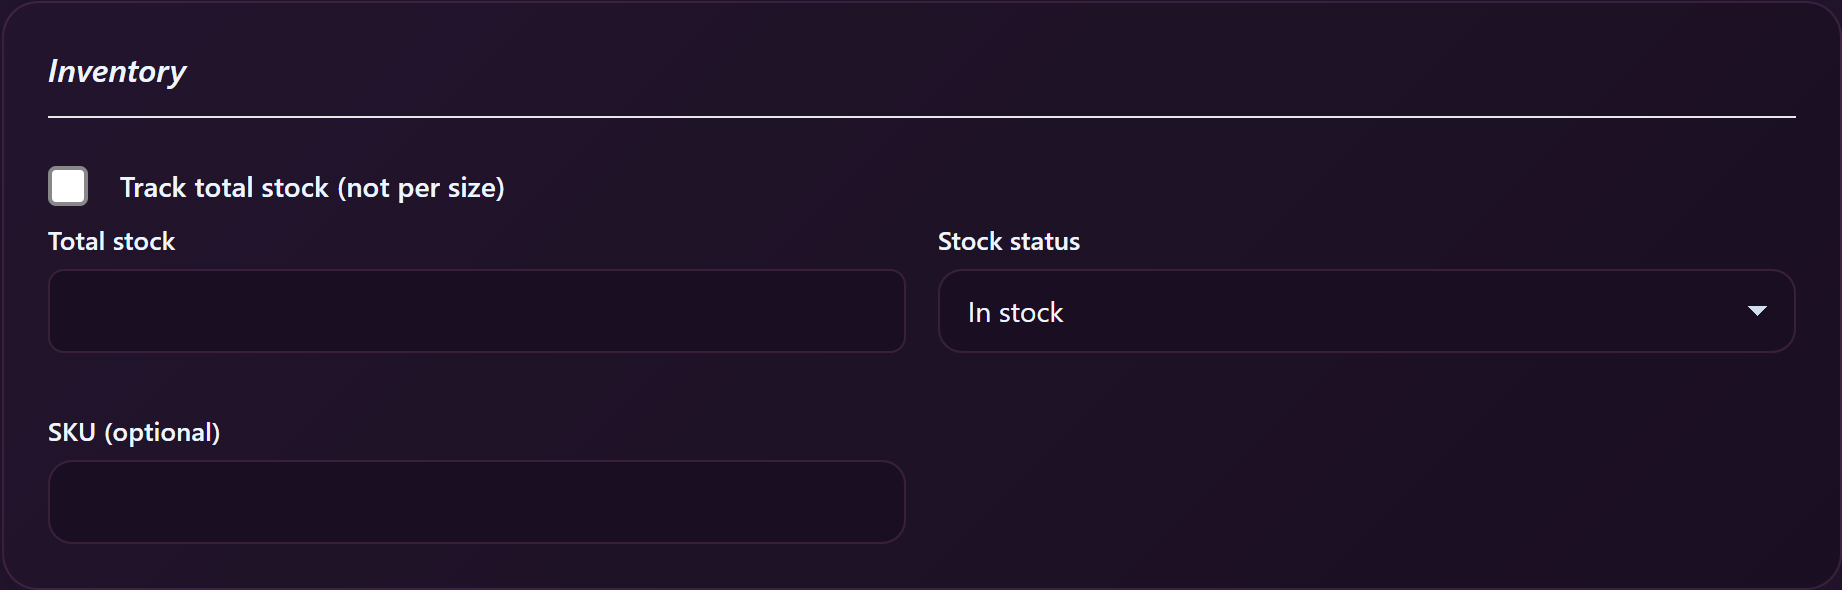
The Inventory card lets you track stock at the whole-item level (instead of per size). Three controls:
- Track total stock (not per size) checkbox — switches between per-size and total-stock modes.
- Total stock — only shown when total-tracking is on. The number of units you have left.
- Stock status — three options: In stock, Out of stock, On backorder. Use Out of stock if you’re sold out but want to keep the listing visible; use On backorder if buyers can order now and you’ll ship later.
- SKU (optional) — your own internal product code. Useful for cross-referencing with a personal spreadsheet. Buyers don’t see this.
Pick total-stock mode for one-of-a-kind items, props, signed prints, food, anything that doesn’t come in sizes. Keep per-size mode (the default for sized categories) for clothing.
8. Marketing — Promote as New / Best Value
The Marketing card has two checkboxes:
- Promote as New — flags the item with a “New” badge for a short window so it stands out on your storefront.
- Best Value — flags the item with a “Best Value” badge. Use this on your most-recommended item, not on every listing.
These are advisory badges, not algorithmic boosts — they exist purely to draw the buyer’s eye to one item over another. Use sparingly so they keep their visual punch.
9. Shipping — quick pointer
The next card is Shipping — origin country, mode (Domestic only / EU & EEA / Worldwide), per-region rates, free-shipping threshold, handling surcharge, and per-country overrides.
Shipping is its own thing and gets its own article. Don’t ignore this card — buyers can’t check out without rates set — but for the full walkthrough see Setting up shipping.
10. Add extras — selling beyond the base item
The Add extras card lets you offer optional add-ons buyers can tick at checkout, each one a separate cart line. The help text reads: “Select which extras buyers can add to this product. Each becomes a separate cart line item at checkout.”
Four built-in extras are listed by default with suggested prices:
- Scented — €5 — “Item arrives freshly worn with natural scent preserved.”
- Worn an extra day — €10 — “Item will be worn one additional full day before shipping.”
- Personalized signed note — €8 — “Handwritten, signed note included with your order.”
- Custom video clip — €25 — “Short custom video about your item, emailed after it ships.”
You can edit the prices on the built-ins but the labels and descriptions are fixed. Tick the checkbox next to each one you want to offer — leave it unchecked to hide that extra from buyers.
If you’re not selling worn clothing. The built-ins lean toward worn-apparel sellers, which is fine — they’re opt-in, not required. If you’re listing signed prints, candles, props, food, or anything where “Scented” or “Worn an extra day” makes no sense, just leave those checkboxes off. Then click + Add custom extra at the bottom of the card and define your own — Extra name, price, and a Short description. Examples that work well: “Custom inscription on the print” (+€10), “Gift-wrap” (+€5), “Express padded mailer” (+€8), “Add a polaroid” (+€15).
11. Discounts — quick percentage off
The Discounts card has one dropdown labelled “Offer a percentage discount on this item”. Options run from No discount through 5% off, 10% off, 15% off, 20% off, 25% off, 30% off, 40% off, up to 50% off.
This is a separate mechanism from the sale price field in §6 — it’s a flat percentage off, applied on top of whatever Regular price is set. Use it for short campaigns or to clear inventory; for longer-running discounts the sale price field with explicit dates reads more cleanly to buyers.
12. Saving — Draft vs. Publish
At the bottom of the form there are two buttons:
- Save Draft — saves everything you’ve entered but doesn’t list the item publicly. Use this if you’re still gathering photos or want to come back later.
- Publish (or Update if you’re editing an existing item) — saves and lists the item on your storefront for buyers.
You can flip between draft and published as often as you want. Drafts don’t expire and don’t show anywhere public.
Frequently asked questions
Q: Can I really sell anything physical?
Anything legal. Worn clothing and lingerie are the most common, but creators also sell signed prints, polaroids, art, props, custom soaps and candles, food items (where law allows), books, accessories — anything you can ship and a fan would buy. Read the platform’s content rules article for the things you can’t sell.
Q: What size photos should I upload?
Anything from 800 × 800 up. The form re-encodes them for the web automatically. Bigger originals are fine — you’ll just wait a moment longer for the upload.
Q: Do I have to fill in sizes if my item isn’t clothing?
No. The sizes grid only appears when the category you picked is set up for sizes (clothing, lingerie, footwear). Pick a non-sized category and the grid disappears — use the Inventory card’s Total stock field instead.
Q: Can I link a worn item to the video where I wore it?
Yes — use the Select vid(s) this item was worn in card (between the sizes grid and the price card). Tick Link this item to specific videos and pick from Your vids; the chosen videos move to the Selected vids column. Buyers see the linked clips on the item page, which is great social proof.
Q: How do buyers actually find my items?
Items show up on your storefront’s products tab, in the platform-wide search by name and category, and in feeds for fans who follow you. The first 24 hours after publish get the most visibility — that’s also when the “New” badge does the most work.
Q: Can I edit an item after publishing?
Yes — open it from Store Manager → Products and you’ll see Edit Physical Item at the top. Photos, prices, description, stock, extras, discounts — all editable. The button at the bottom changes to Update when editing.
Q: What if I want to take an item down without deleting it?
Set the Stock status to Out of stock. The listing stays visible to buyers (so you keep the SEO and reviews) but they can’t add it to cart. Or click Save Draft after editing — that pulls it from public listings without deleting it.
Q: How is my final price calculated for the buyer?
Regular price (or sale price if active) × quantity, plus any extras the buyer ticked, plus shipping for the chosen destination. The discount percentage from §11 is applied to the item subtotal before extras and shipping. Buyers see a full breakdown at checkout.
Q: What do I do if a category really doesn’t fit my item?
Pick the closest match and use the Item Name + Description to be specific. If a whole class of item is missing — for example you’re selling something the catalogue doesn’t cover at all — open a support ticket and tell us; we add categories regularly based on creator requests.
From the buyer’s side
Want to see what buyers see when they shop your store? Ordering physical items walks through the buyer’s view of your storefront, the PDP, the extras section, and checkout. Useful for double-checking your listings actually read the way you want them to.
Need more help?
If something’s not behaving the way this article describes — the form doesn’t save, the photos won’t upload, a category you’re sure was there is missing — open a support ticket from your store manager and pick the Physical items category. Include the URL of the form and a screenshot of what you’re seeing and we’ll take a look.