
Video guide
Prefer to watch? This video walks through the Import list — loading your spreadsheet, how clips are found automatically, and publishing clip by clip.
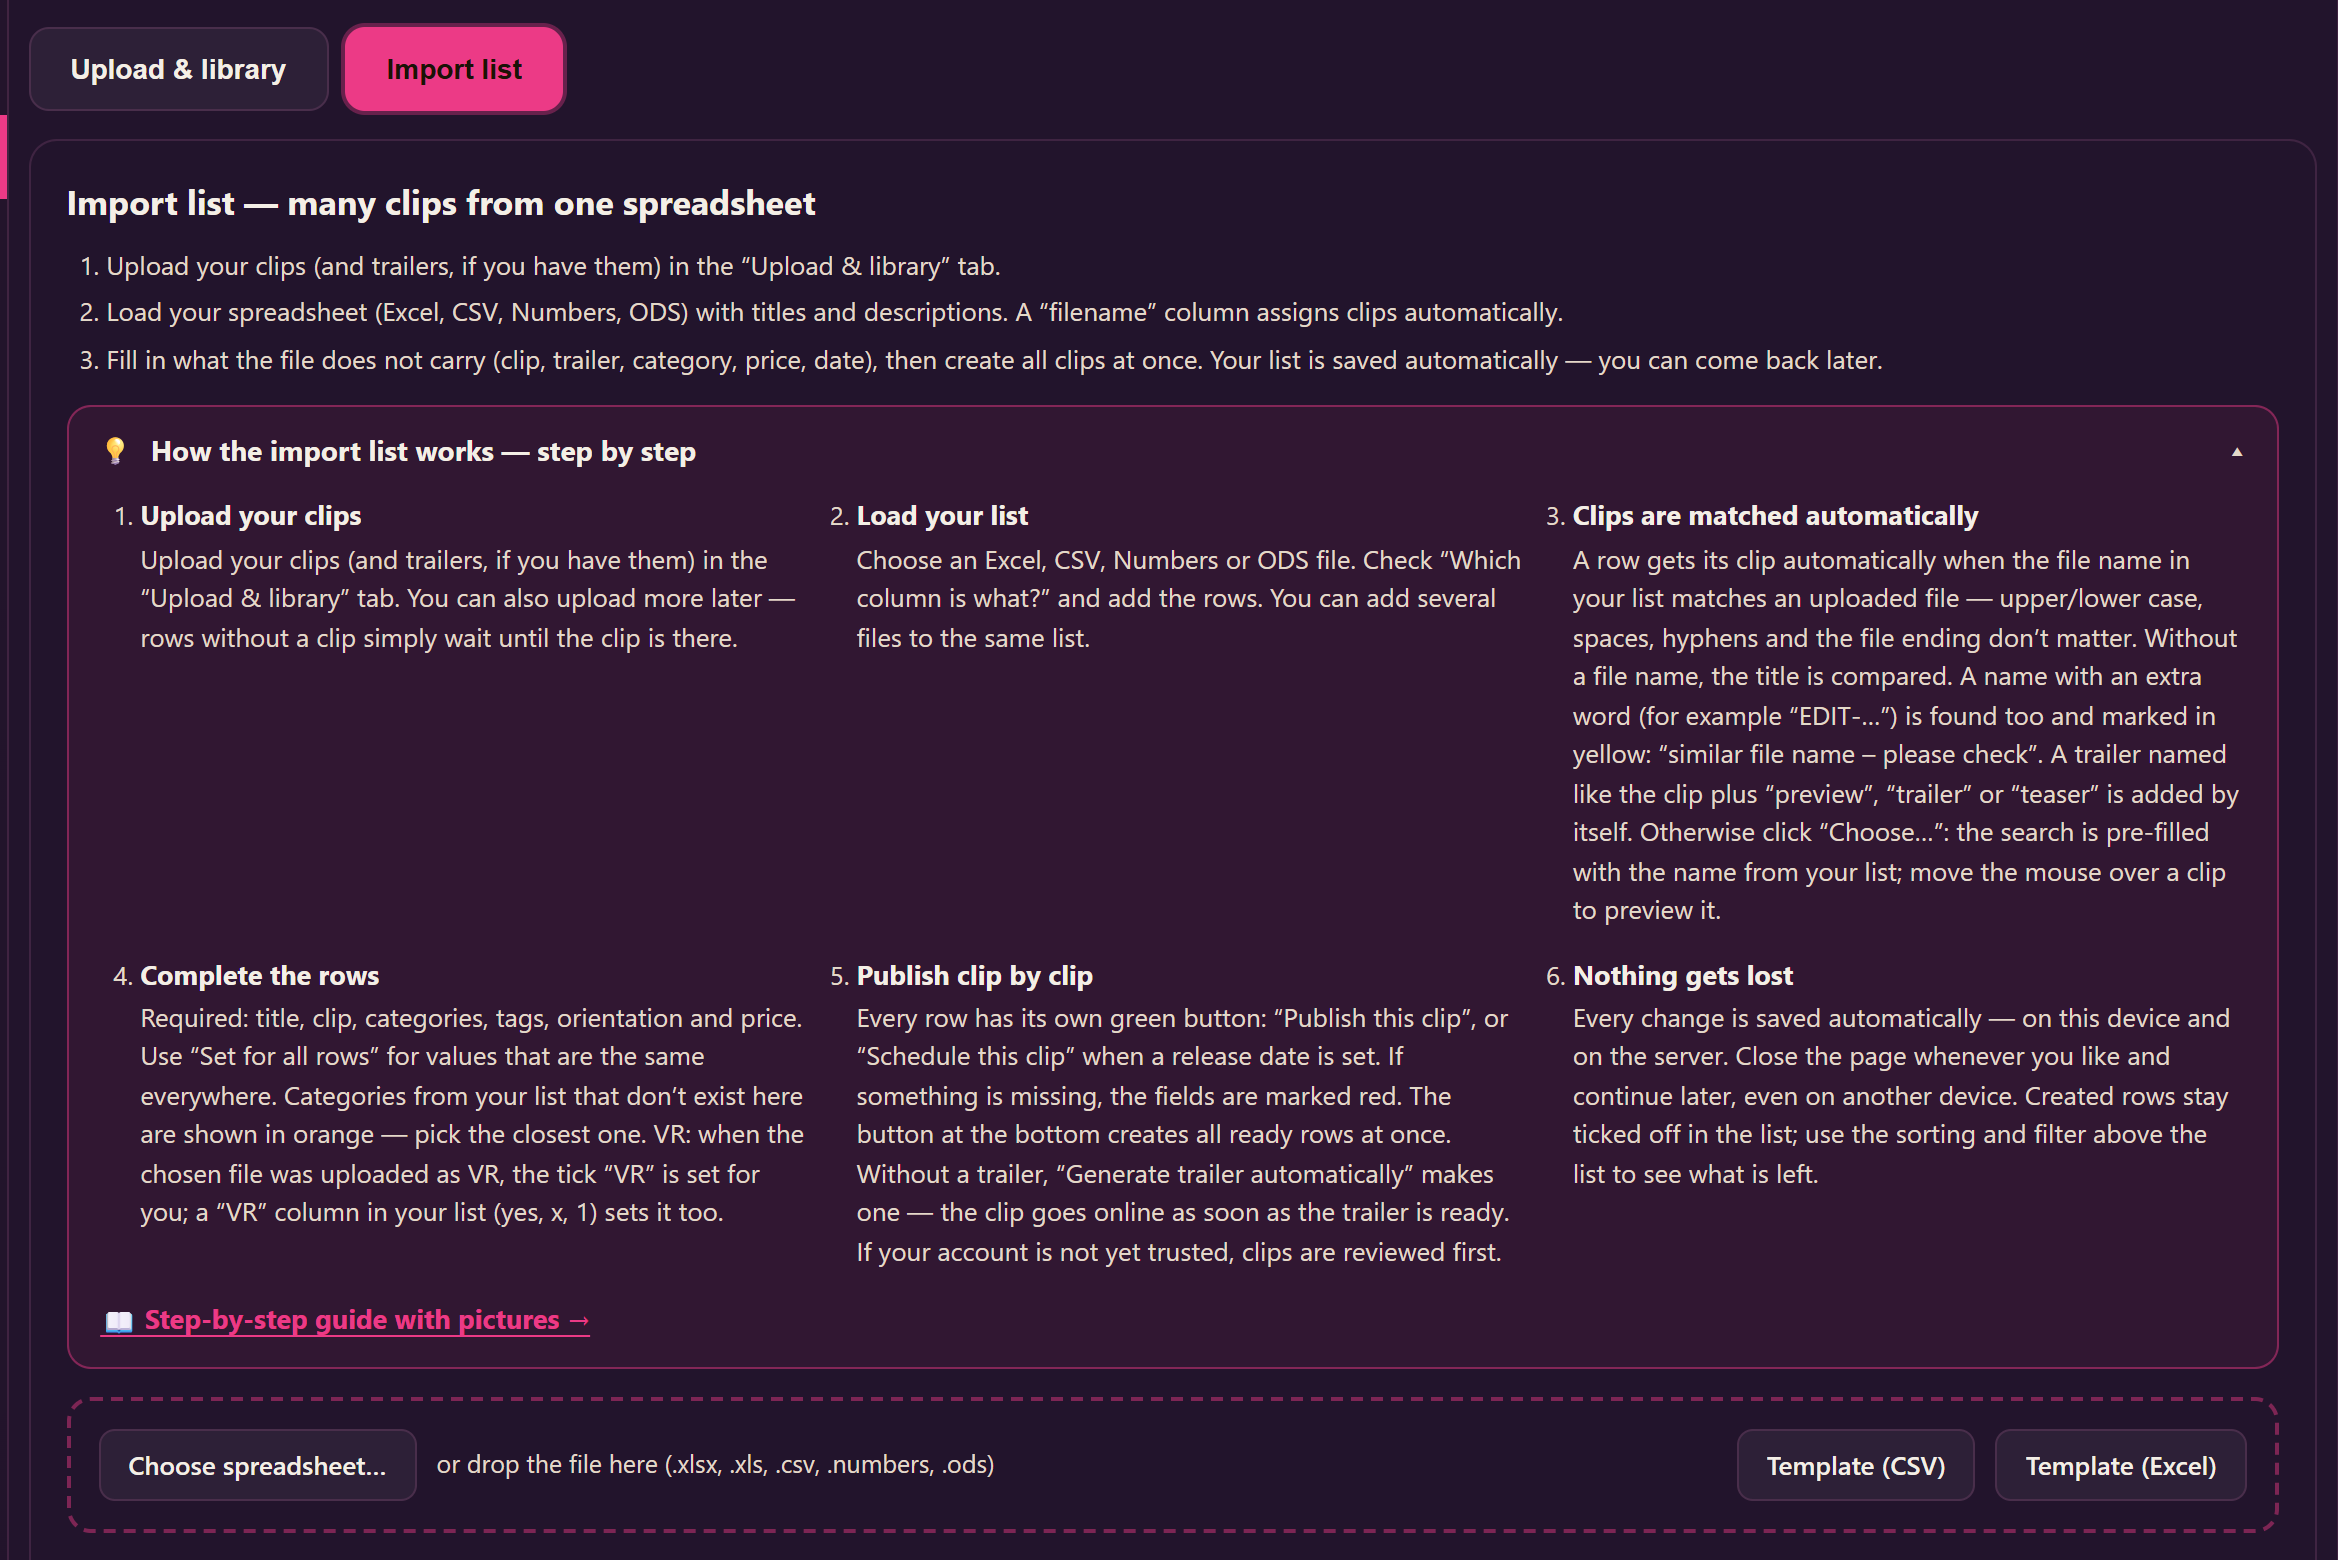
With the Import list you publish many clips from one spreadsheet. You load an Excel or CSV list with your titles and descriptions, the site finds the matching uploaded video for each row, you fill in what is still missing, and then you publish clip by clip — or all at once. Your list is saved automatically, so you can work through it over several days.
You find it under Bulk upload in your creator menu, in the tab Import list. Uploading the video files themselves works as before in the tab Upload & library — see Bulk upload in your browser.
1. Before you start
- Upload your clips (and trailers, if you have them) in the tab Upload & library. You do not need to upload everything first — rows without a clip simply wait until the clip is there.
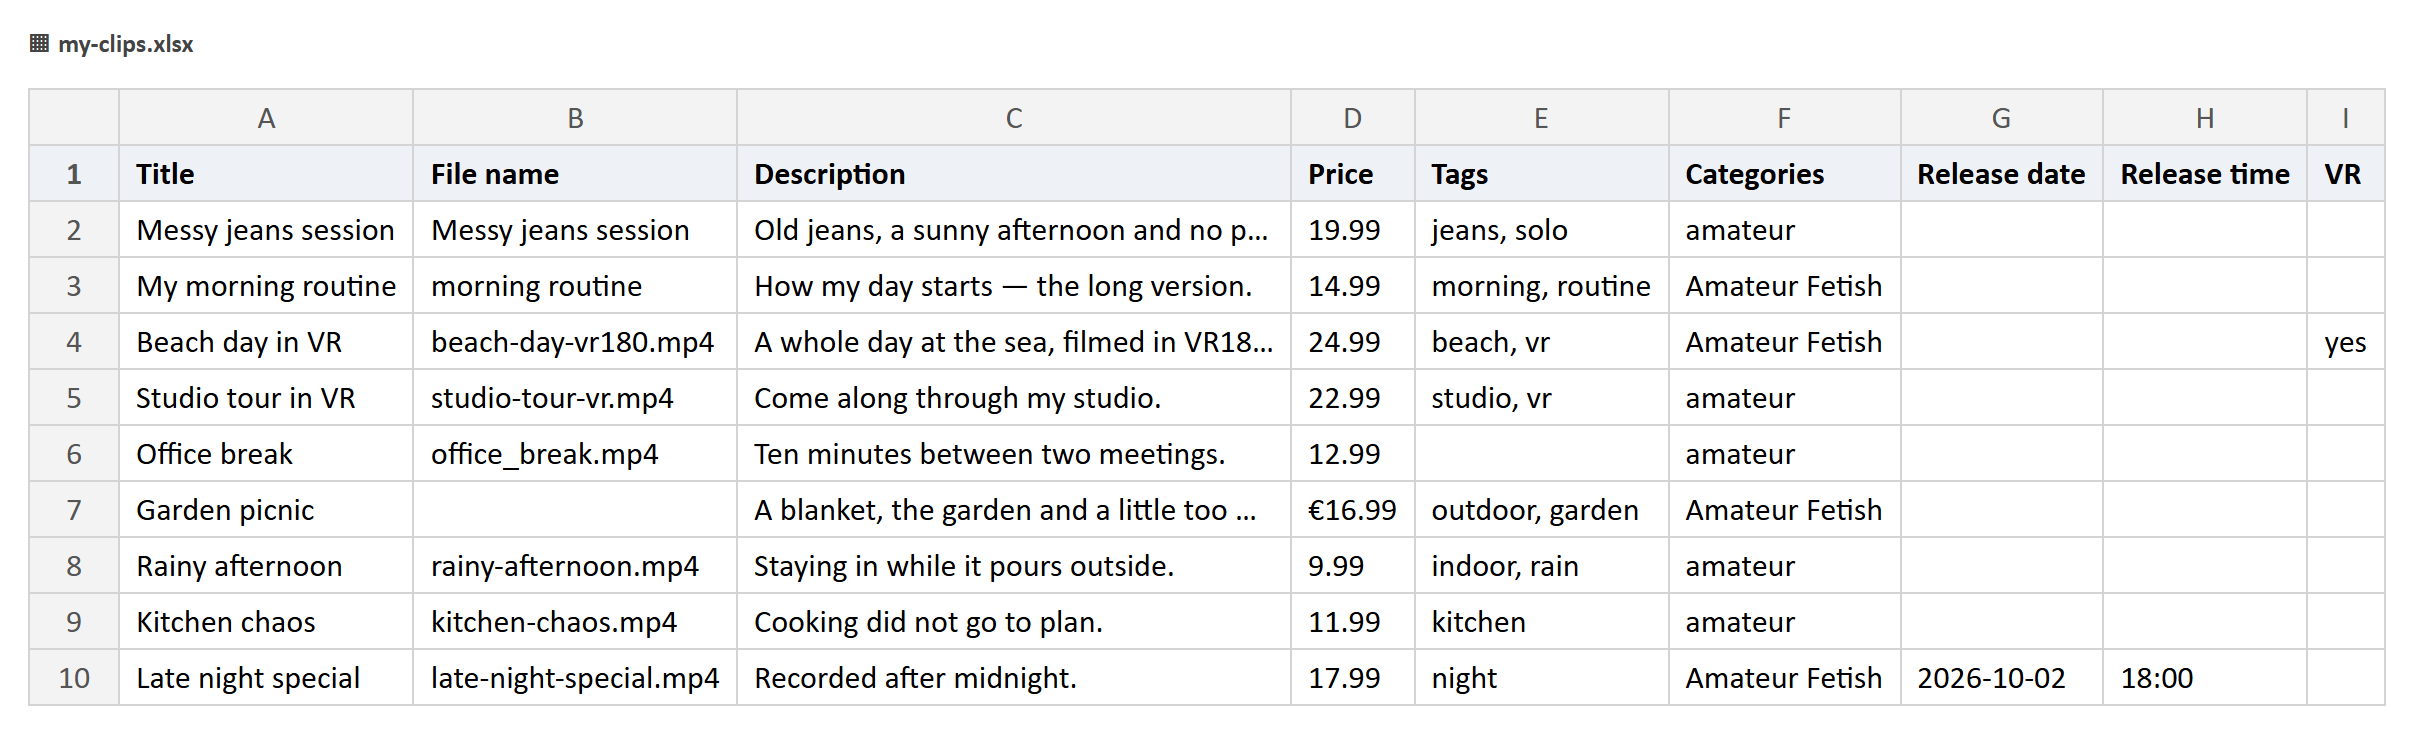
- Your spreadsheet needs one row per clip. Useful columns: title, file name of the video, description, price, tags, categories, release date, release time and VR (yes, x or 1 for a VR clip). Only the title is really needed; everything else you can also fill in on the site.
- Several category columns next to each other are fine — they are read together.
- Not sure how to start? The buttons Template (CSV) and Template (Excel) give you an empty list with the right columns.
2. Loading your list
- Press Choose spreadsheet… or drop the file onto the dashed area. Excel (.xlsx, .xls), CSV, Numbers and ODS files work.
- If the file has several sheets, pick the right one — the sheet with the most rows is chosen for you.
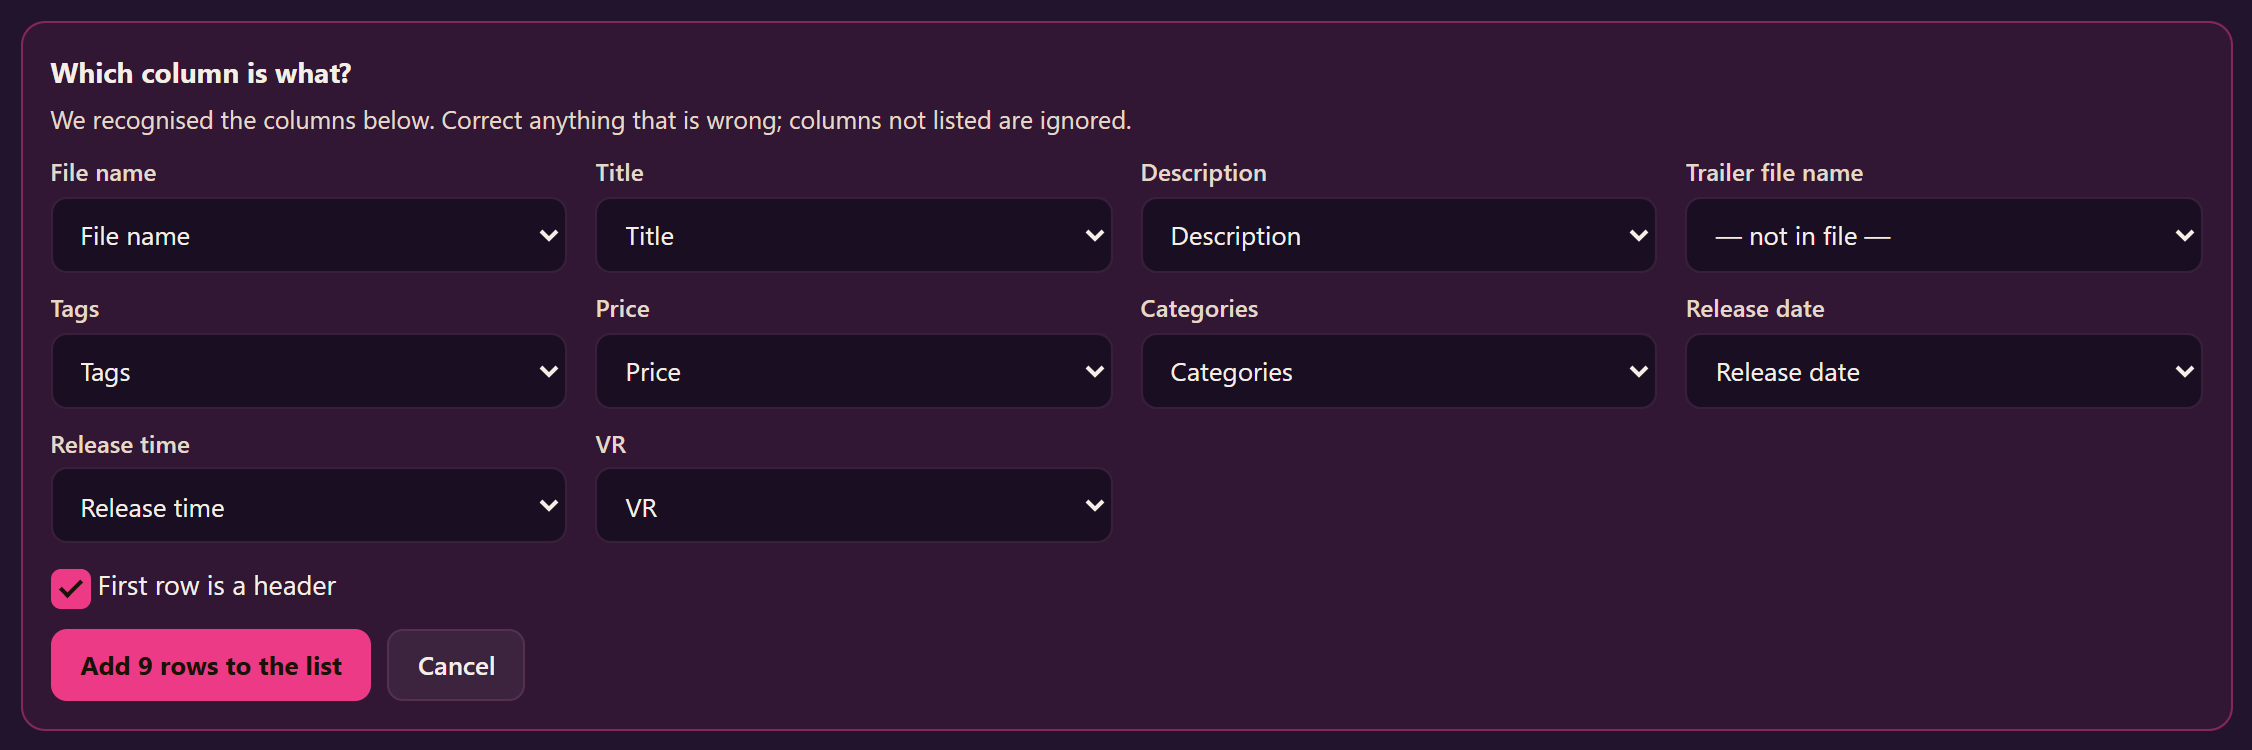
- Under Which column is what? the site shows which column it recognised for each field. Correct anything that is wrong; columns you do not assign are ignored.
- Press Add … rows to the list. You can load more files later — their rows are added to the same list.
3. How clips are found automatically
For every row the site looks for the uploaded video that belongs to it. It compares the file name in your list with the names of your uploaded files. Upper or lower case, spaces, hyphens and the file ending do not matter.
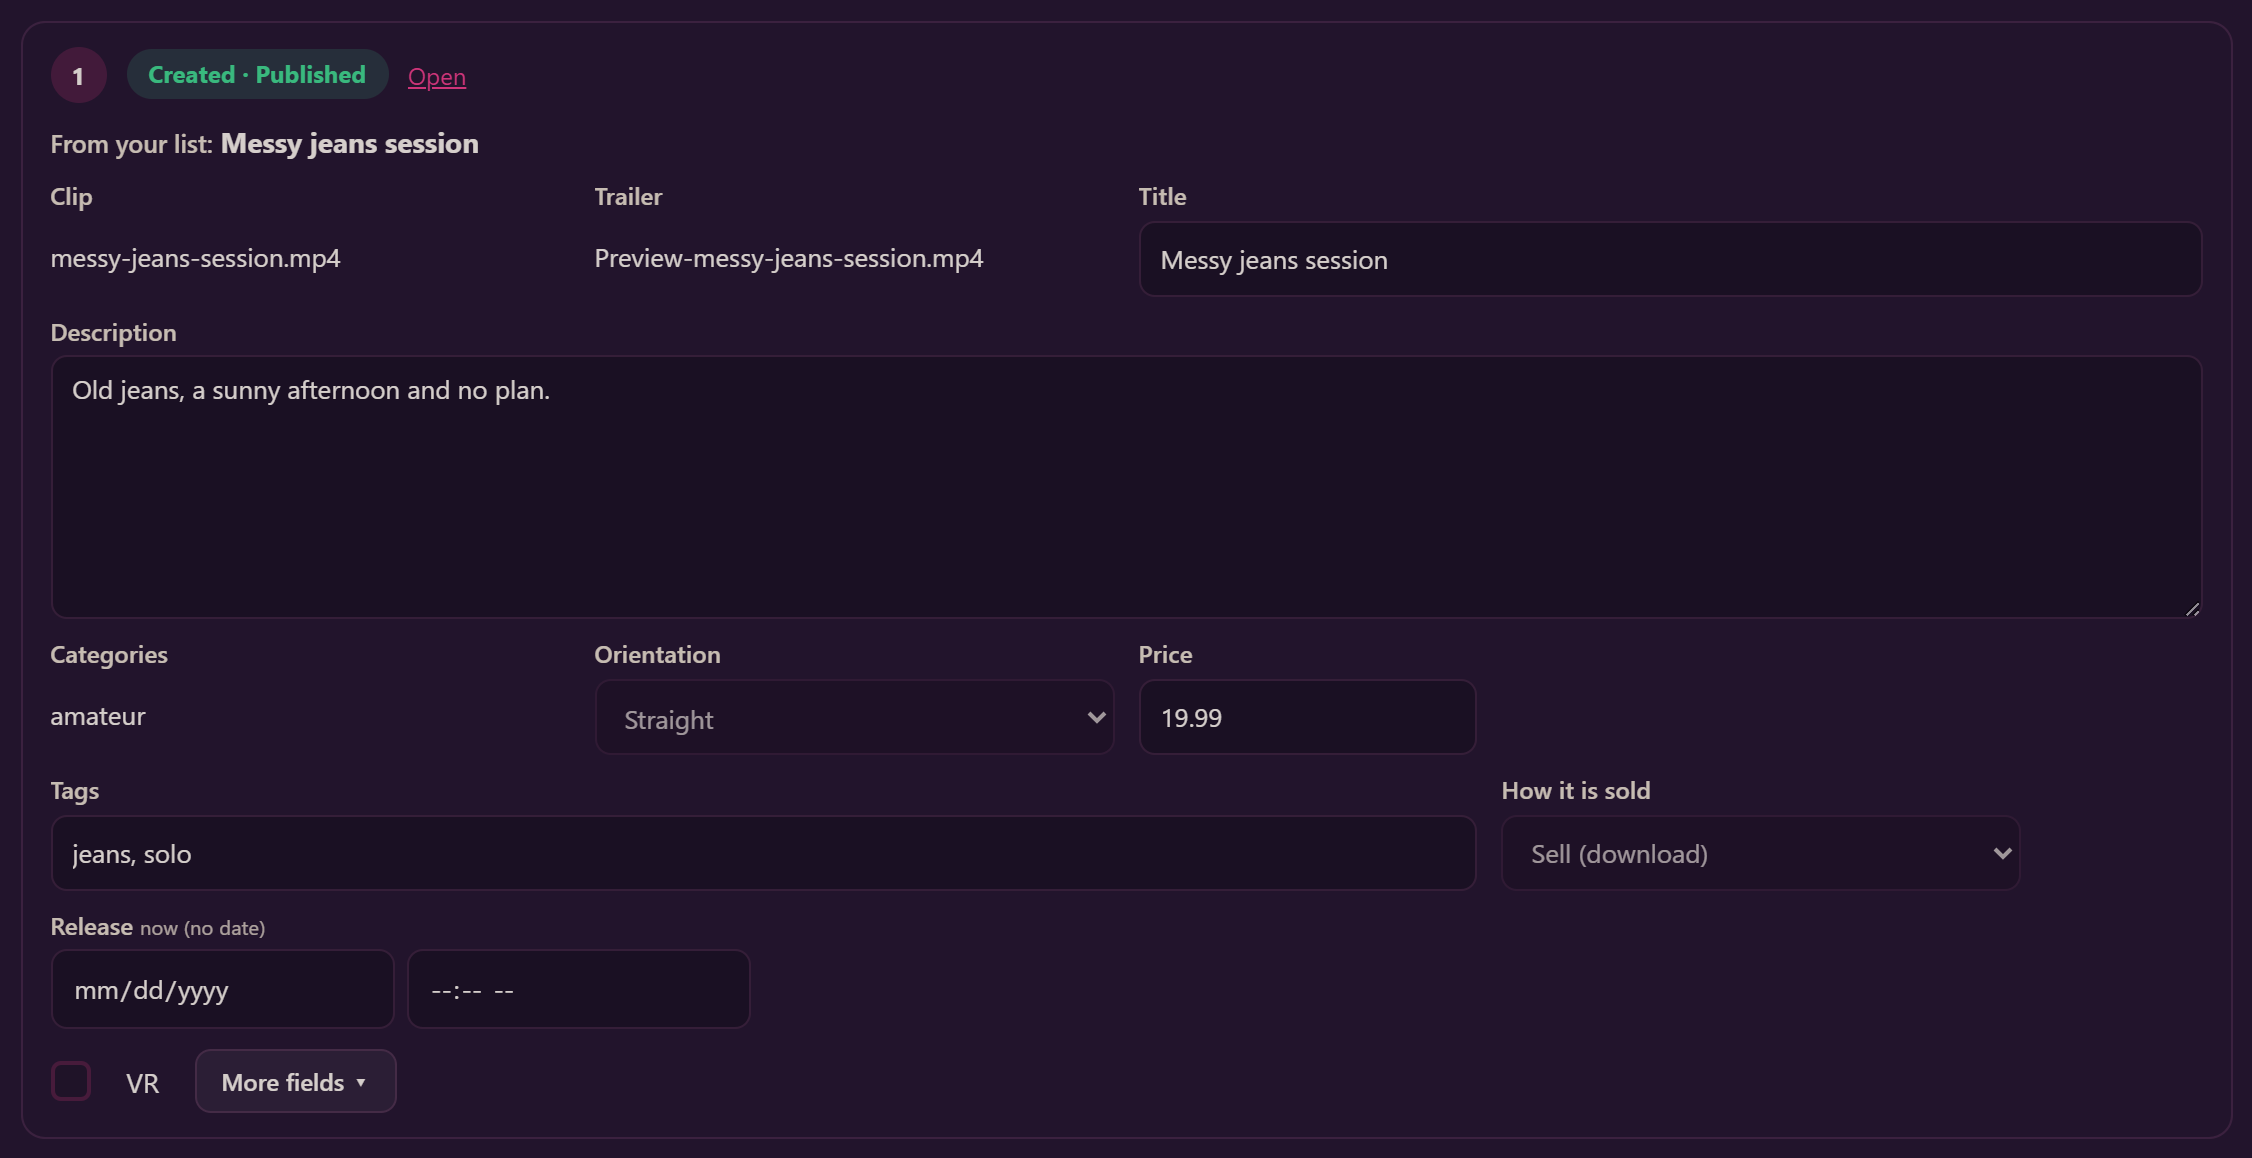
- Same name: Messy jeans session in your list finds messy-jeans-session.mp4. The row says matched by file name.
- No file name in the row: the title is compared instead. The row says matched by title.
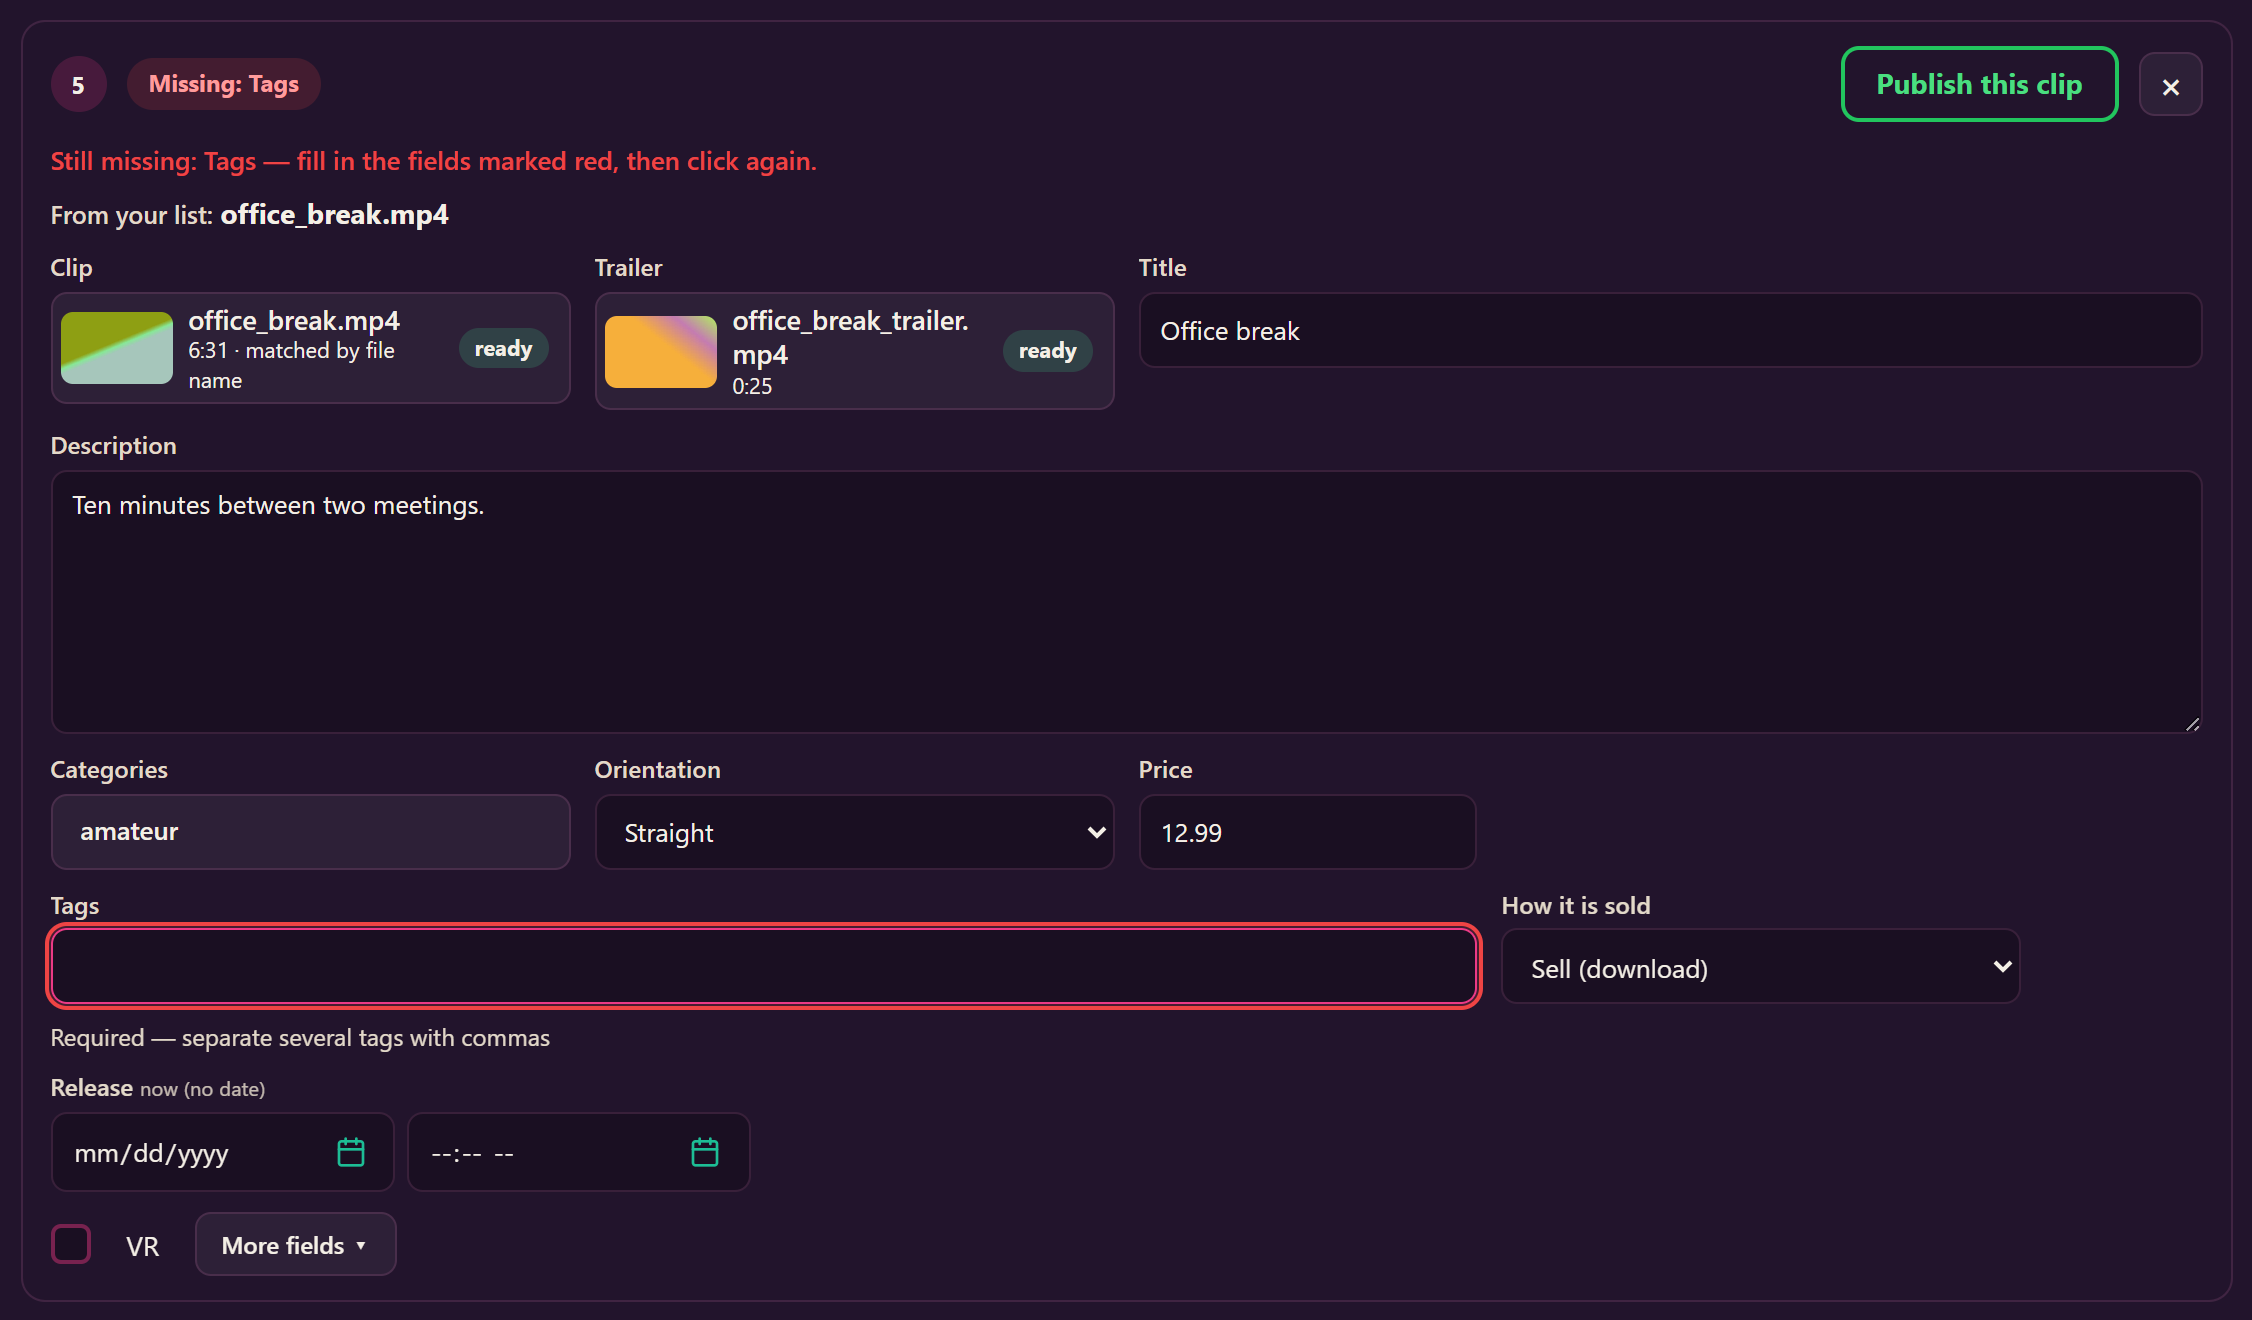
- Name with an extra word: Morning routine in your list also finds EDIT-morning-routine.mp4. Because this is a guess, the row says similar file name – please check in yellow. Take a look before you publish.
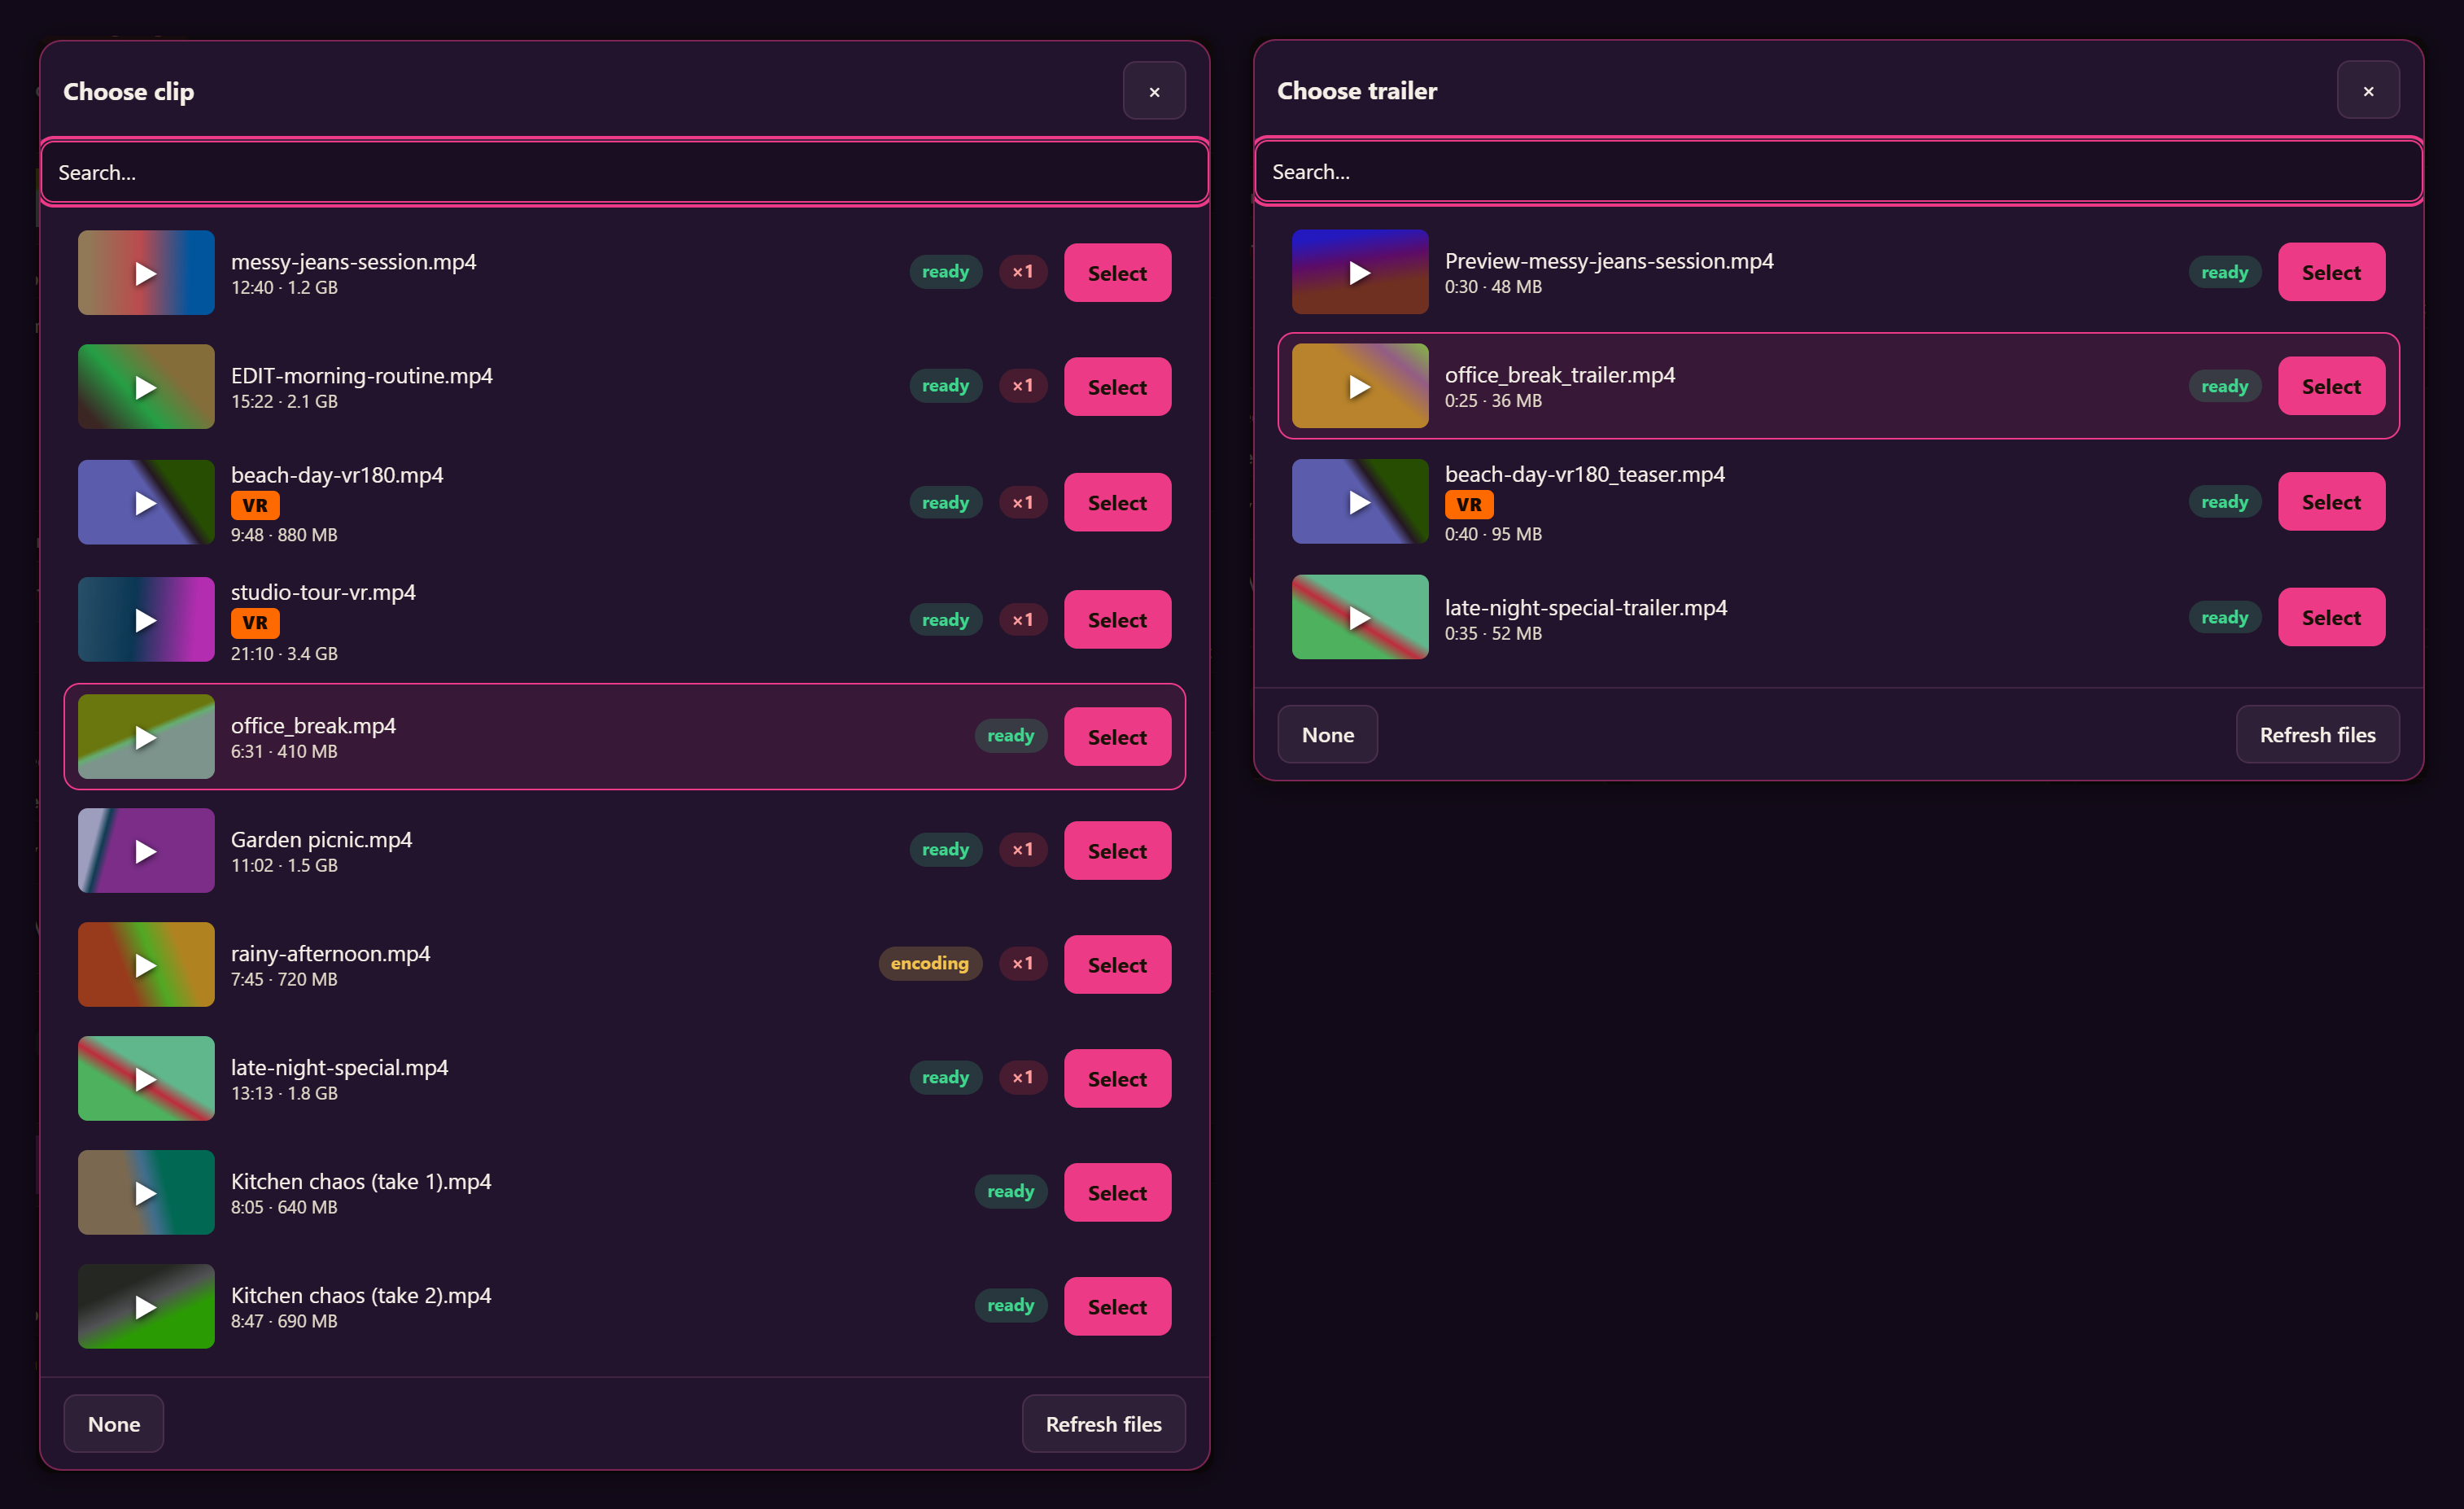
- Trailers are found the same way: a trailer named like the clip with preview, trailer or teaser before or after the name — for example Preview-messy-jeans-session.mp4 or office_break_trailer.mp4 — goes into the row by itself.
A file is only assigned when exactly one file fits and no other row needs it. If you uploaded two files with the same name, or two rows could mean the same file, nothing is assigned and you choose yourself. Nothing is matched by guesswork.
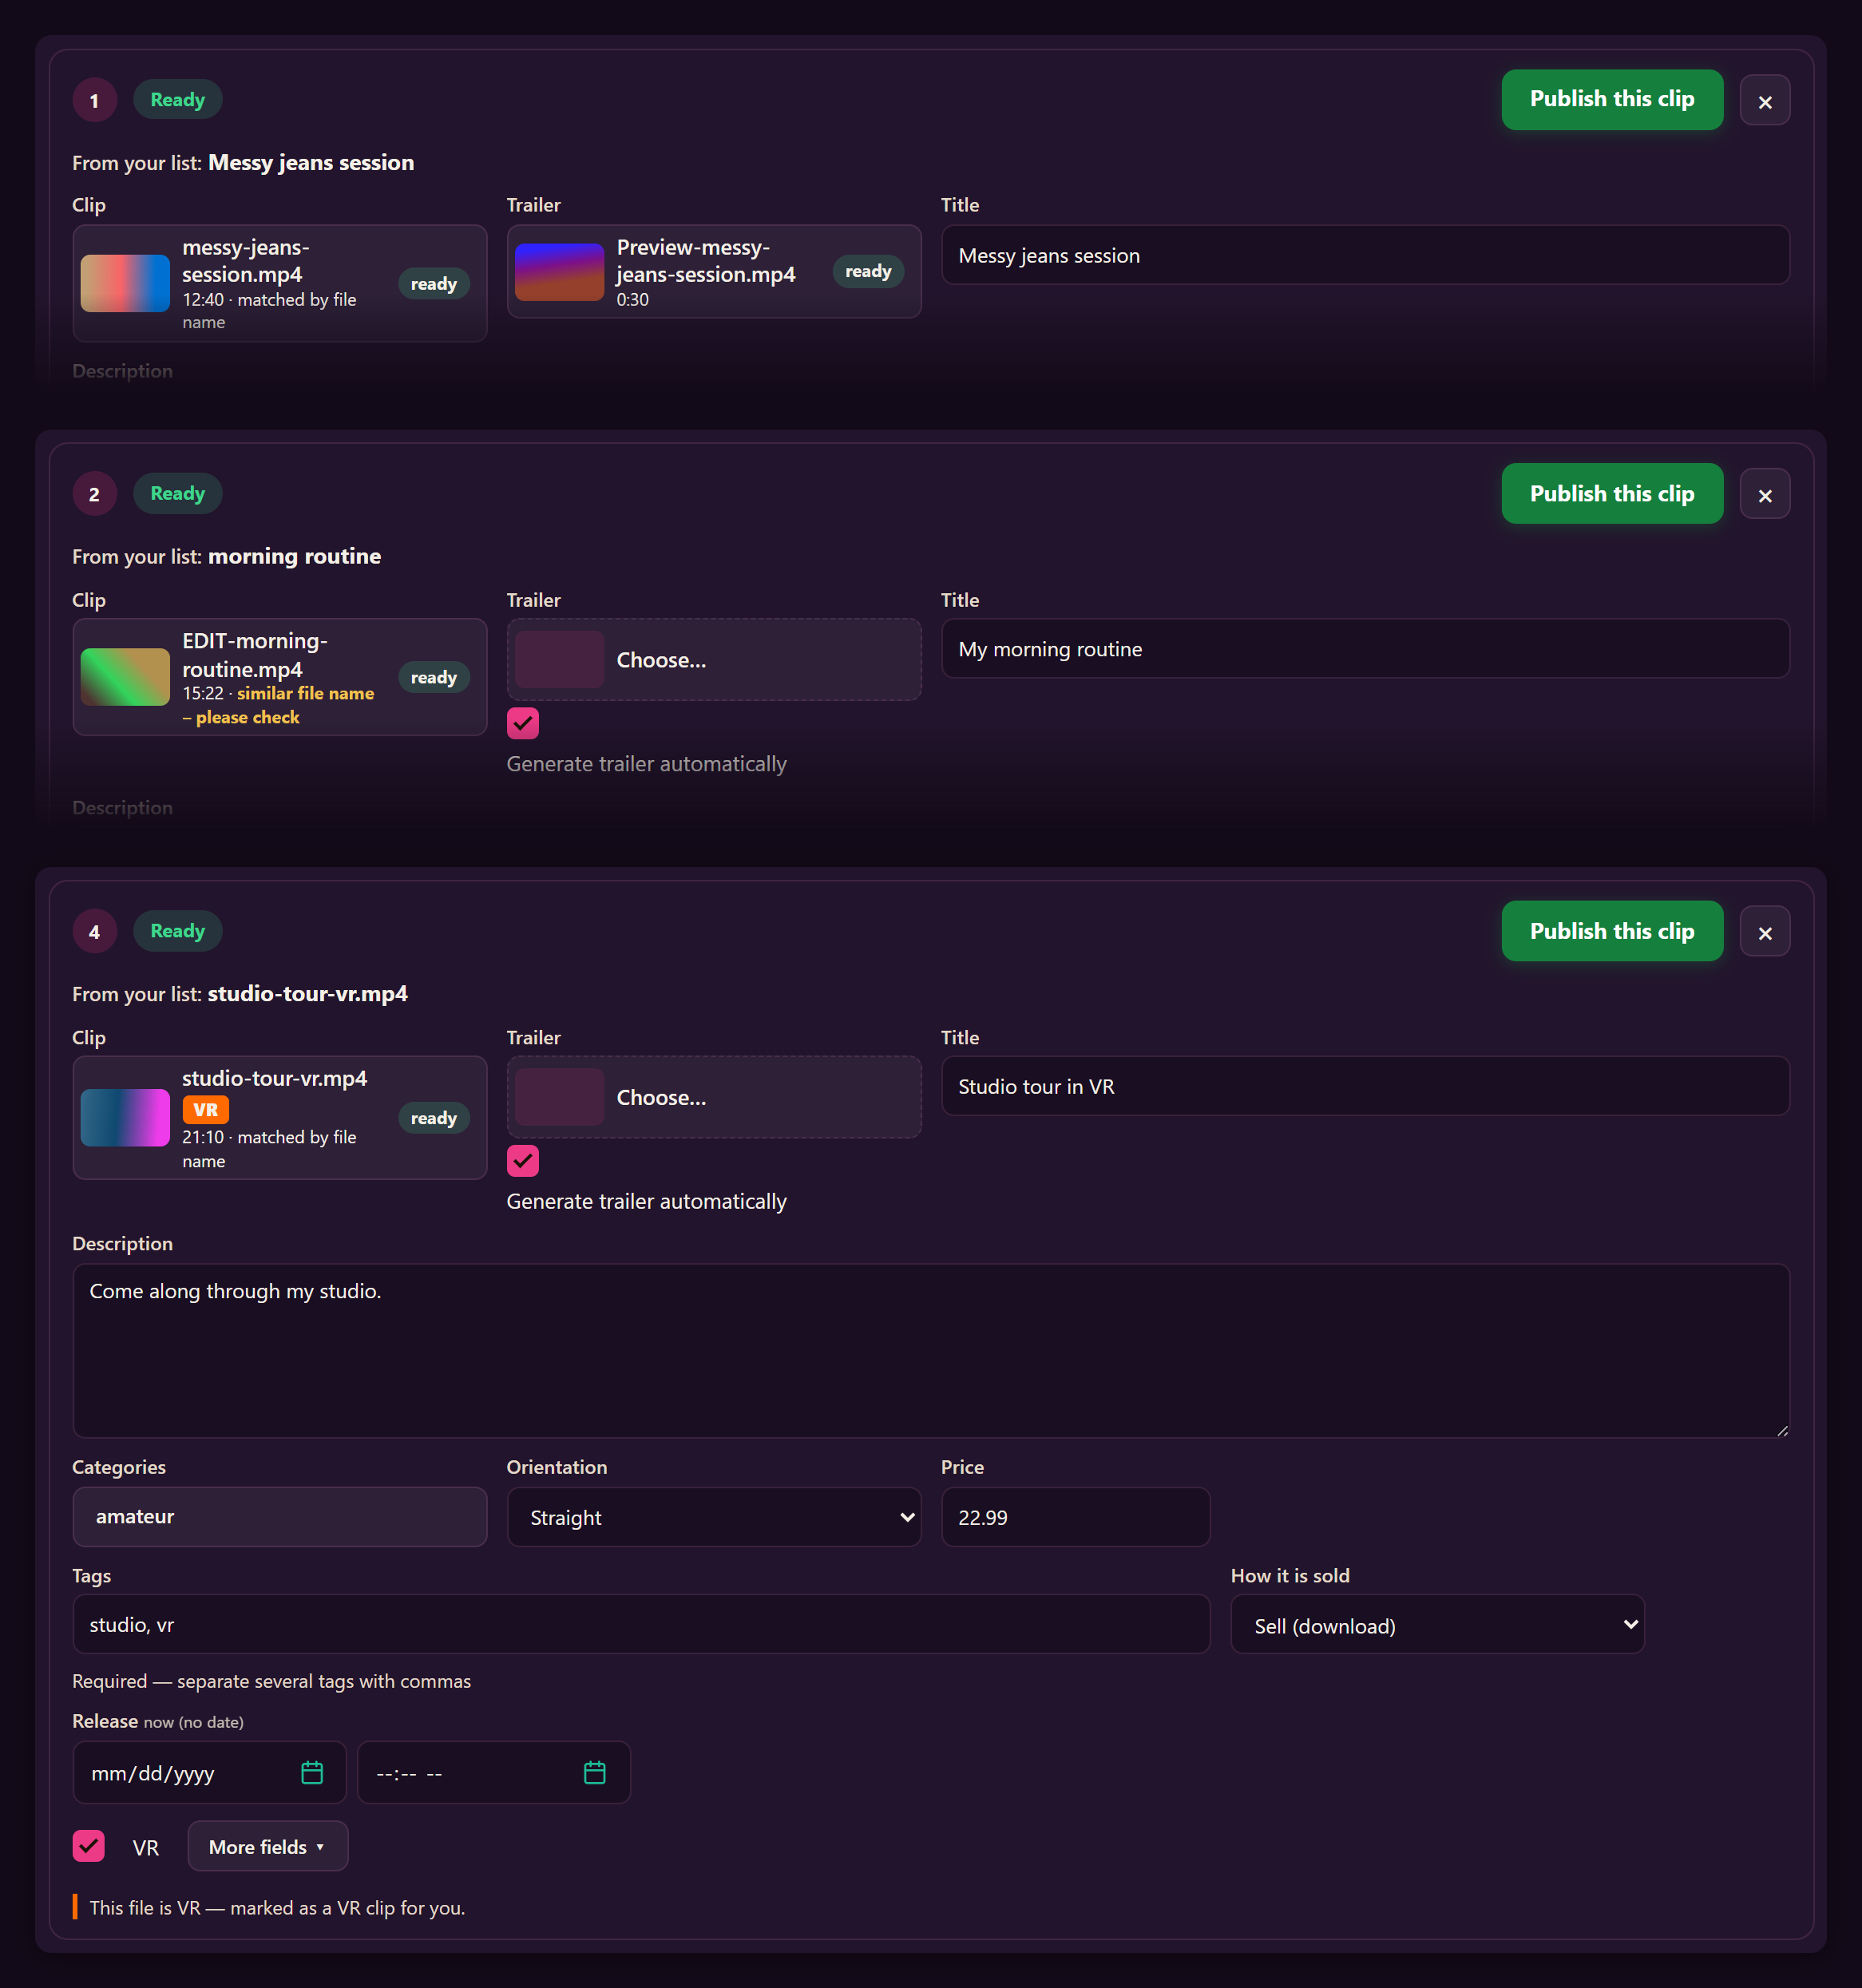
Above each row you see the name from your list in large letters, and next to it the file that was chosen — with the note matched by file name, matched by title or similar file name – please check. Compare the two before you publish.
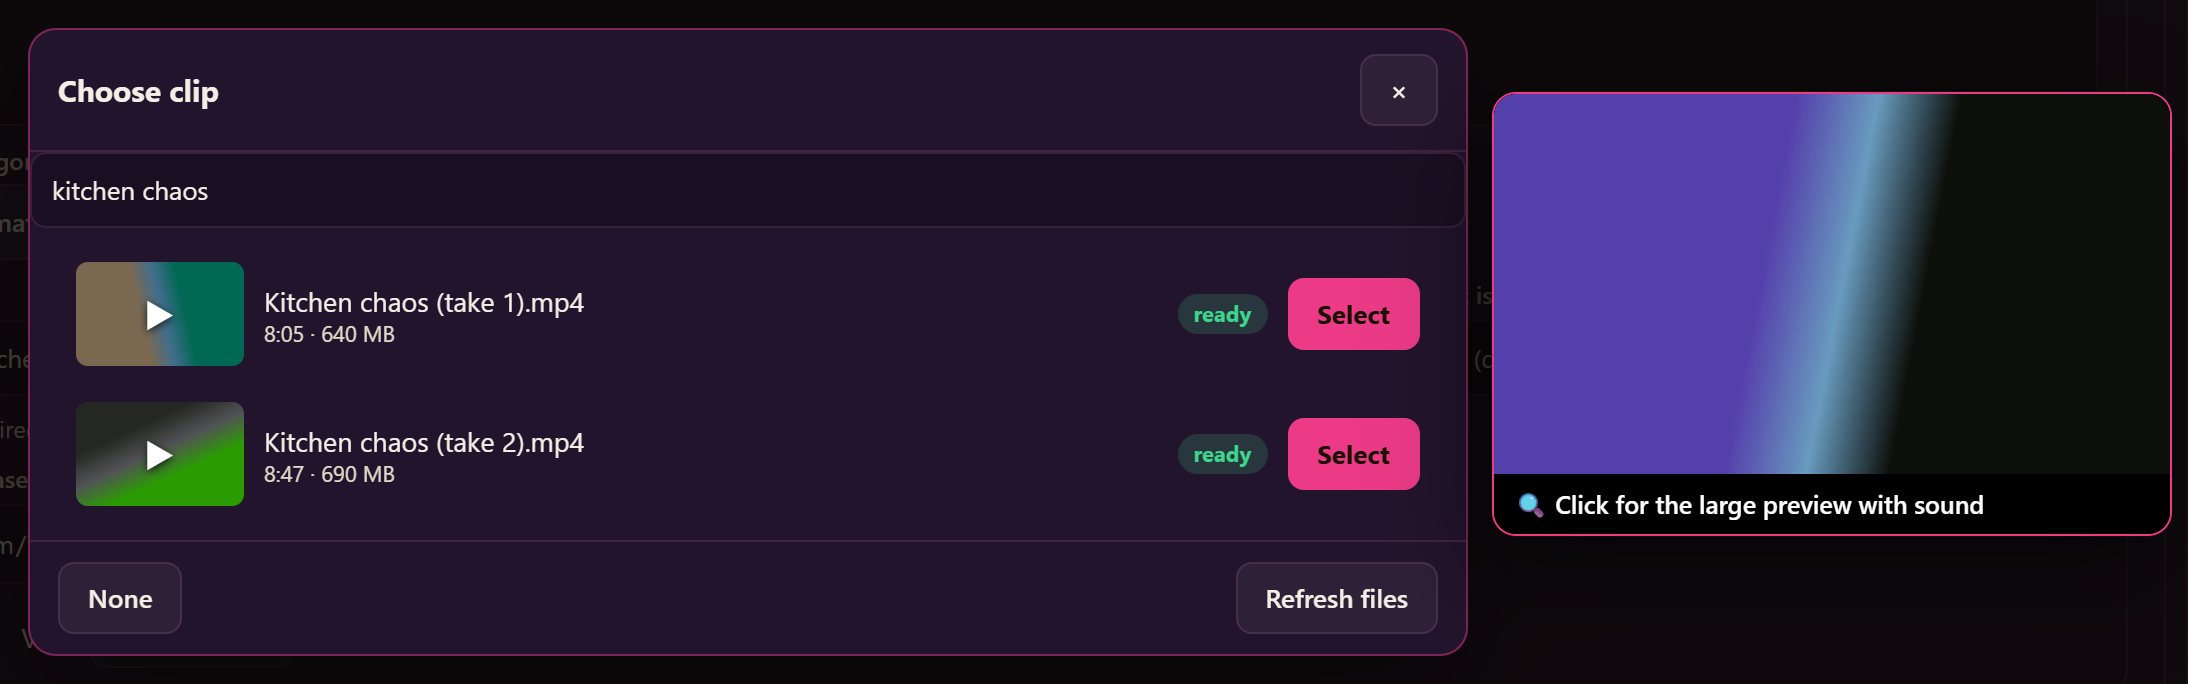
4. Choosing a clip yourself
- Press Choose… in the clip field. The search is already filled with the name from your list, so the most likely files are on top.
- Move the mouse over a clip: a larger preview opens next to the list and plays without sound. Click the preview to watch it big, with sound. On a phone, tap the ▶ on the small picture instead.
- Press Select. Files uploaded as VR carry an orange VR badge. A small ×1 next to a file means it is already used in another row.
- Files that are still being processed show encoding. You can already choose them; the row can be created as soon as the file is ready.
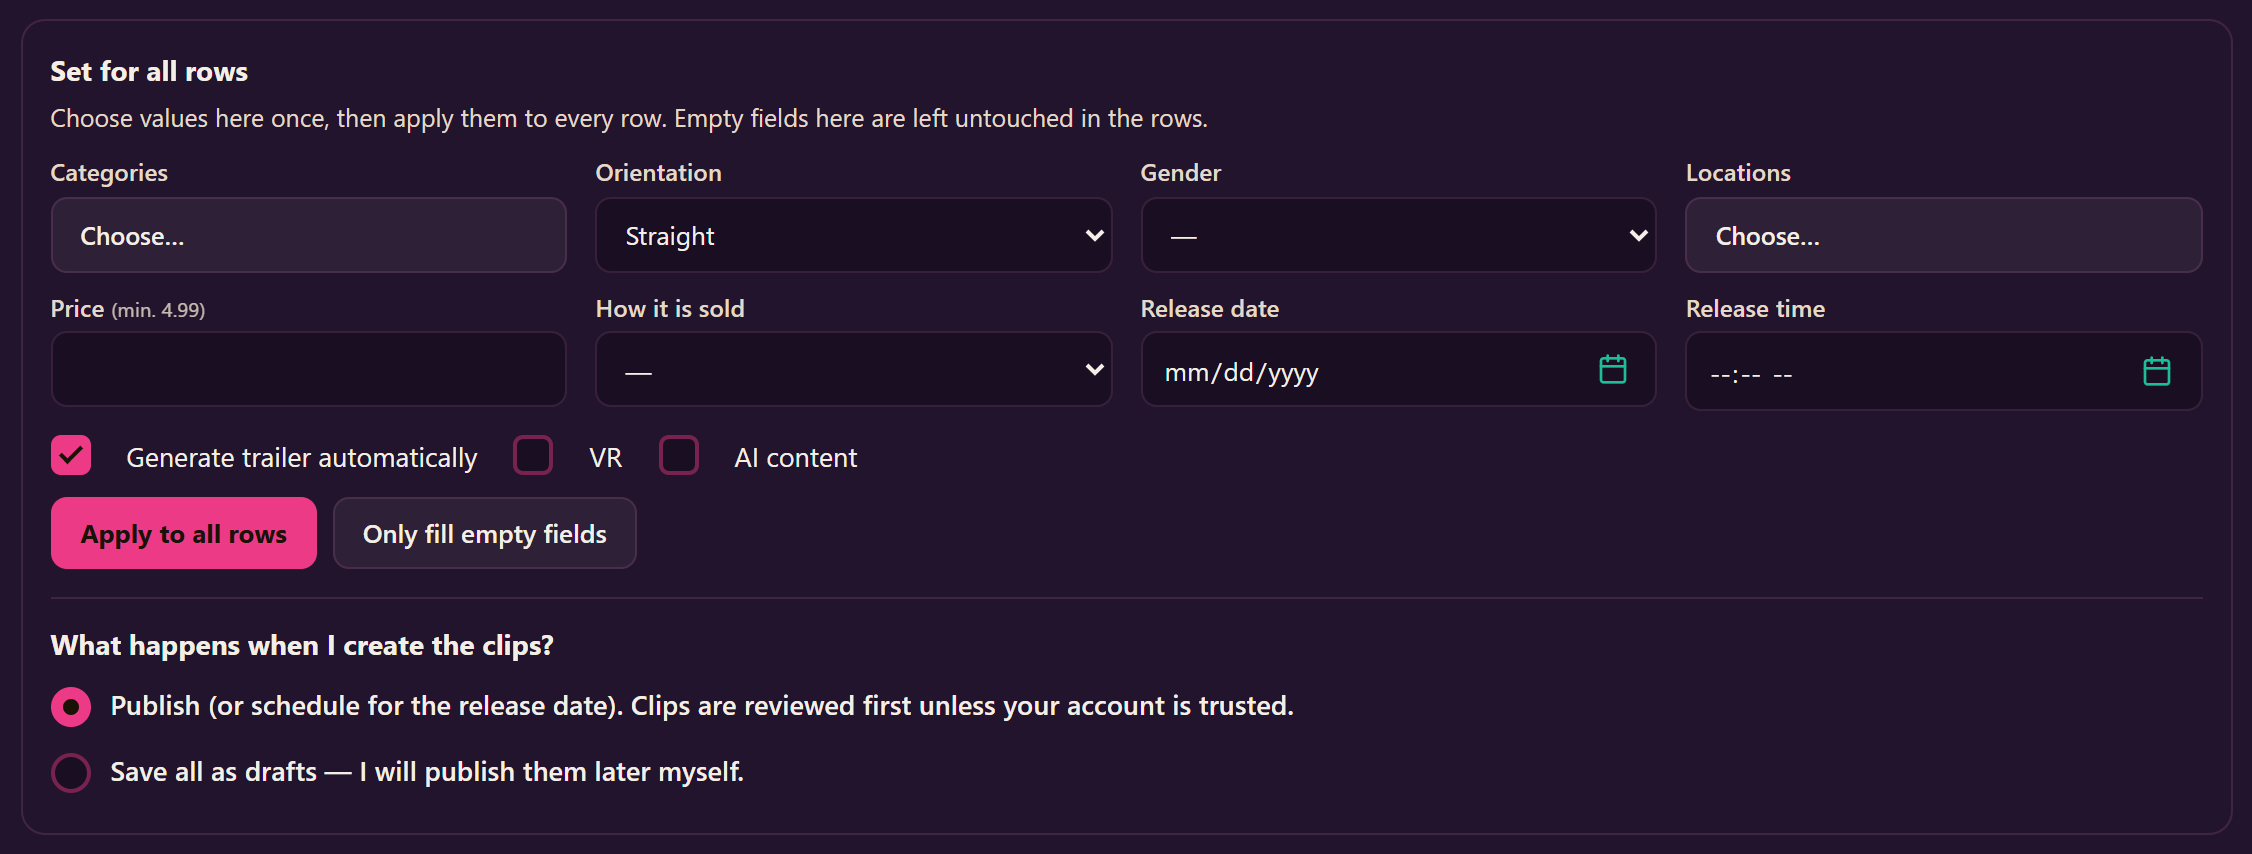
5. Completing the rows
- Every clip needs a title, a clip, at least one category, tags, the orientation and a price. Separate several tags with commas.
- Values that are the same for all clips you set once under Set for all rows. Apply to all rows overwrites the rows; Only fill empty fields leaves what is already filled in.
- Categories from your list that do not exist here are shown in orange under the category field — pick the closest one.
- A price with a currency sign is taken as a euro amount; the row shows what your list said.
- A release date (and time) makes the clip a scheduled clip. Without a date it goes online when you publish it.
- VR: the tick VR sits in every row next to More fields. When the chosen file was uploaded as VR, it is set for you and the row says This file is VR — marked as a VR clip for you. A column VR in your list sets it too. You can always untick it.
- If VR is ticked but the file was not uploaded as VR, a yellow note warns you: in a headset it would play flat. Untick VR or choose the VR file. If a file looks like VR (twice as wide as high) but was not uploaded as VR, a note tells you as well — upload it again with the VR box ticked.
- More fields opens additional performers, locations and AI content for a row.
- The description field can be pulled larger at its lower right corner; the size is kept for all rows.
6. Publishing clip by clip
- Every row has its own green button: Publish this clip, or Schedule this clip when a release date is set, or Save as draft if you chose drafts. You do not have to finish the whole list first.
- If something is missing, the button is shown as an outline. Press it anyway: the missing fields are marked red, a line tells you what is still open, and the page jumps to the first missing field. Nothing is created until the row is complete.
- The button at the bottom of the list creates all ready rows in one go.
- No trailer? Leave Generate trailer automatically ticked. The trailer is made from your clip, and the clip goes online as soon as the trailer is ready — usually within a few minutes.
- If your account is not yet trusted, new clips are checked by our team first; they go online after the check.
7. Coming back later — nothing gets lost
- Every change is saved automatically: a moment after you stop typing or choosing, when you leave the page or switch tabs, and right after each clip is created. The small Saved ✓ next to the list shows it.
- The list is kept on this device and on our server. Close the page whenever you like and continue later — also on another computer.
- The status of created rows updates by itself — for example from In review to Published, or from Scheduled to Published as soon as the release time has come.
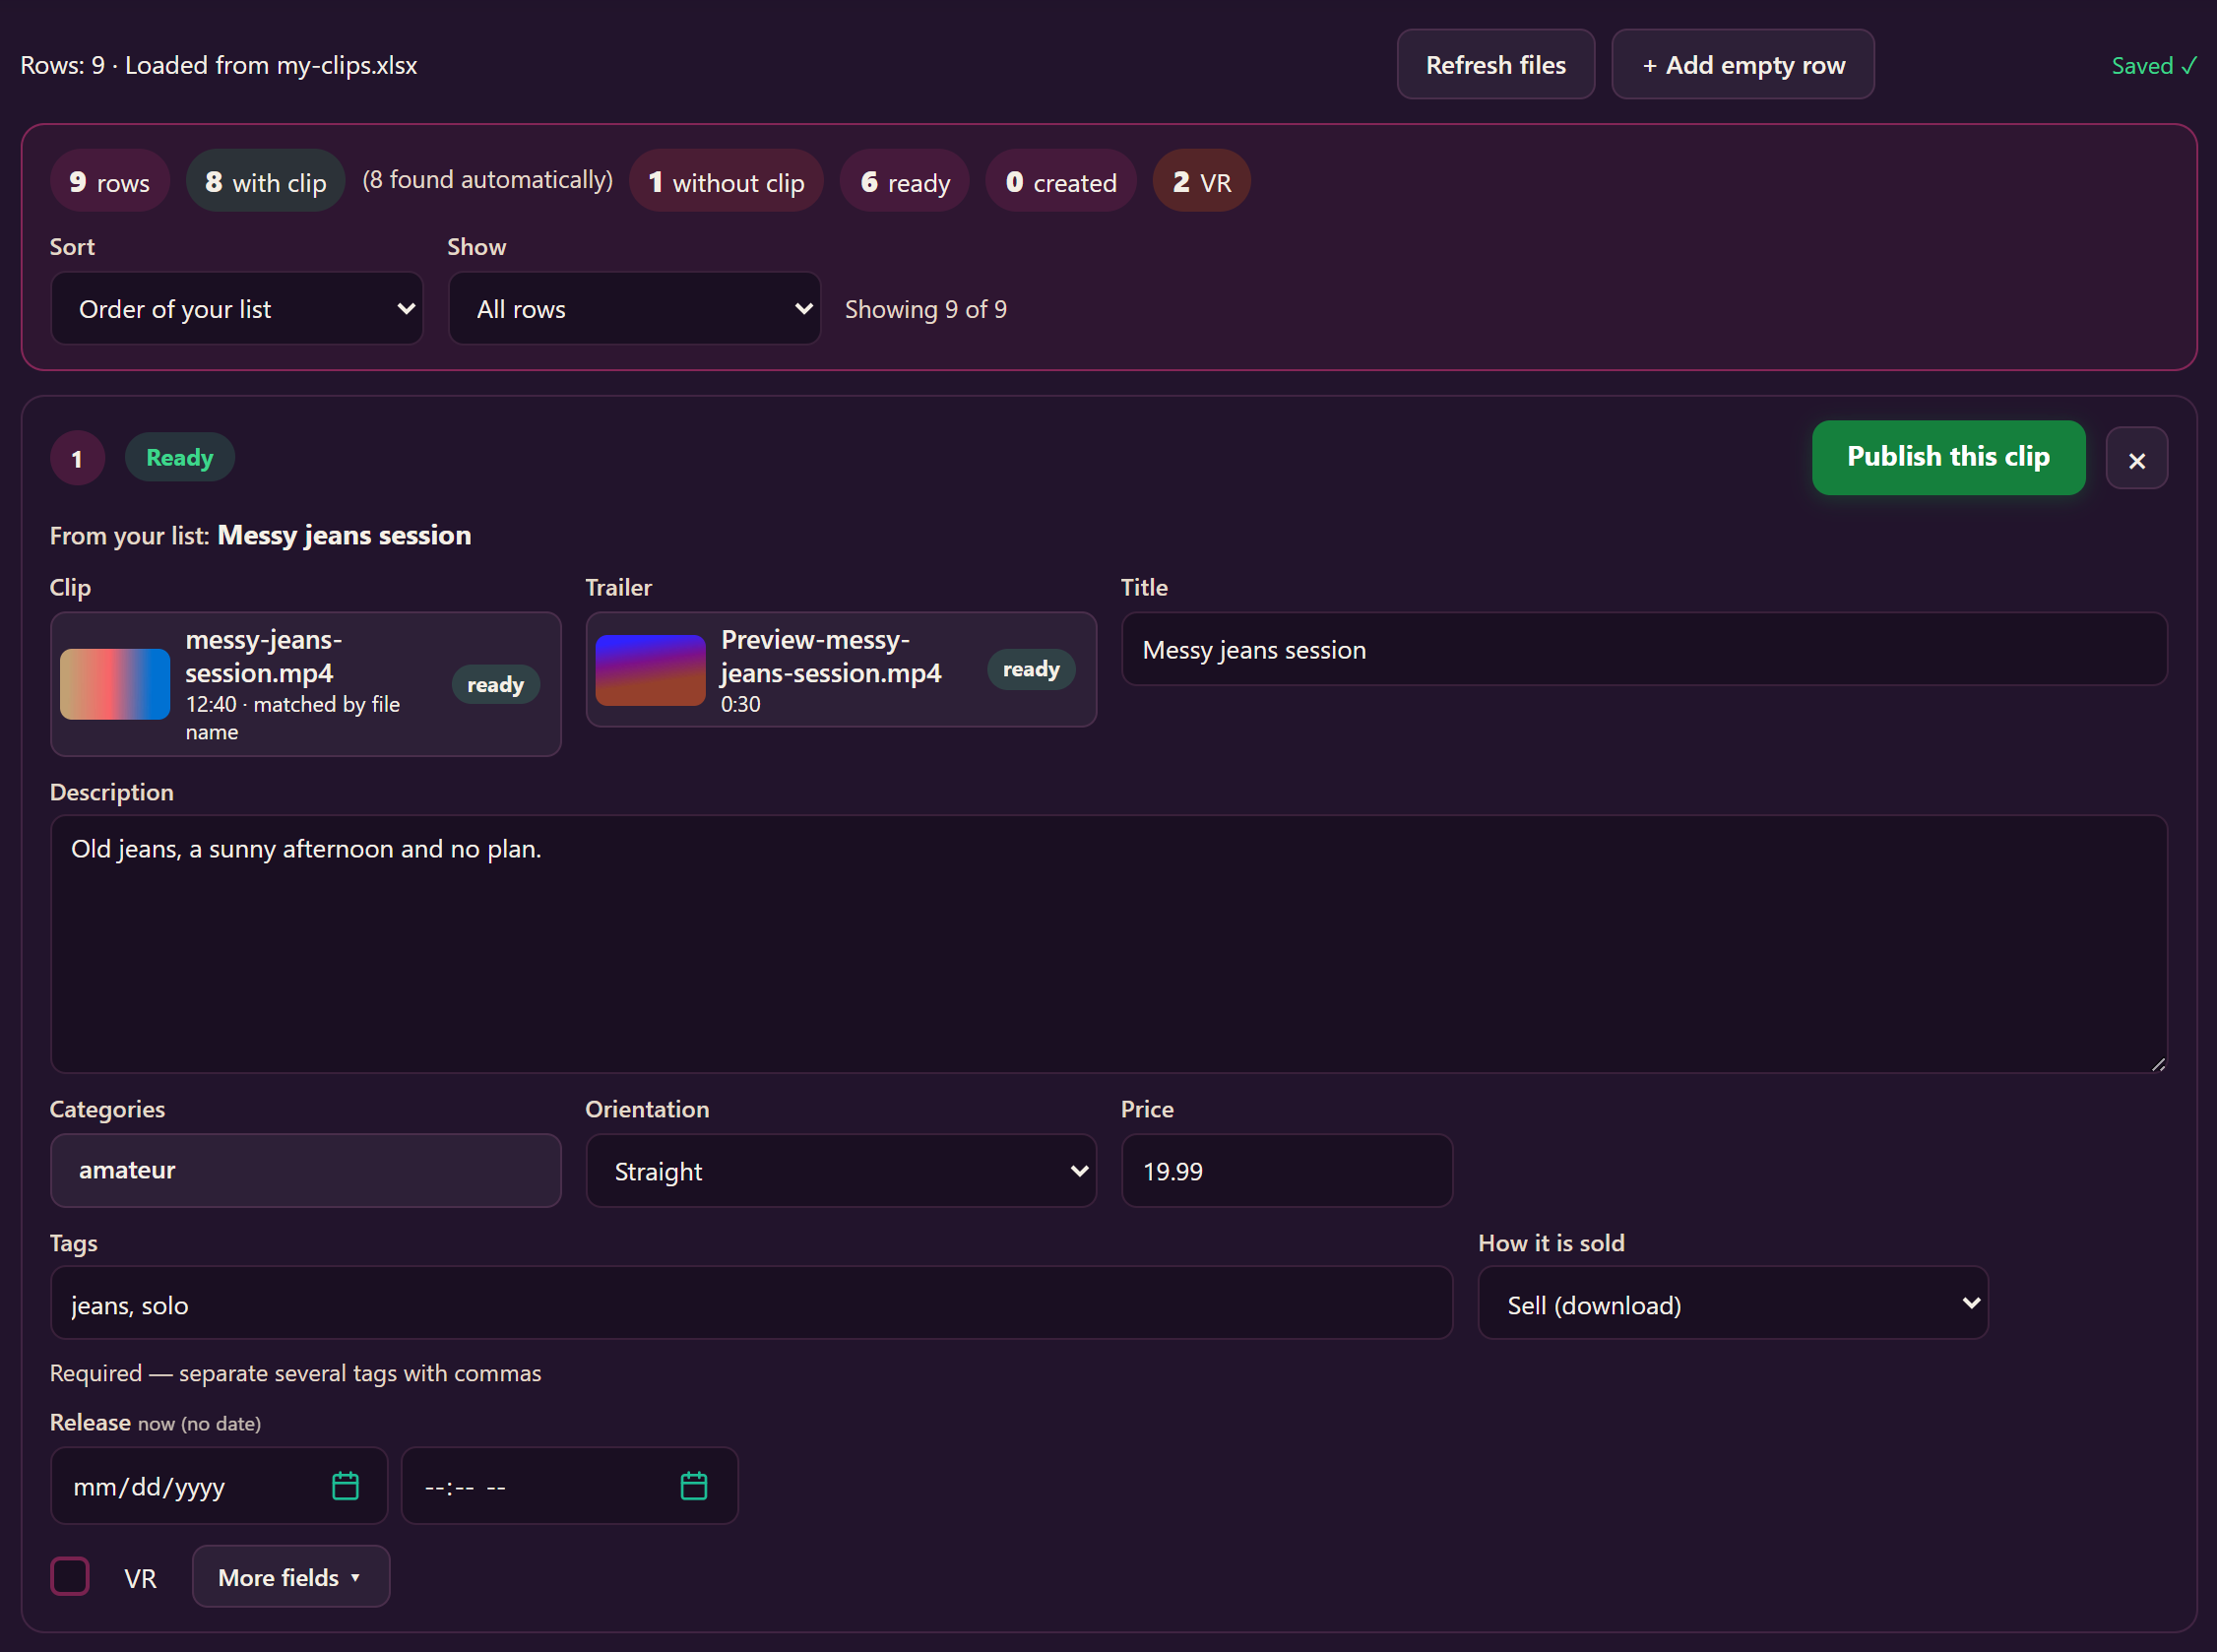
- Created rows stay in the list, ticked off. With Sort you can bring rows with a clip or ready rows to the top, or sort by release date; with Show you hide what is already created.
- Remove created rows tidies the list; Clear list starts over (you are asked first).
8. Good to know
- A long list (several hundred rows) is fine. Work through it in any order.
- If a row cannot be created, the reason is shown on the row; fix it and press the button again. Pressing it twice never creates the same clip twice.
- The import works on a phone too; for long lists a computer is more comfortable.