
Custom orders are some of your highest-margin work — a fan paying you to film exactly what they want, on your schedule. The catch is that your rate has to cover prep, props, filming, the time you’d have spent on regular content, and the small overhead of the order itself. This guide walks through how the pricing UI is structured, what each lever does, what creators in this audience typically charge, and the case-by-case Add Custom Fee tool for unusual requests. The mechanics of the service overall live in How custom orders work; this article focuses purely on the money.
1. Where you set your prices
- Sign in.
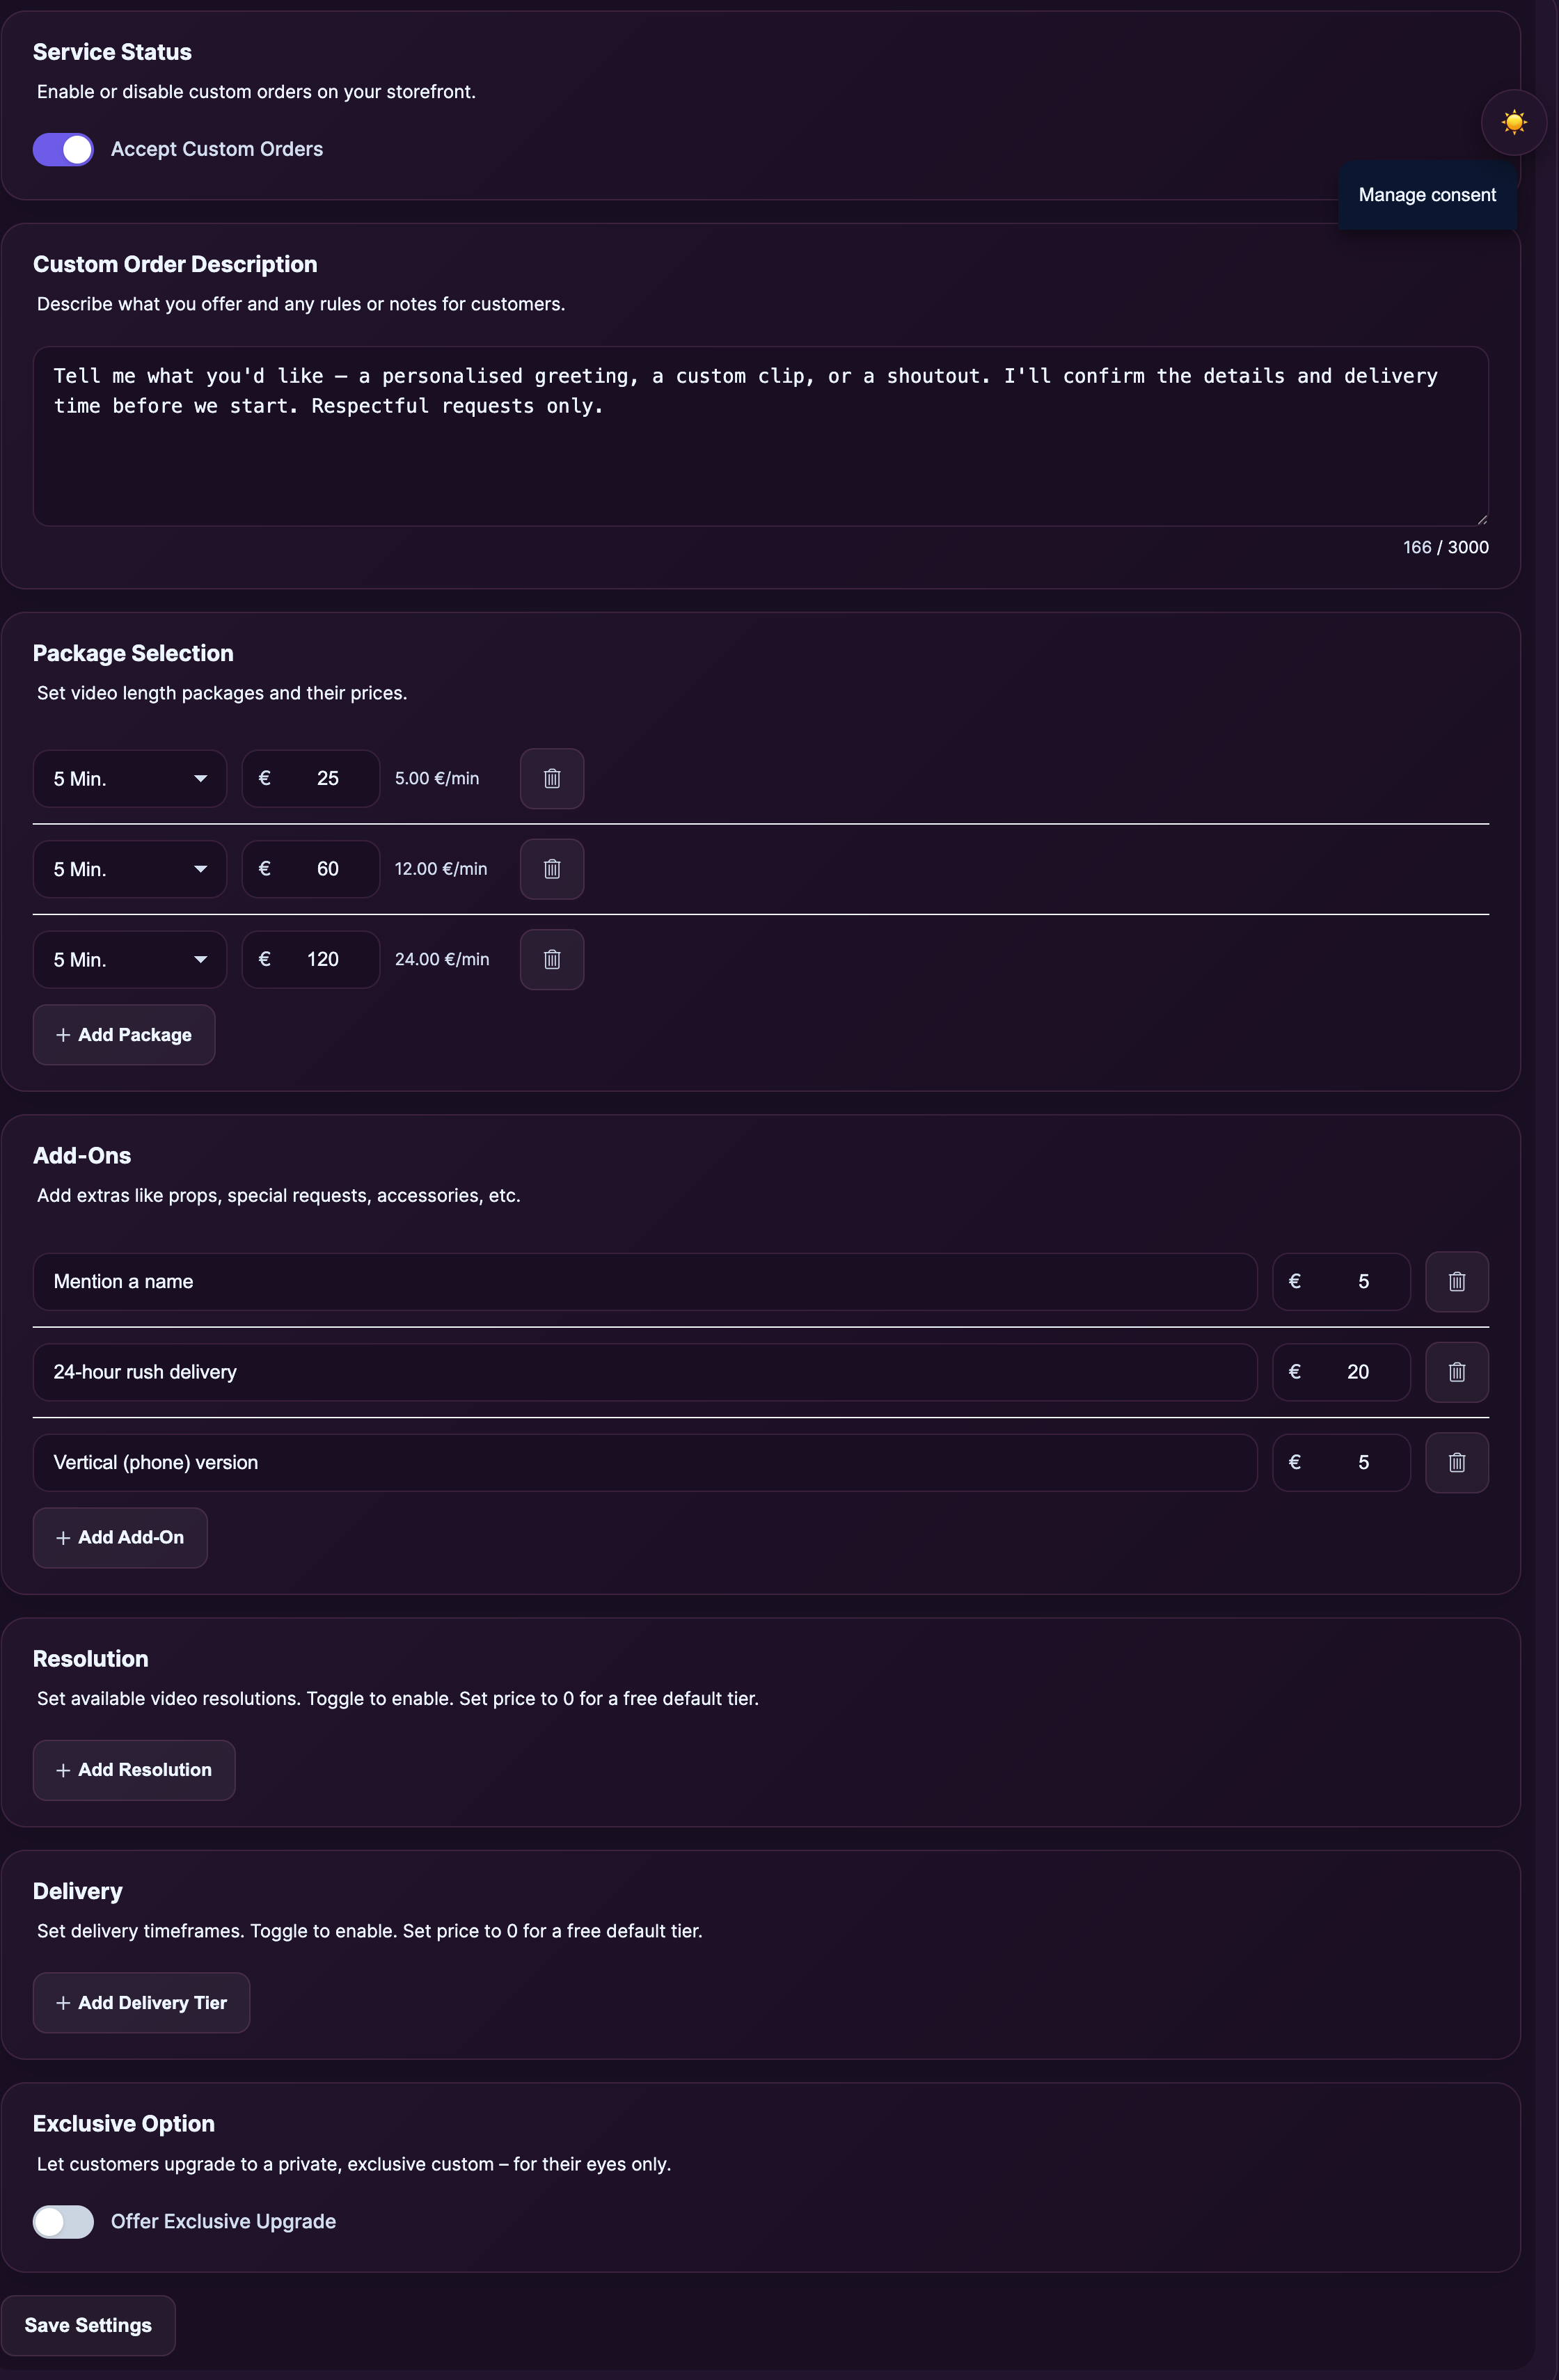
- Open /store-manager/custom-settings/ — the page is titled Custom Order Settings.
- Make sure Accept Custom Orders is toggled on, otherwise the service is hidden from your storefront.
Pricing lives across five cards on this page: Package Selection, Add-Ons, Resolution, Delivery, and Exclusive Option. Click Save Settings at the bottom after every change — nothing applies until you save.
2. Your share of every order
Before pricing anything, know what you keep. The platform takes a fixed share of every custom order; you receive the rest in your earnings. Whatever number you set in the form is the customer-facing total — your payout is your share of that total once payment clears.
That means when you set a package at €100, you should be thinking about your own minimum acceptable take-home, not the headline number. Work backwards: decide what you want to net for the work, divide by your share, and that’s the price you put on the form.
For the live numbers — your share rate, the deductions, when payouts clear — see How creator payouts work.
3. Packages — your bread-and-butter pricing
A package is one length-and-price combination. Customers must pick exactly one. Every order starts here.
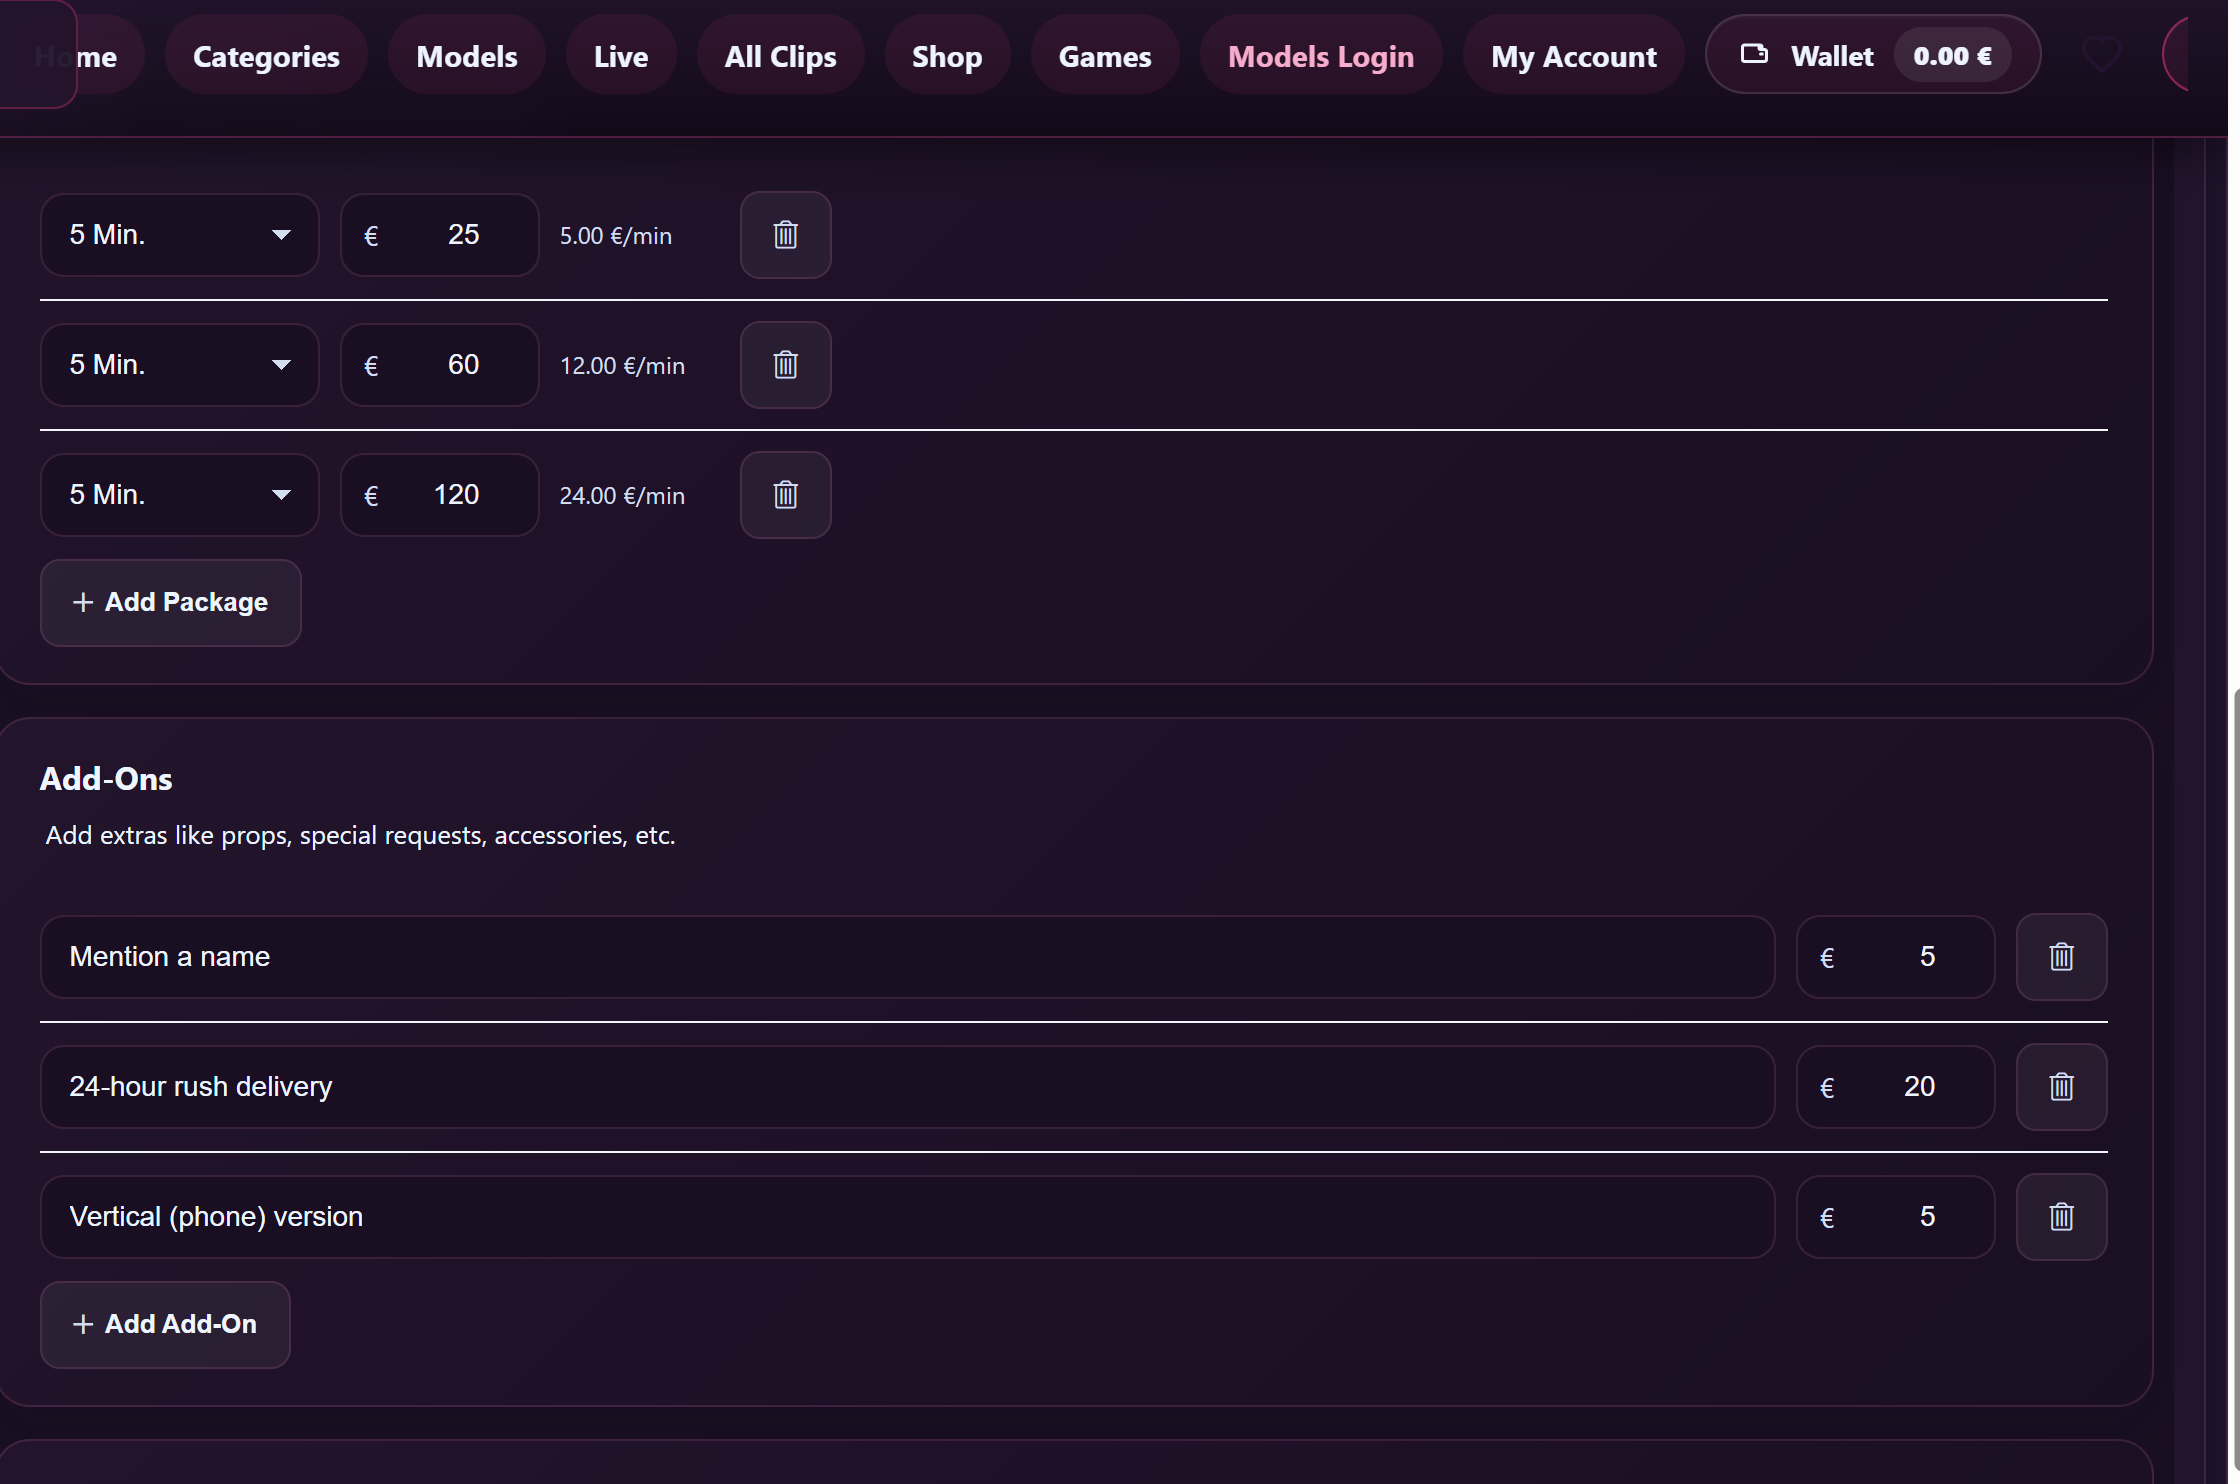
The Package Selection card has rows. Each row is a length picker (5, 10, 15, 20, 30, 45 or 60 minutes) and a price in euros. Use Add Package to add another row, the trash icon to remove one. The form auto-shows a “€/min” rate next to each row so you can sanity-check the slope of your pricing.
Pricing the packages
Three rules of thumb:
- Don’t undercut your live-stream hourly rate. A custom is filmed alone, on your time, with no tippers feeding you. Whatever you’d earn in an hour of streaming is your rough floor; a custom should pay better, not worse.
- Steeper price-per-minute on shorter packages. A 5-minute custom takes almost the same setup time (camera, light, prep, wash, upload) as a 30-minute one — so €/min should be highest at the short end and tapered down as length grows. Example structure: 5 min at €15/min, 10 min at €12/min, 30 min at €8/min, 60 min at €6/min.
- Don’t list every possible length. Three packages — short / standard / long — covers most demand. A wall of seven length options paralyses customers and makes you look indecisive about your own work.
You need at least one package or no order can be placed.
4. Add-Ons — flat fees for specific extras
An add-on is a checkbox on the order form: a one-line label and a price. Customers can tick none, one, or many. Each ticked add-on stacks onto the package price.
Add-Ons are where you charge for the things that change the work itself — not just the length. Each row has a name and a price. Set the price to €0 for a free extra (handy for “name shout-out” or anything you don’t mind including).
Pricing the add-ons
Anchor each add-on to the actual marginal cost of doing it. Examples that map cleanly to what creators on this platform tend to film:
- Outfit change — €5–15 each. Real cost: an extra wardrobe round, a re-light.
- Specific costume / fetishwear — €15–40. If you don’t already own it, you’re buying it.
- Toy use — €10–20. Cleanup time + you’re committing the toy to one customer’s brief.
- Name shout-out — €0–5. Almost free for you, high value for the customer.
- Specific scene / scenario — €10–25. Extra brief-reading time, possibly a re-shoot.
- Outdoor / public location — €30+. Logistics, travel, risk.
- Smear / scat / pee specifics — pricing entirely up to you. Anchor it to your floor for that activity.
Don’t add too many. Six or seven well-chosen add-ons beat fifteen weak ones. If an add-on has never been ticked in three months, drop it.
5. Resolution — tiered upgrade pricing
The Resolution card lets you offer a default tier free, and one or more upgrade tiers at a price. Each row has a name (e.g. 720p, 1080p, 4K), a price in euros, and a toggle to enable or disable the tier.
Common pattern:
- 1080p — €0 (your standard tier)
- 4K — €10–20 (upgrade)
If you don’t film in 4K, don’t list it. If you film in 4K natively for everything, your “free” tier should be 4K and there’s no upgrade row to add.
The fan picks exactly one resolution at order time.
6. Delivery — speed for money
The Delivery card mirrors Resolution: name, price, enable/disable toggle. Use it to charge for rush turnaround.
Common pattern:
- 1 Week — €0 (your standard speed)
- 3 Days — +€10
- 24 Hours — +€25 (rush)
The fan picks exactly one delivery tier at order time. Be honest about your standard speed — if you usually take a week, list it as a week, not 3 days. Missing a rush deadline you charged for is worse than not offering it.
7. The Exclusive Option — selling the right to keep it private
The Exclusive Option card adds a separate “Make it Exclusive” checkbox to the order form. If the customer ticks it, the clip stays private after delivery — only they ever see it. It never appears in your public catalogue, in search, or in anyone else’s library.
Two fields: an Offer Exclusive Upgrade toggle and an Exclusive Price in euros.
Pricing it
This is the trickiest line in the whole settings page because what you’re selling is the opportunity cost of keeping the clip out of your regular catalogue forever. Two anchoring questions:
- What would this clip earn over its lifetime in your normal catalogue? A solo clip at €15 with 200 lifetime sales = €3,000. The exclusive price should be at least that, often a multiple, because you’re losing the lifetime tail.
- How niche is the brief? A clip that nobody else would buy (heavily personalised, name shout-outs, hyper-specific kink) has near-zero opportunity cost — price the exclusive low. A clip that’d sell well to your whole subscriber base — price it high.
You don’t have to offer Exclusive at all. Many creators don’t. If you do offer it, never apologise for the price — set what it’s actually worth to lose the clip and trust your buyer to decide.
8. The Custom Fee — case-by-case adjustments before payment
While an order sits at Pending Review, you can add a Custom Fee on top of the package + add-ons + resolution + delivery total. This is for the brief-specific stuff your standard menu doesn’t cover — and, just as importantly, it’s the formal way to settle anything you and the customer agreed to in DMs.
The Add Fee panel is inside the order’s expanded details. Two inputs:
- Fee Amount — euros, can be 0.
- Reason (optional) — up to 500 characters. The customer sees this with the fee on their order.
Examples of what to use it for: “Special props (€20)”, “Travel to outdoor location (€40)”, “Rush within 6 hours (€30)”, “Brief requires extra prep — three outfit reviews and a script revision (€25)”. The placeholder text inside the field reads: “e.g. Special props, extra scene, rush delivery…”
Click Add Fee (or Update Fee / Remove if one’s already set). The total updates immediately and the customer sees the new amount + your reason on their order page (My Account → Orders) the next time they look.
Use it for negotiated extras
The most common reason to add a fee isn’t a flat surcharge from your side — it’s a small extra that you and the customer talked through in DMs. The flow:
- The customer places the order and it lands at Pending Review.
- You read the brief and message the customer with Message Customer: “I can do this if we add a second outfit and bump it to 4K — that’d be €30 on top. Sound good?”
- The customer replies “yes”.
- You open the order’s expanded details, set Fee Amount to 30, write the agreed reason in Reason (e.g. “Second outfit + 4K upgrade as discussed in DM”), click Add Fee.
- The customer’s order total now shows the new amount with your reason underneath. They’ve already said yes; they pay the agreed price.
- You click Accept Order. The price locks at the agreed total.
You can update the fee as many times as you want during Pending Review — change the amount, swap the reason, or set it back to 0 to remove it. Each edit replaces the previous one and recalculates the total. So if you and the customer go back and forth a few times, the fee field tracks the final agreement.
This is much cleaner than trying to settle add-ons in DMs alone. The order’s record shows the agreed extras and price for both sides, support can see what was agreed if anything escalates later, and the customer pays a single total — no awkward “send me €30 separately” workarounds (which would also violate platform terms).
The hard rule
The Custom Fee can only be added, updated, or removed while the order is at Pending Review. Once you click Accept Order, the price is locked — the server returns “Fees can only be added while the order is pending.” if you try to edit. So if a brief is going to need a fee, add it before accepting; if you and the customer are still negotiating, don’t accept yet.
9. Pricing strategy — patterns that work
- Don’t price for the average customer; price for the customer you want. Low prices attract low-effort briefs, missed deadlines, and refund requests. Higher prices attract customers who’ve thought about what they want, send better briefs, and tip on top.
- Match your prices to your reputation. A new creator with no reviews and a thin catalogue can’t charge what an established creator with a long sales history charges. Start at the lower end and raise prices as your sales prove the demand.
- Re-price every quarter. Look at the Custom Orders inbox: how many requests came in, how many you accepted, how many cancelled before payment. If acceptance is high and demand is overwhelming, you’re under-pricing. If demand is thin, your description or your packages need work — not necessarily your prices.
- Use the Custom Fee tool aggressively. Anything outside your standard menu deserves a fee. Customers who’ve thought about an unusual brief are usually willing to pay; customers who balk at a fee are flagging that the brief was casual.
- Don’t compete on price across the platform. The platform doesn’t show comparison prices side by side, and customers who care about your work don’t shop on price. Compete on craft, on your description, on response time — never on undercutting.
10. Common questions
Q: What’s the minimum I can charge for a package?
The form accepts any price ≥ €0, so technically zero is allowed (though no one should). Practical floor: enough to cover your own break-even per minute of filmed time, including the prep / cleanup overhead.
Q: Can I have different prices for different customers?
Yes — that’s exactly what the Add Custom Fee tool is for. Your standard packages set a baseline; the fee adjusts case by case before you accept. After accepting, the price is locked.
Q: Do I have to offer add-ons / resolutions / delivery tiers?
No. Only Packages is required (you need at least one). Add-Ons, Resolution, Delivery, and Exclusive are all optional — leave a card empty and it doesn’t appear on the order form.
Q: I changed my prices but old orders still show the old totals.
That’s correct. A locked-in order keeps its agreed total — you can only change pricing for new orders. To adjust an existing pending order, use the Custom Fee field on that specific order.
Q: A customer asked for a discount in the brief. Can I price-down a specific order?
There’s no negative-fee path. The closest thing is to message them, agree on a different package or fewer add-ons, and ask them to re-place the order at the lower combination. The Custom Fee tool only adds, never subtracts.
Q: When do I get paid for a custom?
The customer pays as soon as you accept the request and they complete checkout. Your share of that payment lands in your earnings the same way as any other sale, and pays out on the next cycle. See How creator payouts work.
Related guides
- How custom orders work — turning on the service, pricing it, and delivering the clip — the end-to-end overview; this article zooms in on the pricing.
- Declining a custom order safely — when not to accept and how to say no without burning the customer.
- Cancelling a custom order — what happens after acceptance and payment if either side needs to back out.
- Requesting a custom video — the customer-facing flow, useful to read so you understand what fans see when they fill out your form.
- How creator payouts work — your share, the cycle, the bank.