
The VR Hub is our own room for a VR headset: you stand in a bright room with a real 360° photo all around you, the clips play on a screen in front of you, and everything you can do on the site — browse, buy, watch, tip, comment, pin a creator, watch together — you can do without taking the headset off. This article walks through the room, button by button. All pictures in it are taken from the hub; the clip pictures are blurred on purpose.
Looking for the basics — what a VR clip is, DeoVR, your phone in a cardboard holder? That is in Watching VR videos. Streaming live in VR180 as a creator is in Streaming live in VR180.
1. Opening the hub
- Put the headset on and open its browser (on a Meta Quest that is the built-in Browser). Sign in to the site there once — the browser remembers you.
- Go to
/vrfeedon this site, or open any live page and press Watch in VR, or open a clip page and press Watch in VR in your library — every one of these lands in the hub. - Press Enter VR. The browser asks once whether the page may enter VR; say yes.
- You can also type vr.lewdden.com into the headset browser. It opens the invitation page: what is waiting inside (a ring of posters, live numbers), what you can do in here — and the same Enter VR button.
The room loads first. After Enter VR the view stays dark for a moment — on a computer or phone the invitation page holds still and says Loading the room … — until the room around you, walls and textures, is completely in place; then it fades in. Nothing pops in later. The hub already fetches the room while you are still on the invitation page, so the wait is short; if the room has not arrived after eight seconds, you are let in anyway.
What works: Meta Quest 2, 3 and Pro in their own browser (that is what we test on). Pico and Apple Vision Pro use the same web standard (WebXR) and should behave the same; we have not tested them ourselves yet. A phone or a computer does not enter the hub itself — there, /vrfeed opens as a 360° preview on the same page: look around with a finger, the mouse or by turning the phone, and Back takes you to the invitation page again. The ring of posters on that page turns by itself; drag it to turn it yourself — on a computer, resting the mouse on it holds it still — and click or tap a poster to open that clip straight in the preview. On a phone there is a second button, Watch in VR: put the phone into a viewer (a Cardboard-style holder) and the preview shows the room in stereo, steered by turning your head. The clip pages and the live pages have their own Look around mode.
Pico and Apple Vision Pro get the same hub without any Quest assumptions: on the Vision Pro you look at a thing and pinch to press it (there are no controllers, and the hub treats the pinch like a hand pinch), on a Pico the controllers and hands work as on the Quest, and the hub picks the highest frame rate the headset offers up to 90 Hz. Everything else — layers, the player, the wallet — is chosen by what the browser reports, not by the headset’s name. We have not had either device in our hands, so count them as untested until you tell us.
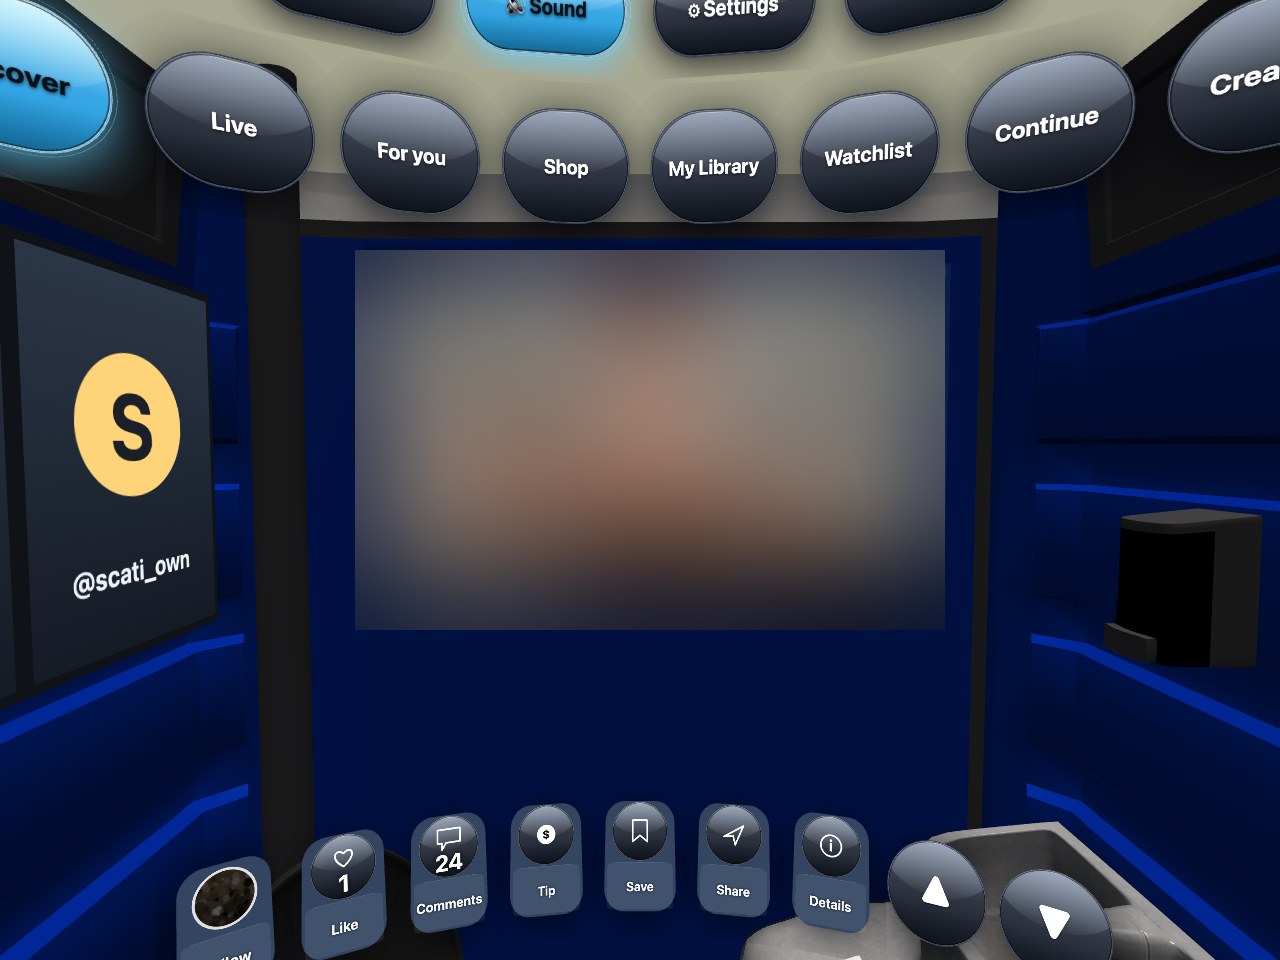
2. How you point and press
- Point with either controller — a thin ray comes out of it. Whatever the ray touches lights up and a small line under the screen tells you what it is.
- Trigger presses the button you are pointing at.
- Thumbstick up or down moves to the next or previous clip; so do the ▲ ▼ buttons at the right end of the action bar.
- B or Y closes whatever is open — a dialog, the keyboard, the big dome.
- In the dome, pointing at nothing and pressing the trigger hides the control bar so you can just watch; press again to bring it back. After 4 seconds without moving, the bar fades by itself.
Sitting or standing both work. The hub measures your height once at the start and puts the screen at eye level; if you stand up later, it follows.
A short sign tells you how to browse. The first time you enter Discover, the Shop or My Library in a session, a line appears under the screen for a few seconds: in Discover the stick goes up or down to reach the next clip, in the Shop and in My Library it goes left or right along the shelf — and the trigger opens whatever is in front of you. It shows once per tab and then stays out of the way.
This guide is in the headset too. Press the ❓ Help chip above the tabs and this article opens as a book inside the hub: a contents page with its thirteen chapters, then pages you turn with the buttons under the text or with the stick up and down — with the same pictures as here, in the language you chose. B or Y closes it, and it remembers where you were.
Your hands instead of the controllers
If you put the controllers down and the headset tracks your hands, four gestures work anywhere in the hub. Each one shows a small plaque so you know it was understood, and the same gesture waits two seconds before it can fire again.
- Thumbs up — make a fist with the thumb up and hold it about a second: Like for the clip in front of you.
- Pinch and hold — pinch thumb and index finger while pointing at nothing for about one and a half seconds: opens the tip for that clip.
- Wave — wave an open hand back and forth: the next clip, exactly like the ▼ button.
- Open hand in front of your face — hold it there for a second: Pause.
3. The tabs above the screen
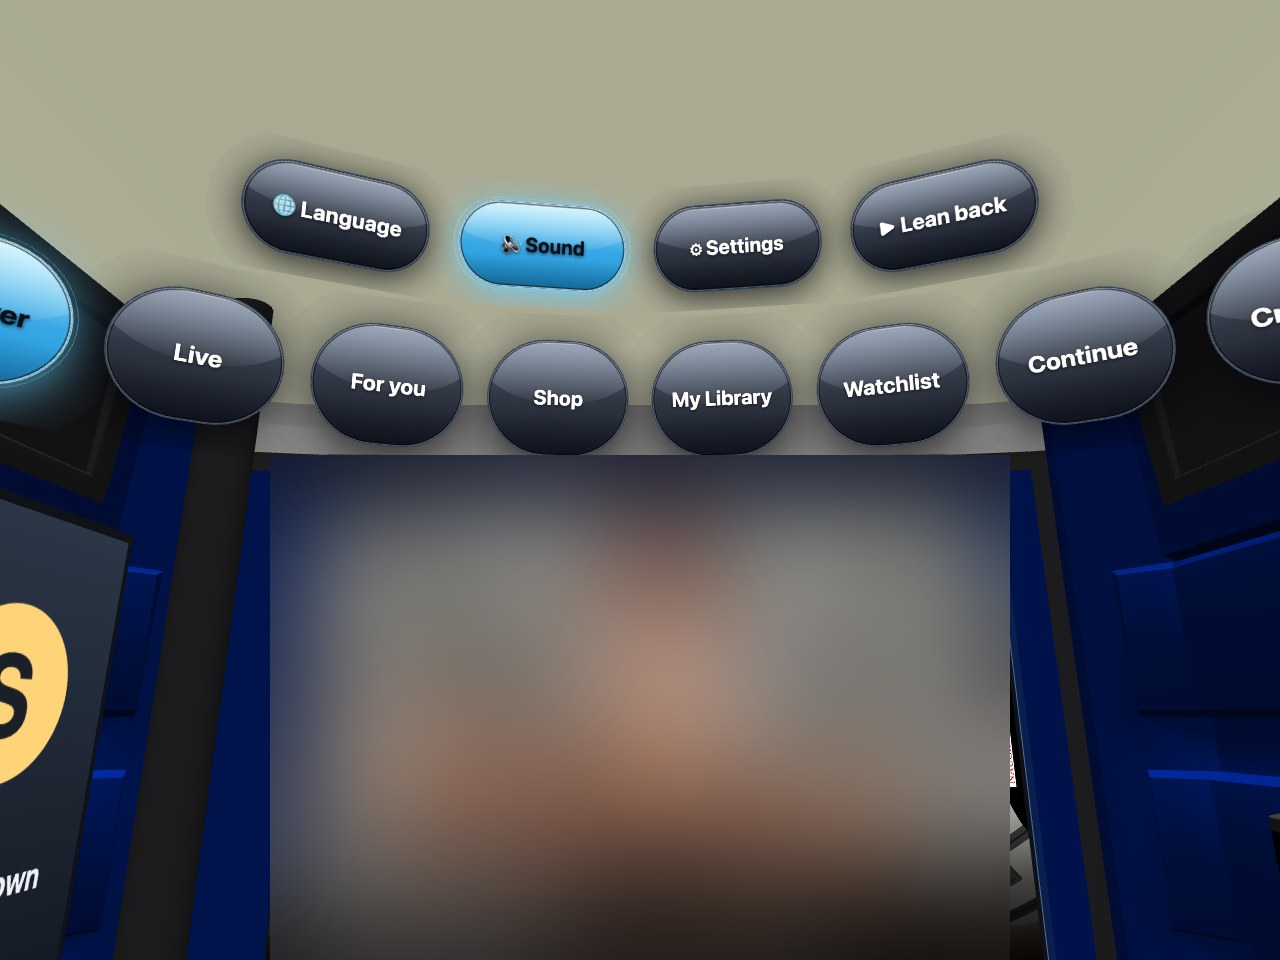
- Discover — the free trailers, one after another, like the feed on the site.
- Live — everyone streaming right now, in VR180 or 2D. Empty when nobody is live. Its bar has a Search button to filter the shows.
- For you — trailers picked from the creators you follow and what you watched.
- Shop — VR clips you can buy, with their price. Bought clips show a green tick.
- My Library — the full clips you own. This is where the whole film plays, not the trailer.
- Watchlist — clips you saved for later, with the ♡ Save button on the site or in the hub.
- Continue — clips you started and did not finish; they resume where you stopped.
- Creators — one page per creator with their trailers, a Follow and a Subscribe button.
The five chips above the tabs: Language (the hub speaks eight languages, changed right here), Sound on or off for the trailers, Settings (see section 12), Lean back (section 10), and — when you are signed in — Report a bug (section 13).
A creator’s own room. Open a creator’s page — from the Creators tab or from a poster on your wall — and the room is theirs for that visit: their poster hangs on your left, a lamp under the ceiling glows in the colour they chose and lights the room from above, and if they recorded a greeting you hear it once, as you arrive. Creators set all three themselves in their store manager; one who has set nothing gets the standard room. Leave the page — another tab, or close it — and the room is yours again.
Voice control
Voice control in the VR hub. You can run the whole hub by voice: hold the A or X button on either controller, say a command, let go. A small plaque shows what was heard and what happened. The hub understands the language it is set to (🌐 Language in the top row) — and English words work in every language. The microphone is allowed once outside VR: on the invitation page press Voice control: allow the microphone once and confirm in the browser; the same button switches voice control off again. Nothing is recorded or stored: the short snippet is turned into text on our own server and discarded.
Tips. Speak one command at a time, in a normal voice; two or three words are recognised better than a single short word — say next clip rather than next. If the hub did not catch it, the plaque says so and you simply try again. Creator names work for creators currently on screen (Discover, Shop, Live); anything else becomes a search in the Shop. Voice control needs a signed-in account for tips and purchases, like the buttons do.
- Pause — “pause”, “stop”, “hold on”
- Play / continue — “play”, “resume”, “continue”
- Next clip — “next clip”, “next video”, “skip”
- Previous clip — “previous clip”, “last video”, “previous”
- From the start — “from the start”, “start over”, “restart”
- Skip forward — “fast forward”, “skip ahead”, “30 seconds forward”
- Rewind — “rewind”, “15 seconds back”, “go back 30”
- Quality — “8K”, “6K”, “4K”, “auto quality”
- Louder / quieter — “louder”, “volume up”, “quieter”, “volume down”
- Mute / sound on — “mute”, “sound off”, “unmute”, “sound on”
- Like — “like”, “heart”, “love it”
- Save to watchlist — “save”, “bookmark”, “remember”
- Tip — “tip”, “tip 5” (with an amount), “send tokens”
- Follow — “follow”, “subscribe”
- Share / comments / details — “share”, “comments”, “details”
- Buy — “buy”, “purchase”
- Tabs — “Discover”, “Live”, “For you”, “Shop”, “Library”, “Watchlist”, “Continue”, “Creators”
- Search / show me — “search for …”, “show me Franky” (a creator on screen)
- Back / close — “back”, “close”, “cancel”
- Help / settings — “help”, “settings”
- Lean back — “lean back on”, “lean back off” (clips play on by themselves)
- Party / moment / DeoVR / recenter — “party”, “moment”, “DeoVR”, “recenter”
4. The action bar under the screen
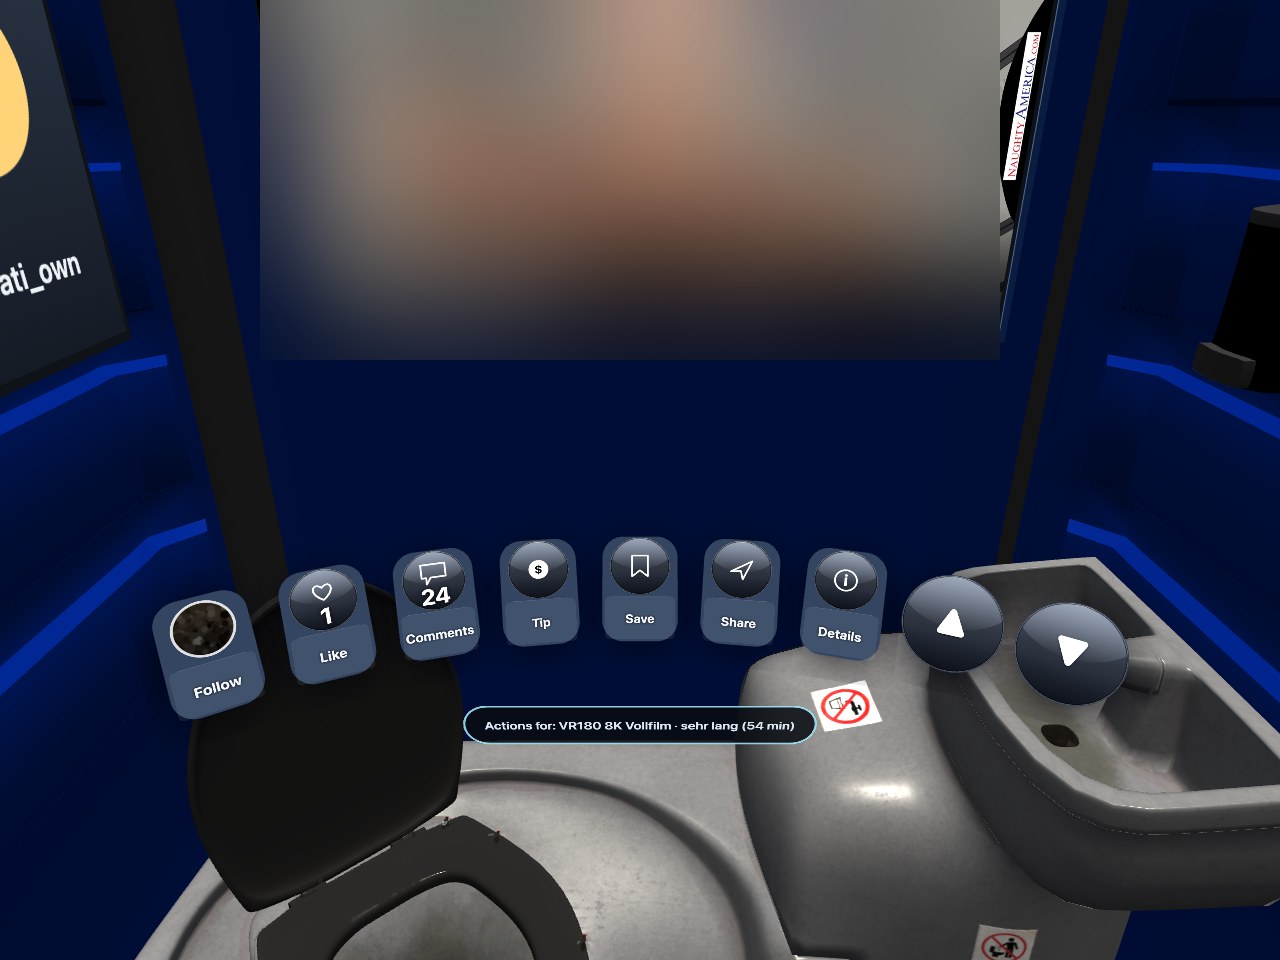
- Follow — the creator’s picture; press it to follow or unfollow.
- Like and Comments — the same likes and comments as on the site. Comments open a dialog with a keyboard you type on with the ray.
- Tip — send the creator a tip from your wallet, with a short message if you like.
- Save — puts the clip on your Watchlist.
- Share — shows the clip’s address in large letters, with Copy and Invite by e-mail. The e-mail goes to your own address — from your phone you forward the link wherever you like. (There is no QR code: you cannot scan one from inside the headset.)
- Details — everything from the clip page: description, models, length, price, and the button to buy or to watch.
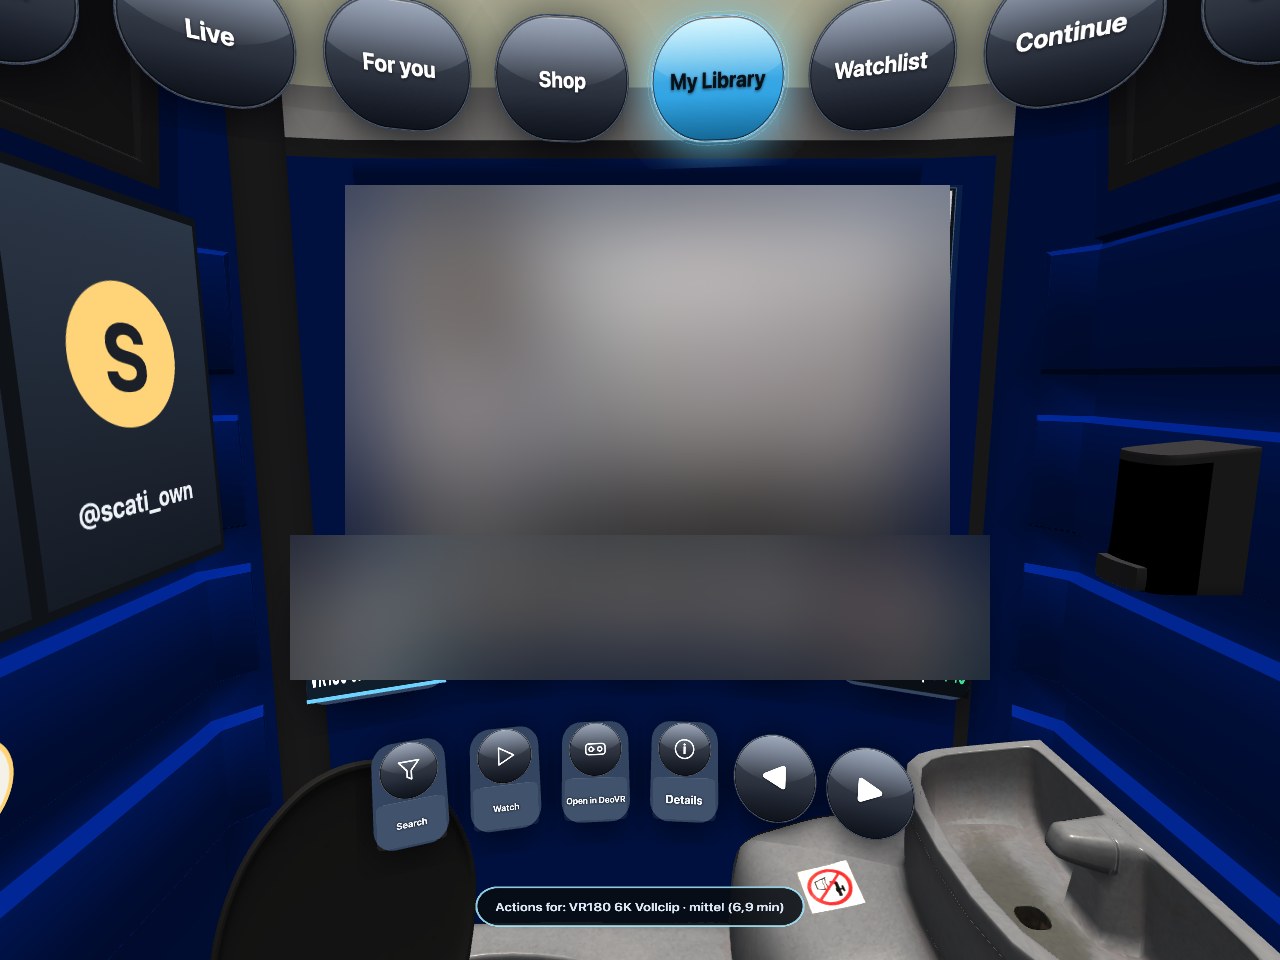
In Shop and My Library the bar changes: there you get Search, Buy or Watch, and a row of small cards below the screen to jump between clips.
5. Watching: the dome
Press Watch (or point at the screen and press the trigger) and the picture wraps around you: that is the dome. VR180 means the front half of the world is filmed in 3D — turn your head and the room turns with it. The picture is the real 8K/6K/4K clip, not the trailer, if you own it.
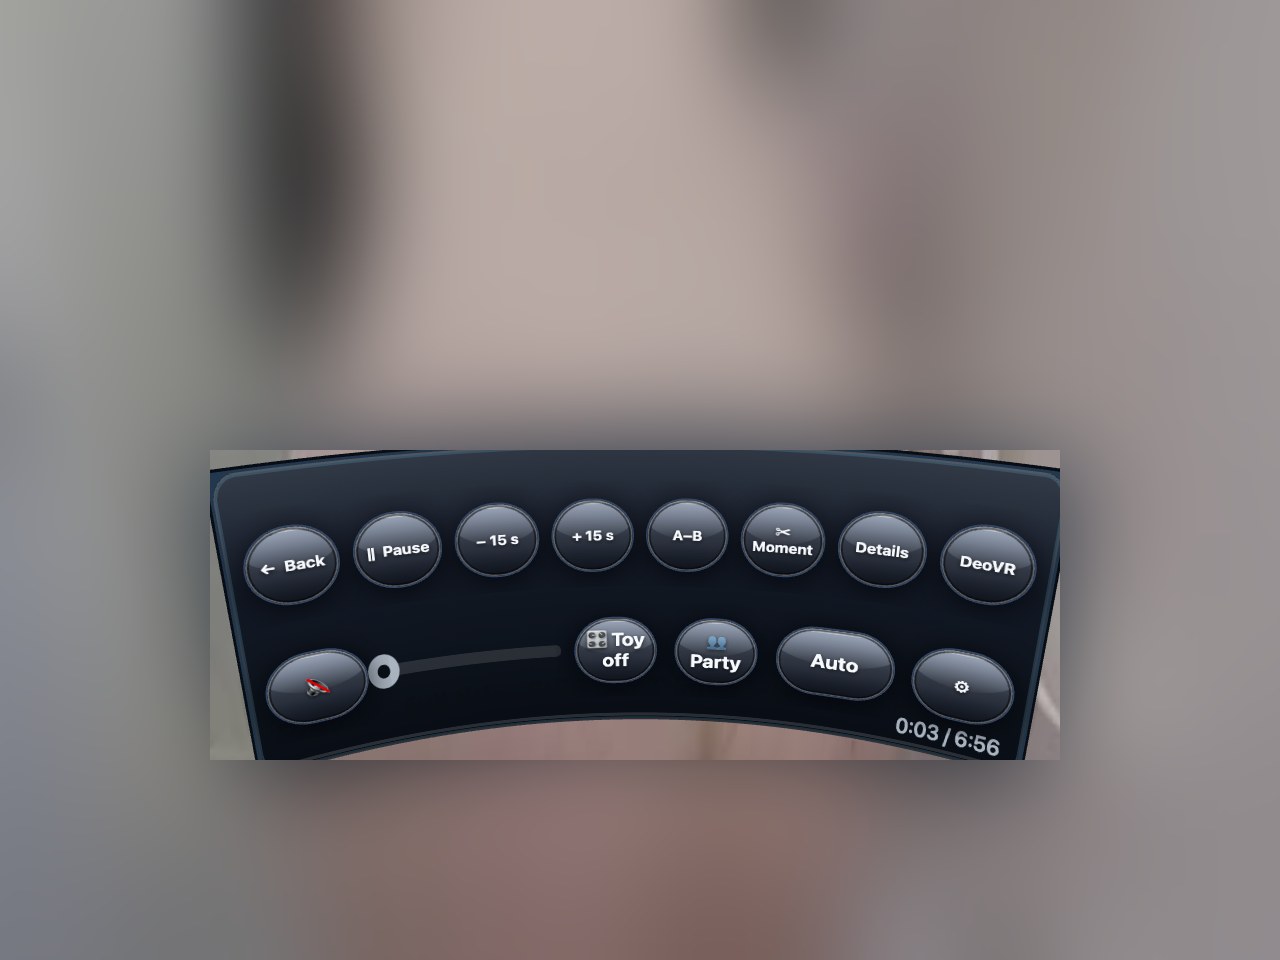
- Back leaves the dome. Pause pauses and resumes.
- − 15 s / + 15 s jump backwards and forwards (the step is a setting).
- A–B repeats a stretch: press once at the start, once at the end, and it loops; press again to stop.
- ✂ Moment cuts a short piece and gives you a link — section 9.
- Details is the same dialog as in the feed. DeoVR hands the clip to the DeoVR app if you prefer that player; the hub tells you first that VR will end for that.
- Sound (the speaker), the timeline you can drag with the ray, Toy (section 10), Party (section 7), the quality button (Auto, or a fixed rung such as 8K AV1 — Auto picks the best your connection carries), and ⚙ settings.
How Auto picks the quality. A clip starts on a rung your connection carries at once and climbs to the best one in a single step, early on — then it holds that rung for the rest of the clip. It does not step up and down while you watch: every change of rung makes the headset rebuild its video decoder, which you feel as a short freeze of picture and controllers, so the hub allows itself one step per clip. If the connection gets worse, Auto steps down and stays down. If you want 8K from the first second, pick 8K AV1 in the quality button — that choice is for the clip in front of you; the next clip starts on Auto again.
Where you stopped is remembered. Open the same clip again and it continues there, with a From the start button in the bar in case you want the beginning; the Continue tab lists all such clips.
6. Buying, and the wallet
Everything you can buy in the hub is paid from your wallet balance, so a purchase is one press and there is no checkout inside the headset.
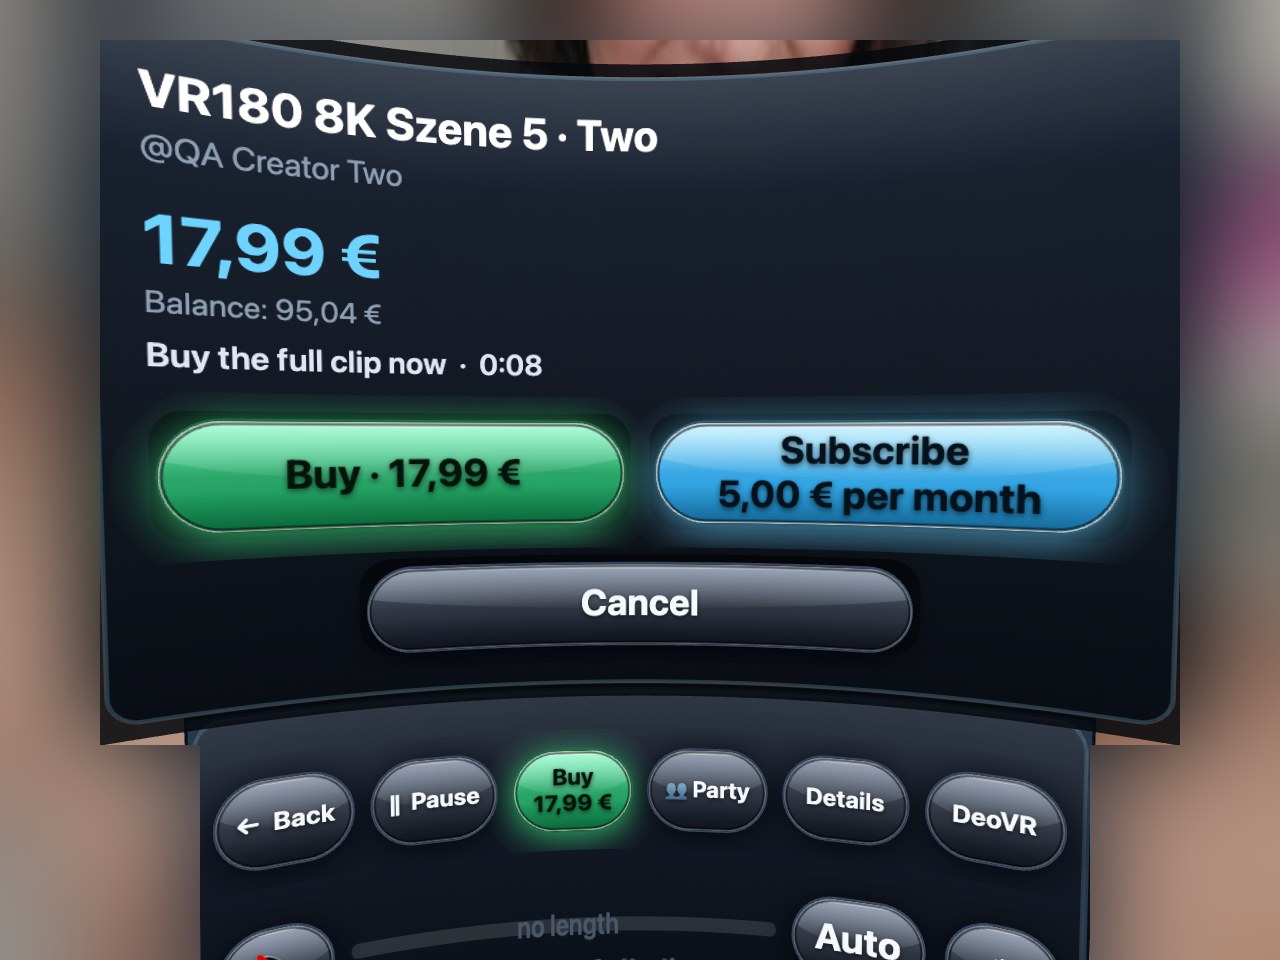
- Enough balance: press Buy, confirm, and the full clip opens right away.
- Not enough balance: the dialog offers top-up amounts. Pick one and the hub shows a 6-digit code. On your phone or computer open
/payon this site, type the code, and finish the top-up there — the headset waits and continues by itself once the money has arrived. That is on purpose: a card form is no fun to type on with two rays, and a QR code cannot be scanned from inside a headset. - Subscribe to the creator instead, or buy the bundle the clip belongs to — both go through the normal checkout, and the hub brings you back to the clip afterwards.
7. Watch party — the same clip, together
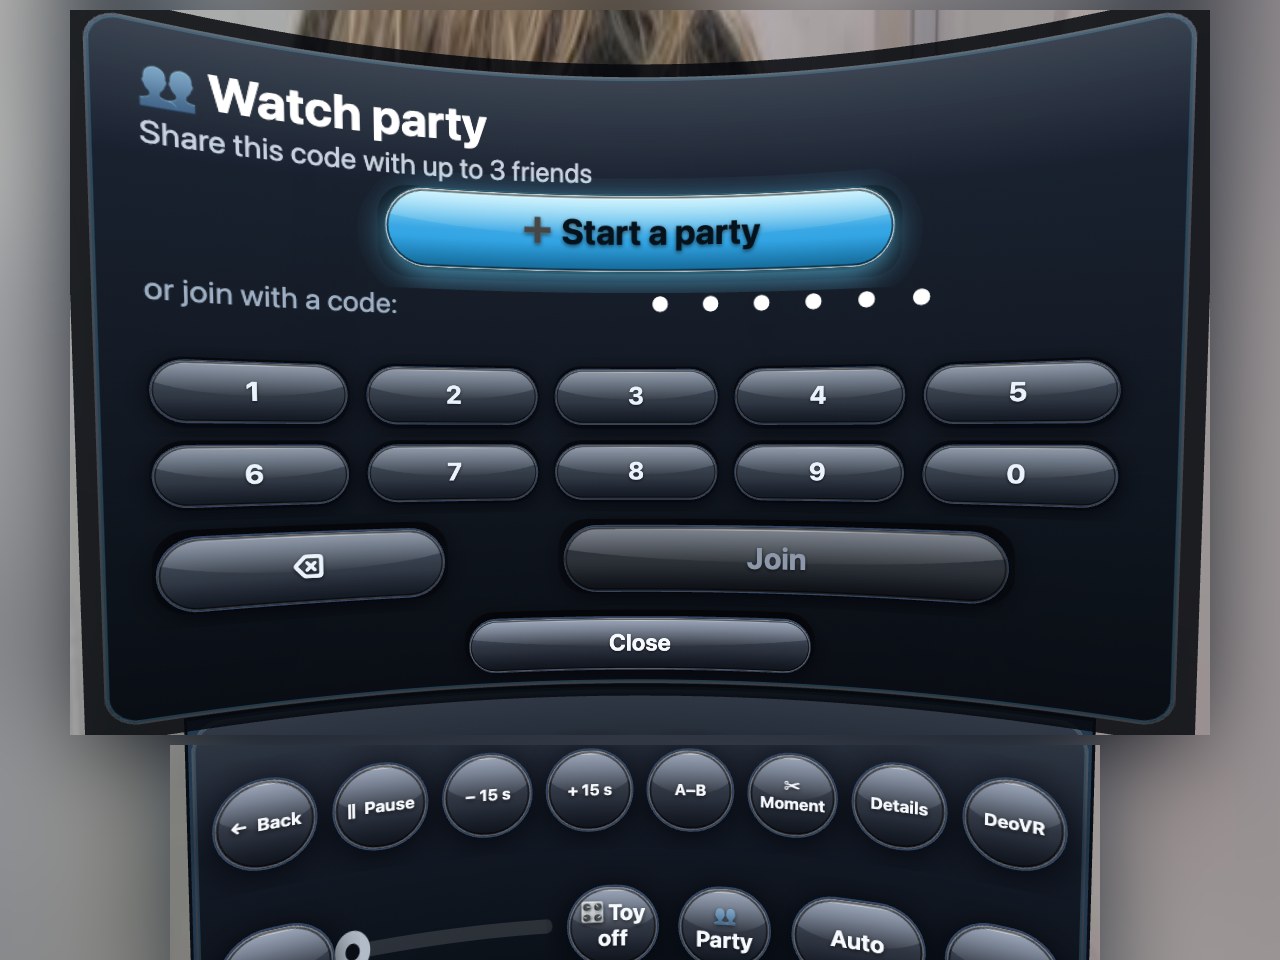
Press Party in the dome bar. Start a party gives you a 6-digit code; up to three friends join with it from their own hubs. Invite by e-mail sends the invitation link (with the code) to your own e-mail address, so you can forward it from your phone. Guests follow the host: when the host pauses, jumps or opens another clip, everyone follows. Everybody can talk — Voice on / Voice off switches your microphone — and there is a small chat with a keyboard. A guest who does not own the clip the host opens sees a lock and can buy it right there. If the host leaves, the next guest becomes the host automatically; Leave ends it for you.
8. Premieres — and hearing the creator
Some clips are sold before their premiere: you can buy them, the card counts down, and at the moment of the premiere the dome opens by itself for everyone who owns the clip.
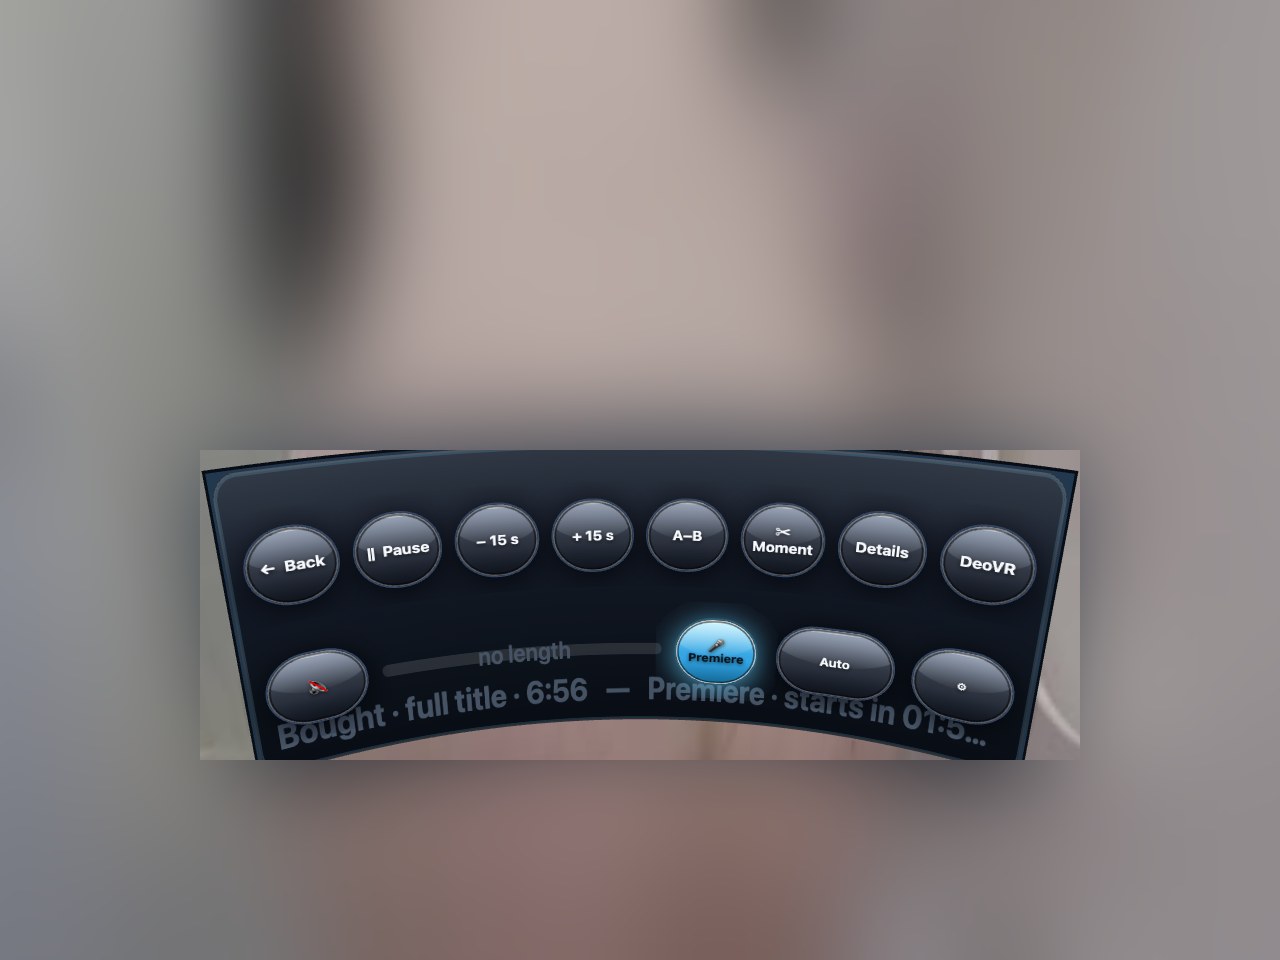
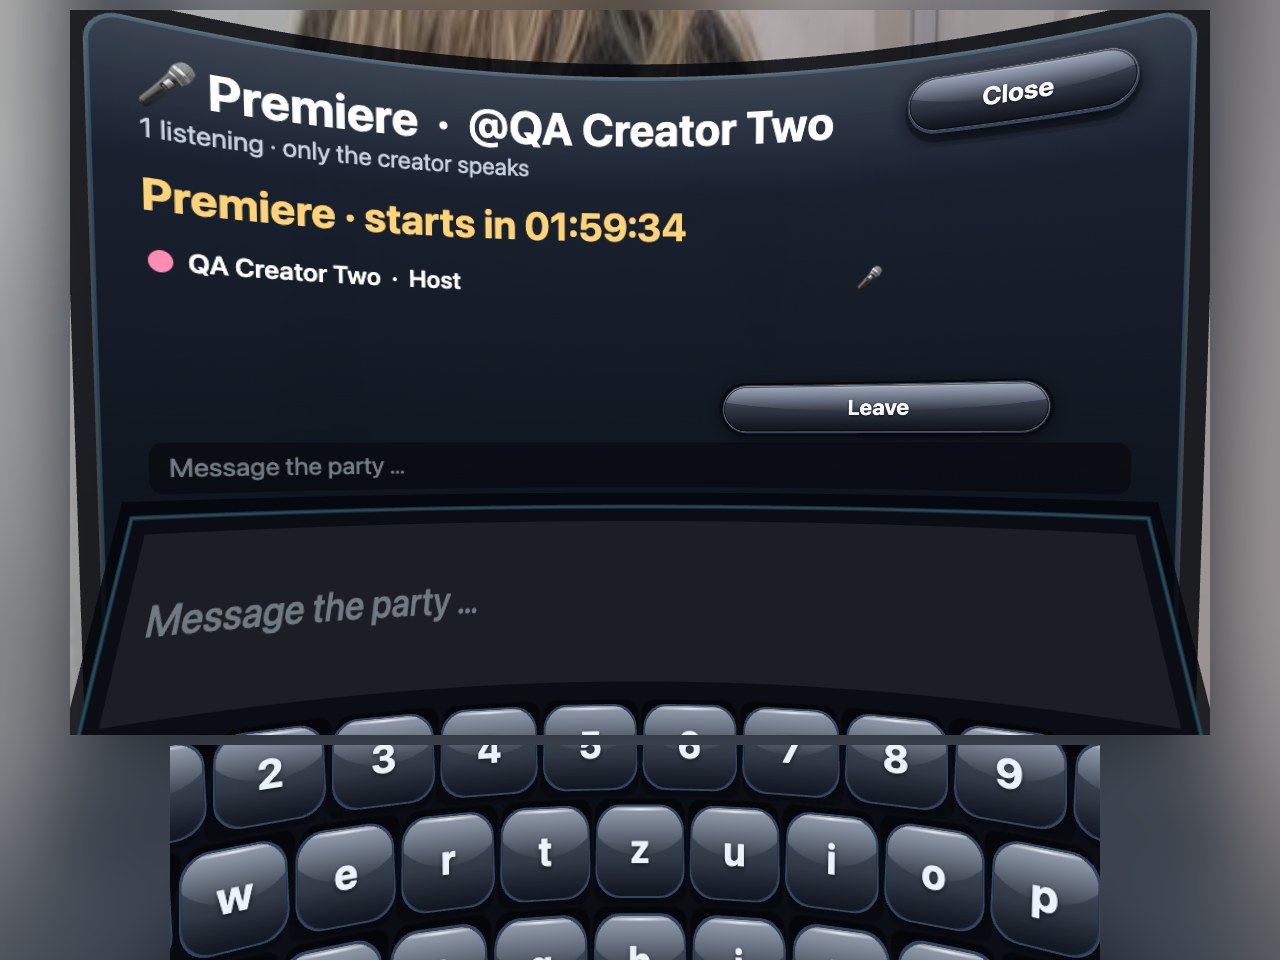
Creators can open a premiere room for their premiere and talk to you in it from their computer. When the room is open, the Party button of that clip turns into 🎤 Premiere — on a trailer, where the bar has room, it says 🎤 Premiere with @creator. Press it and you are in the room: you hear the creator, you see how many are listening, and you can write in the chat. Only the creator speaks — there is no microphone button for you in a premiere. When the creator closes the room, the hub tells you so.
9. Moments — take a piece of a clip with you
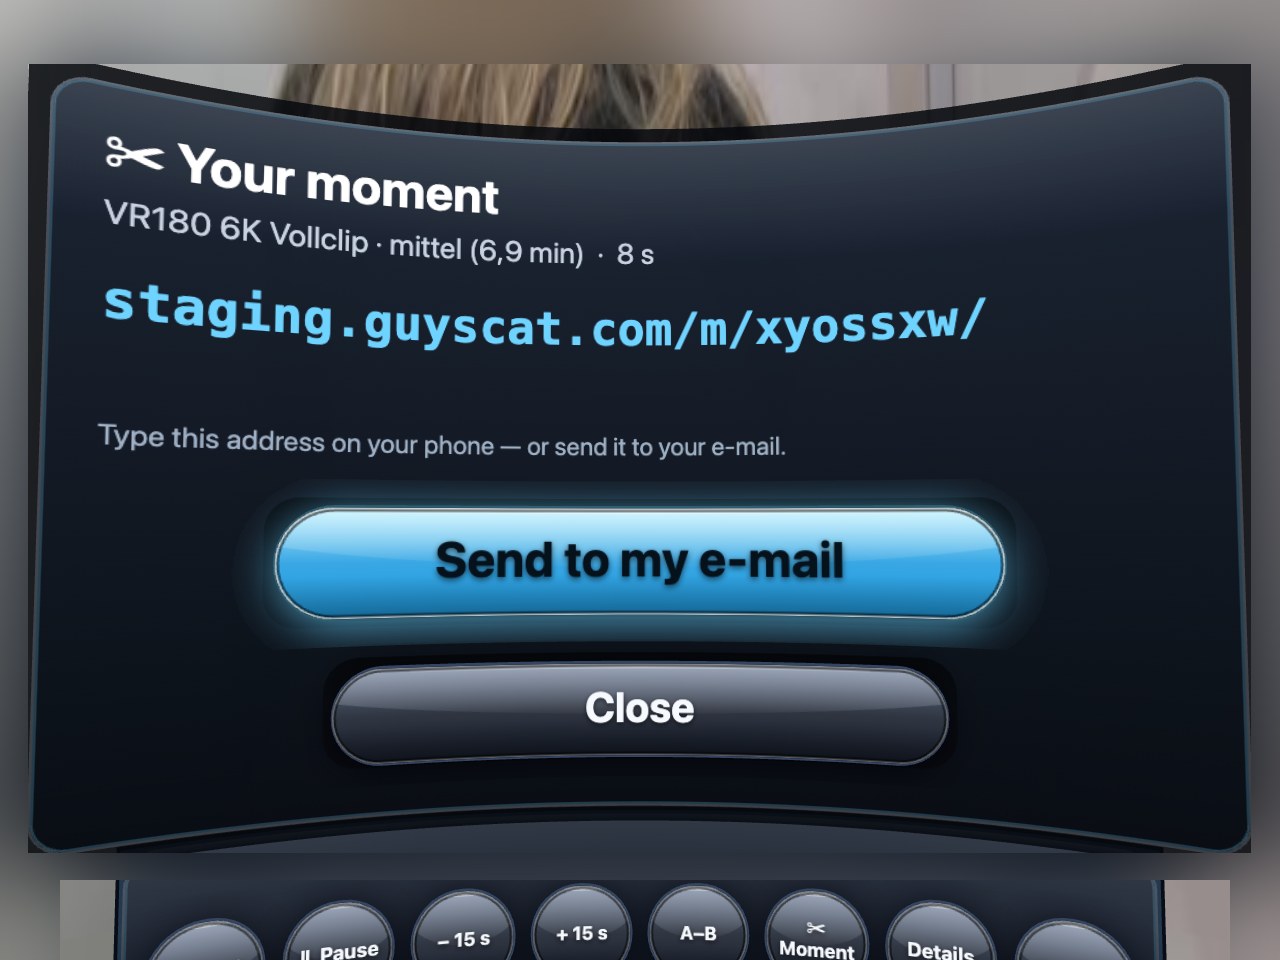
In the dome press ✂ Moment and the hub cuts ten seconds from the current position (or the A–B stretch, if one is set) into a short clip with its own link. The dialog shows the address in large type so you can type it on your phone, and a button Send to my e-mail that sends it to your account address. There is no QR code on purpose: a code shown inside a headset cannot be scanned by the phone you are holding. The link opens a small page with the moment and a button to the full clip — good for sending to a friend. Creators decide whether moments are allowed for their clips.
10. Your wall, badges, Lean back, Toy — the things that make the room yours
Your wall
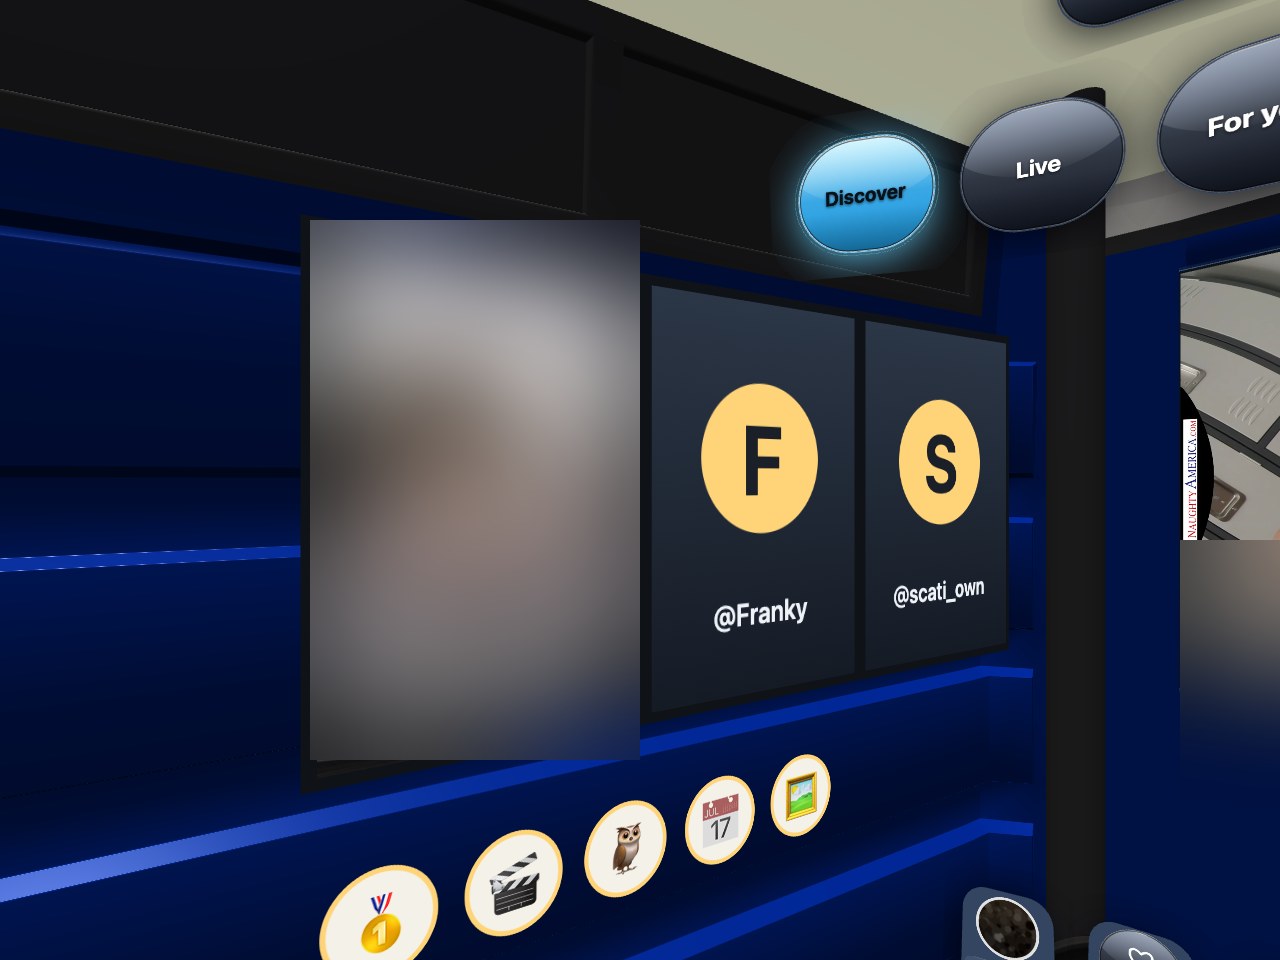
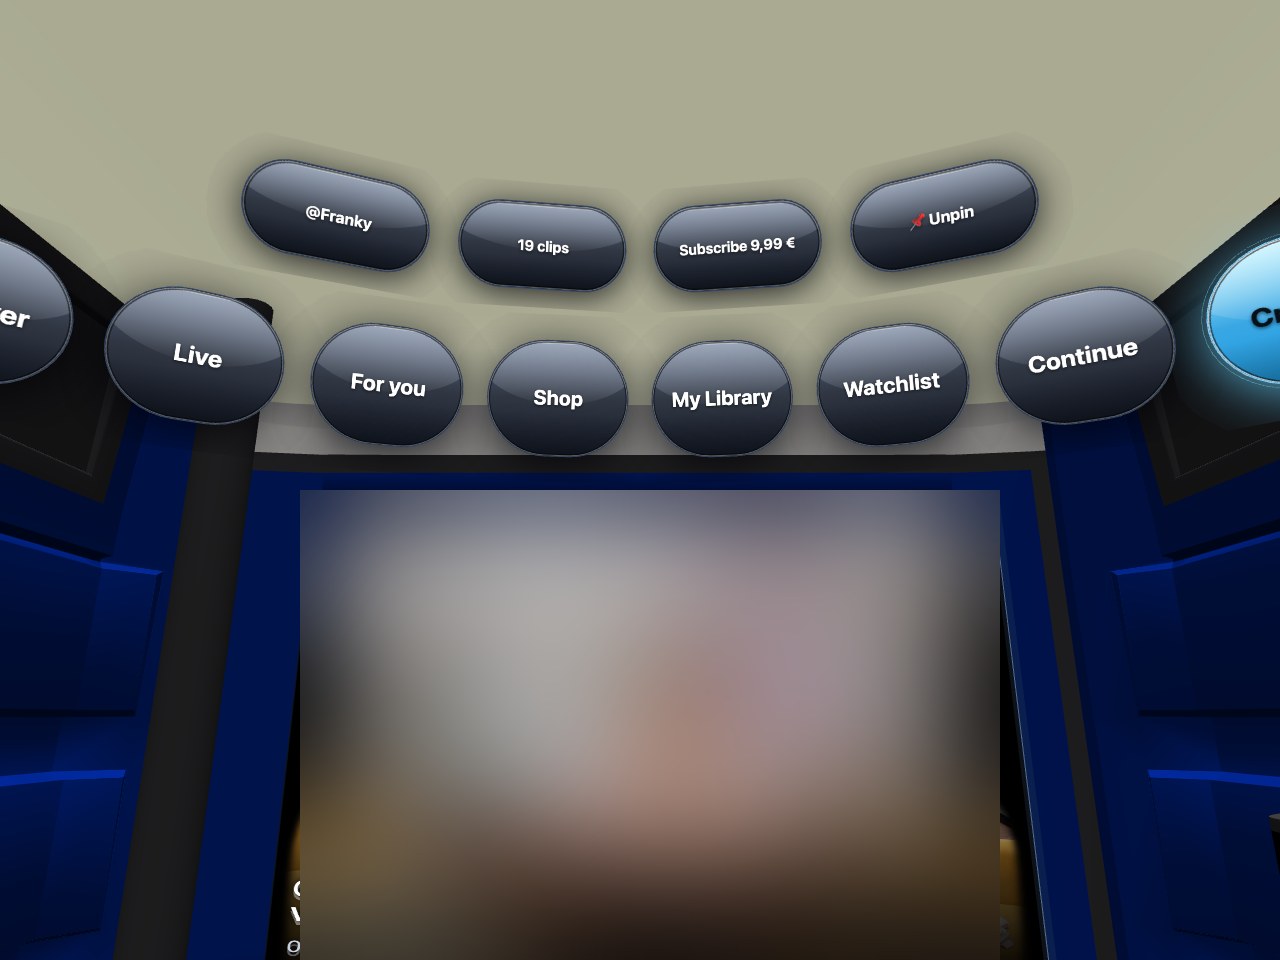
The wall on your left is yours. Open a creator’s page in the hub and press 📌 Pin in the chips above the tabs — their poster hangs on your wall from then on, up to three of them, on every visit. A creator who has not uploaded a poster hangs there as their profile picture, filling the frame, with their name underneath. Point at a poster and press to jump to that creator. If you have not pinned anyone, the wall shows the creators you follow. Unpin takes a poster down again.
Badges
Under the posters sit your badges — stickers you earn by using the hub: your first purchase, five and twenty clips in your library, subscribing, tipping, watching three, seven and thirty days in a row, a night visit, decorating your wall. A new badge pops up as a small sign on the screen. Some of them come with a small credit to your wallet; the sign tells you when that happens.
Style my booth (Settings → 🏅 Me) sells small decorations for tokens — a gold or neon frame around a creator’s poster, a set of colours for the booth light, a pack of wall stickers under your badges, a name plate on the inside of the door and a slowly changing “club” ceiling light. Each item is bought once with tokens from your wallet and stays yours; you can switch any of them off and on again in the same dialog. If your balance is too low, the dialog offers a top-up by phone code, just like buying a clip. The money goes to the hub, not to a creator.
Lean back
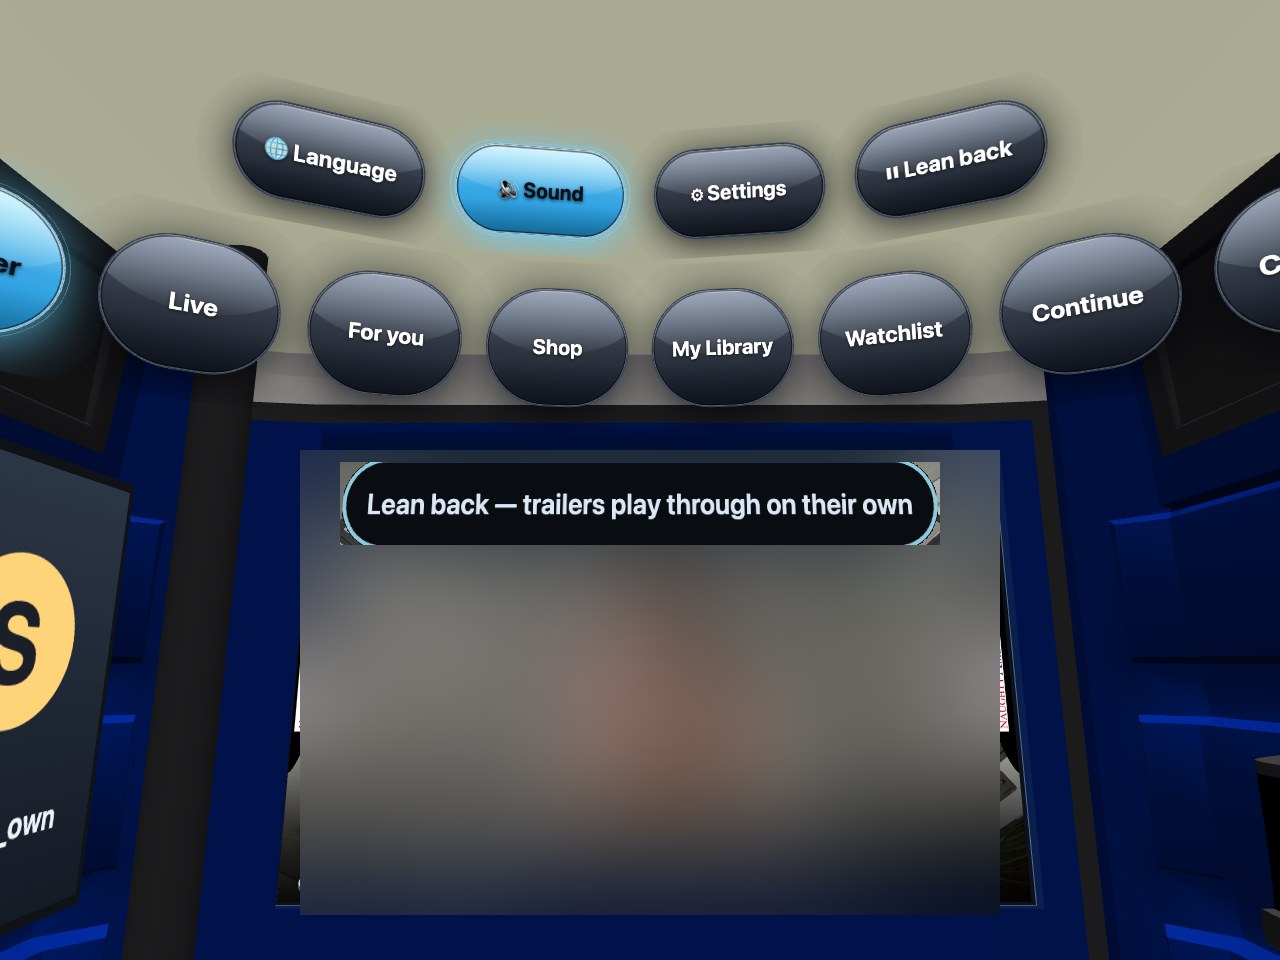
Press the ▶ Lean back chip and the feed runs like a TV channel: each trailer plays through once, then the next one comes, and at the end it starts over. It keeps going in the dome as well: when a clip ends, the next one opens by itself — no scrolling, no reaching for the stick; a film is never cut short, only its end moves you on. It pauses while a dialog is open and continues when you close it. Press the chip again (now ‖) to stop. The hub remembers the switch.
Toy — feel the clip
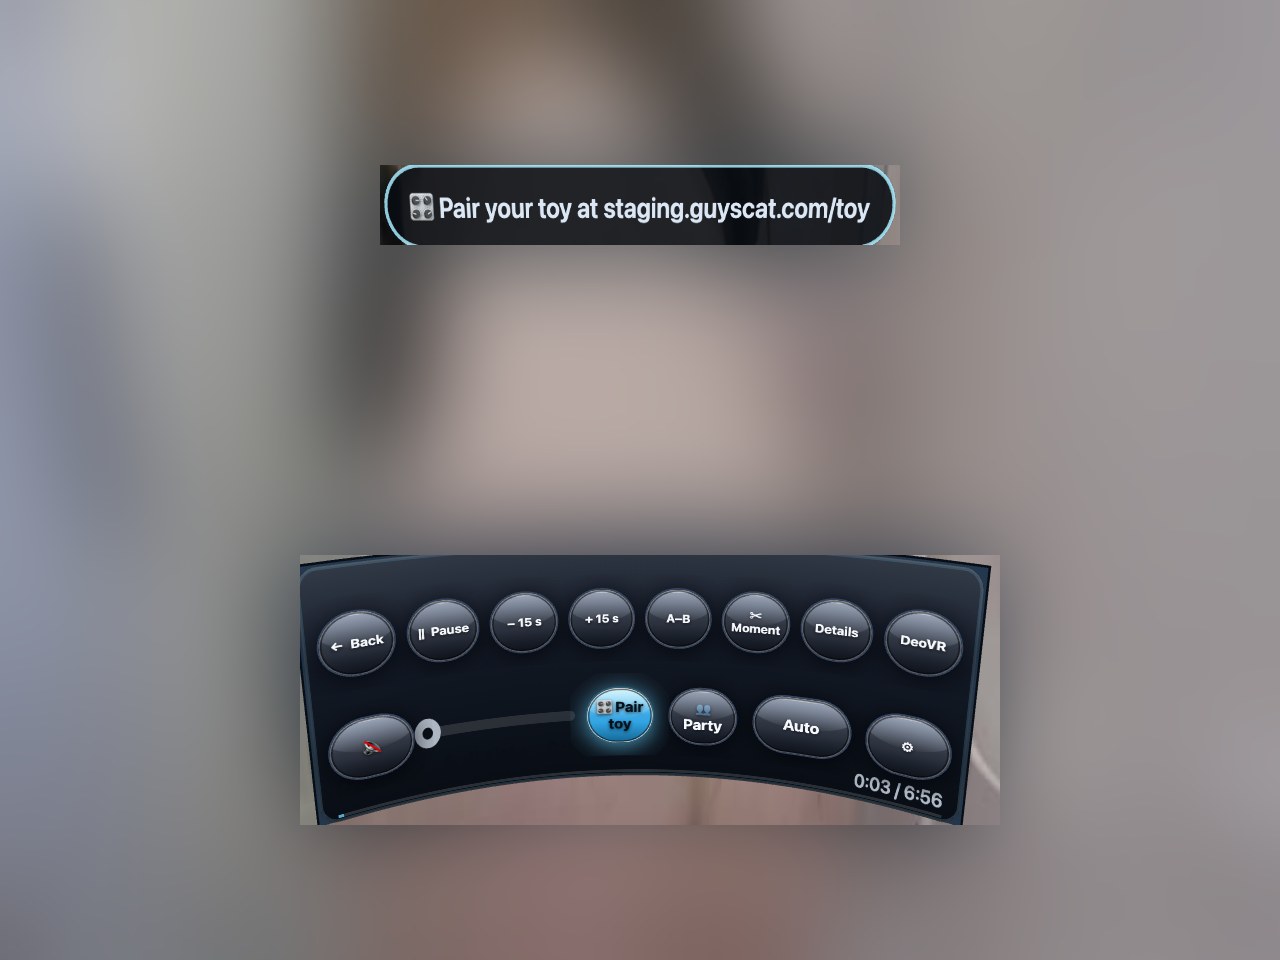
If you own a Lovense toy and the creator has added a toy script to the clip, the clip can drive your toy: the toy follows the video while it plays, and stops when you pause. It works like this:
- Pair the toy once, on your phone or computer: open
/toyon this site, press Show pairing code, and scan the code with the Lovense Remote app (scan button in the app). Press Check pairing to be sure; Test vibration gives a short buzz. Pairing from inside the headset is not possible — a QR code cannot be scanned there — which is why the hub points you to this page. - In the hub, open a clip that has a toy script (the Toy button only appears on those, and only on the full clip you own) and press Toy. It turns blue: Toy on. Not paired yet? The button says Pair toy and a sign shows the page address together with a 6-digit code: type
/payon this site into your phone, enter the code, and you land on the pairing page already signed in (the code is valid for 20 minutes and works once). - That is all. Pause, jump or close the dome and the toy stops; play again and it continues at the right place. Press Toy again to switch it off; the hub remembers your choice.
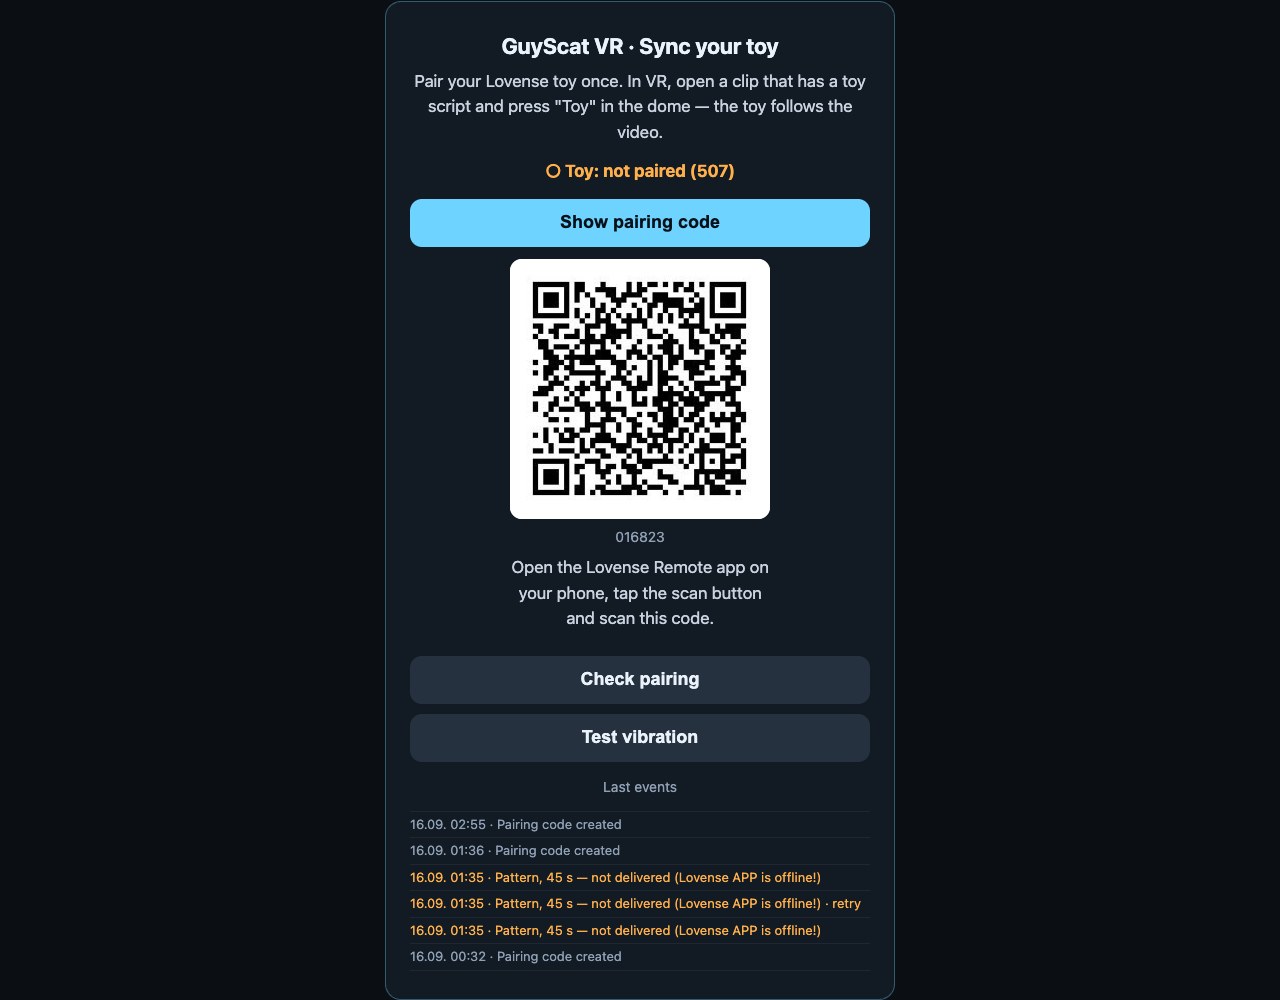
The toy is controlled through Lovense’s own cloud, so the phone with the Lovense app must be online while you watch. Keep the app out of your phone’s battery saver — a sleeping app is the most common reason a toy does not react.
11. Live streams in the hub
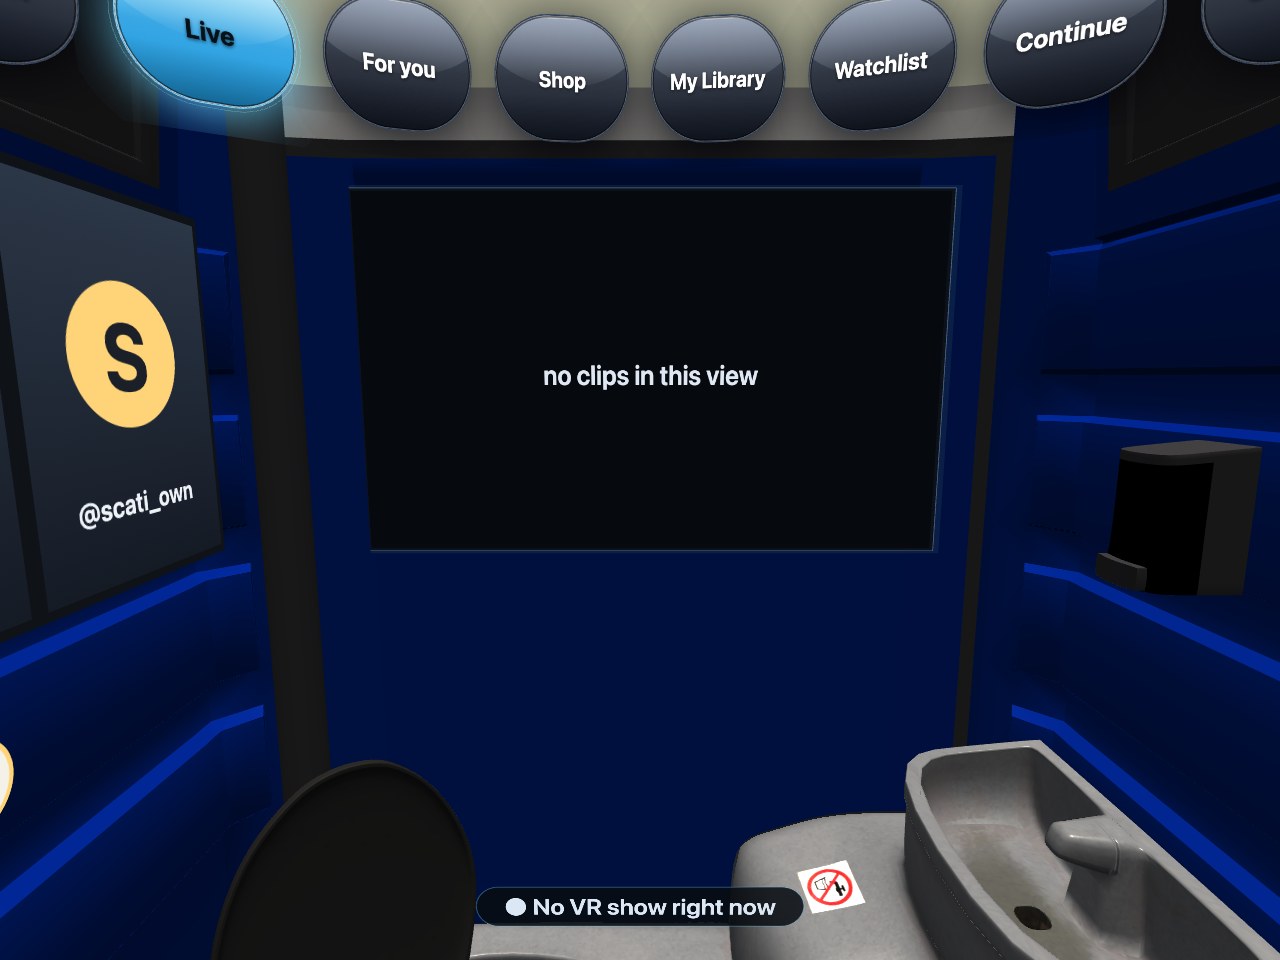
The Live tab lists every creator streaming in VR180 right now. Open one and the dome shows the live picture; the bar has the live chat as a band you can read, 💬 Chat to write into the room yourself (the keyboard appears in front of you, everyone in the room can read it), ★ Tip, and reactions. Paid rooms work in the headset too: a ticket show, a premium room billed per minute, a running private show you can watch as a voyeur, and rooms for subscribers only — the dome opens a small dialog that names the price, and one press buys the ticket, starts the minutes or joins as voyeur, paid with your tokens. In a free room the 🔒 Private button asks the creator for a private or exclusive show; once accepted, the show is yours. If your balance is too low, the dialog offers the top-up amounts and a code for your phone, exactly like buying a clip; a subscription is taken out on your phone with such a code, and the show opens by itself. There is no timeline on a live show. You can also come in from the live page on the site — its Watch in VR button lands directly in the right dome.
2D shows and your VR tag. Creators streaming a normal 2D show are listed in the Live tab too, marked 2D. They play on a flat 16:9 screen in front of you instead of the dome — chat, tips and access work exactly the same. In the creator’s chat and viewer list you appear with a small VR tag, so everyone can see you are watching from the headset.
Spotting a VR show before you put the headset on. On the site’s /live overview a running VR180 show carries a VR180 · 3D badge in the corner of its card and is counted in the VR segment; its live page has the Watch in VR button described above.
Finding the right show. The bar of the Live tab has a Search button, the same as in the Shop. It opens the search-and-filter dialog: type a creator’s name on the keyboard in front of you, choose a stream type — All, VR180 · 3D or 2D — and pick a performer or one of the creator’s categories and tags from the chips (the creator’s performer profiles and the categories of their clips; a creator without clips shows no chips). Press Apply and the Live tab shows only the matching shows; Reset brings every show back. The filter is yours alone — it changes nothing for other viewers, and the Discover, Shop and library tabs keep their own filters.
Your voice in an exclusive private. When a creator has accepted your exclusive private show and allows cam2cam, the dome bar shows 🎤 Talk. Press it and the headset’s microphone goes to the creator — they hear you, nobody else does. The button turns into 🎤 Mic on; press it again to mute. In a normal private or as a voyeur there is no microphone, just as on the website. The headset has no camera pointing at you, so cam2cam in VR is voice only.
If the creator has set a tip goal in their studio, the dome shows it: a bar above the live bar with the goal, the tokens collected so far and the percentage, and a small board to the right with the top tippers of this show (the same names the room chat shows). Without a goal the bar simply counts the tips of the show. When the goal is reached the room flashes, confetti falls, a plaque says Goal reached!, you hear the click and your controller buzzes twice. Everything comes from the same live room as the chat — the hub never sets a goal of its own.
Some live shows come back as a replay: when a creator records a VR180 broadcast, they can turn it into a normal VR clip afterwards. You find these in the Shop and Discover like any other clip, marked ⏺ Replay on the card, and you buy and watch them the same way — full VR180, same quality ladder as a studio clip. Whether a show gets a replay is up to the creator.
12. Settings
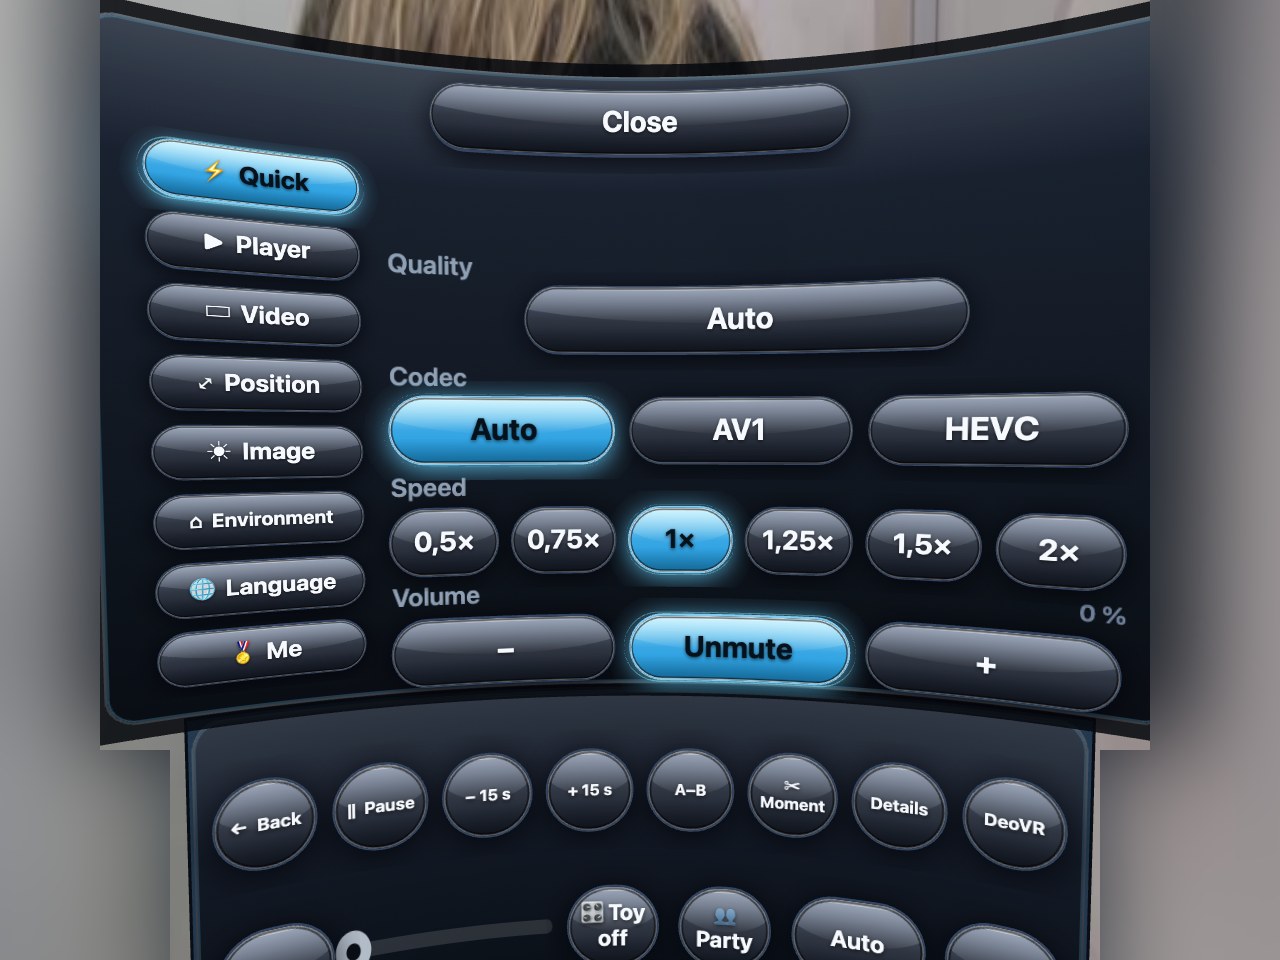
- Quick — quality, codec (Auto, AV1, HEVC), speed 0.5×–2×, volume.
- Player — Resume playback where you stopped, Pause when headset is removed, the jump step for − / + (5 to 30 s), Loop, controller Vibration, a Frame rate display, and Recenter view.
- Video — projection (180° dome or 360° sphere) and stereo layout (side by side, over/under, mono 2D), for a clip that was uploaded with the wrong tags.
- Position — move the picture up or down and to the side.
- Image — Bright, or dim the picture in two steps.
- Environment — the cabin itself on or off, Room sound, Menu distance (near, normal, far), the Flies themselves on or off, the Fly buzz and the Button click sounds, Share gaze data (off by default: an anonymous picture of where people look, for the creator), and Reset all.
- Language — the same eight languages as the site.
- Me — your badges.
13. If something is off
Found a bug? Press the Report a bug chip above the tabs, type what happened on the keyboard (at least 20 characters — what you did and what you expected) and press Send. The hub attaches the tab, the clip and the headset details by itself, and the report lands with the same team that handles bug reports from the website.
A short freeze once, soon after a clip starts — picture and controllers stand still for about a second, then everything runs on: that is the one quality step of Auto (section 5), the headset switching its decoder to the higher rung. It happens once per clip at most. If you would rather never see it, pick a fixed rung in the quality button of the dome bar as soon as the clip starts.
| What you see | What to do |
|---|---|
| The screen says no clips in this view | That tab is empty for you right now — nobody live, nothing saved, nothing to continue. Pick another tab. |
| The picture is soft and does not sharpen | Give it ten seconds — Auto starts low and climbs. Use 5 GHz Wi-Fi; 8K needs a steady connection. Or pick a fixed rung in the quality button. |
| The picture looks doubled or squashed | Settings → Video: pick Side by side, Over/under or Mono, and 180° or 360°, to match how the clip was filmed. |
| The bar is gone | Point at nothing and press the trigger. It also comes back when you move the controller. |
| “Your session has ended” or the browser drops out of VR | Press Start VR again. Your place in the clip is kept. |
| Toy does not react | Open /toy on your phone and press Check pairing; make sure the Lovense Remote app is open and not in battery saver. |
| A watch party will not connect | Both of you need the code exactly; a party expires after a few hours. Start a new one. |
Questions or something that does not work as described here? Write to support from the site — a line about which headset and which clip helps a lot.