Video guide
Prefer to watch? This short guide walks your My Recordings page — where every recorded show lands automatically, how to set who can watch each one, how to turn a recording into a paid clip, and how to hide or delete it.
Lewdden can record every show you broadcast and keep the recordings as VODs (videos-on-demand) in your store. You decide which show types get recorded, who can watch the recordings afterwards, and when to delete them. This guide walks through the whole flow.
Heads-up: recording is off by default. Turn it on for the show types you want kept (Section 1) before you go live.
Why turn it on
Once you’ve flipped the right toggles to On, there’s nothing else to do. Every recorded show is processed automatically and lands in your My Recordings library after it ends — you don’t have to upload anything, edit anything, or click any “publish” button.
If you also run a subscription tier on your store (highly advisable — it’s one of the easiest ways to grow recurring income), recordings turn into passive earnings. Every show you do becomes another piece in your subscriber library, every subscriber gets to binge-watch your back catalogue, and the longer you stream the more reasons new fans have to subscribe. You earn from a show the night it goes live AND every time a subscriber watches the recording weeks or months later — for the same one stream.
In short: the toggle is free, the work is done for you, and the recordings keep paying out long after the live show ends.
1. Turn recording on
Recording is controlled by three independent toggles in studio Settings → Pricing:
- Record shows — On / Off (default Off). Records your public and Premium-per-minute streams.
- Record privates — On / Off (default Off). Records your 1:1 Private and Exclusive Private shows.
- Record ticket shows — On / Off (default Off). Records your Ticketed shows. With this on, ticket-holders get the recording in their My Library after the show.
Flip whichever ones you want to On and click Save Pricing. The setting persists across sessions until you change it. If you want a one-off — record this show, but not the next — there’s also a Record button in the studio actions row while you’re live; it toggles recording for the current session only.

2. Where your recordings live
All your recordings appear in My Recordings at /store-manager/vod-manager/. Each VOD is a card showing:
- A thumbnail / preview frame
- The show type it came from (Public, Premium, Private, Exclusive Private, Ticket)
- The current visibility (see Section 3)
- A status badge (Available or Hidden)
- A retention badge (Hot, Cooling, Cold candidate, or Cold — see Section 5)
- Duration, file size, recording date, and the session ID
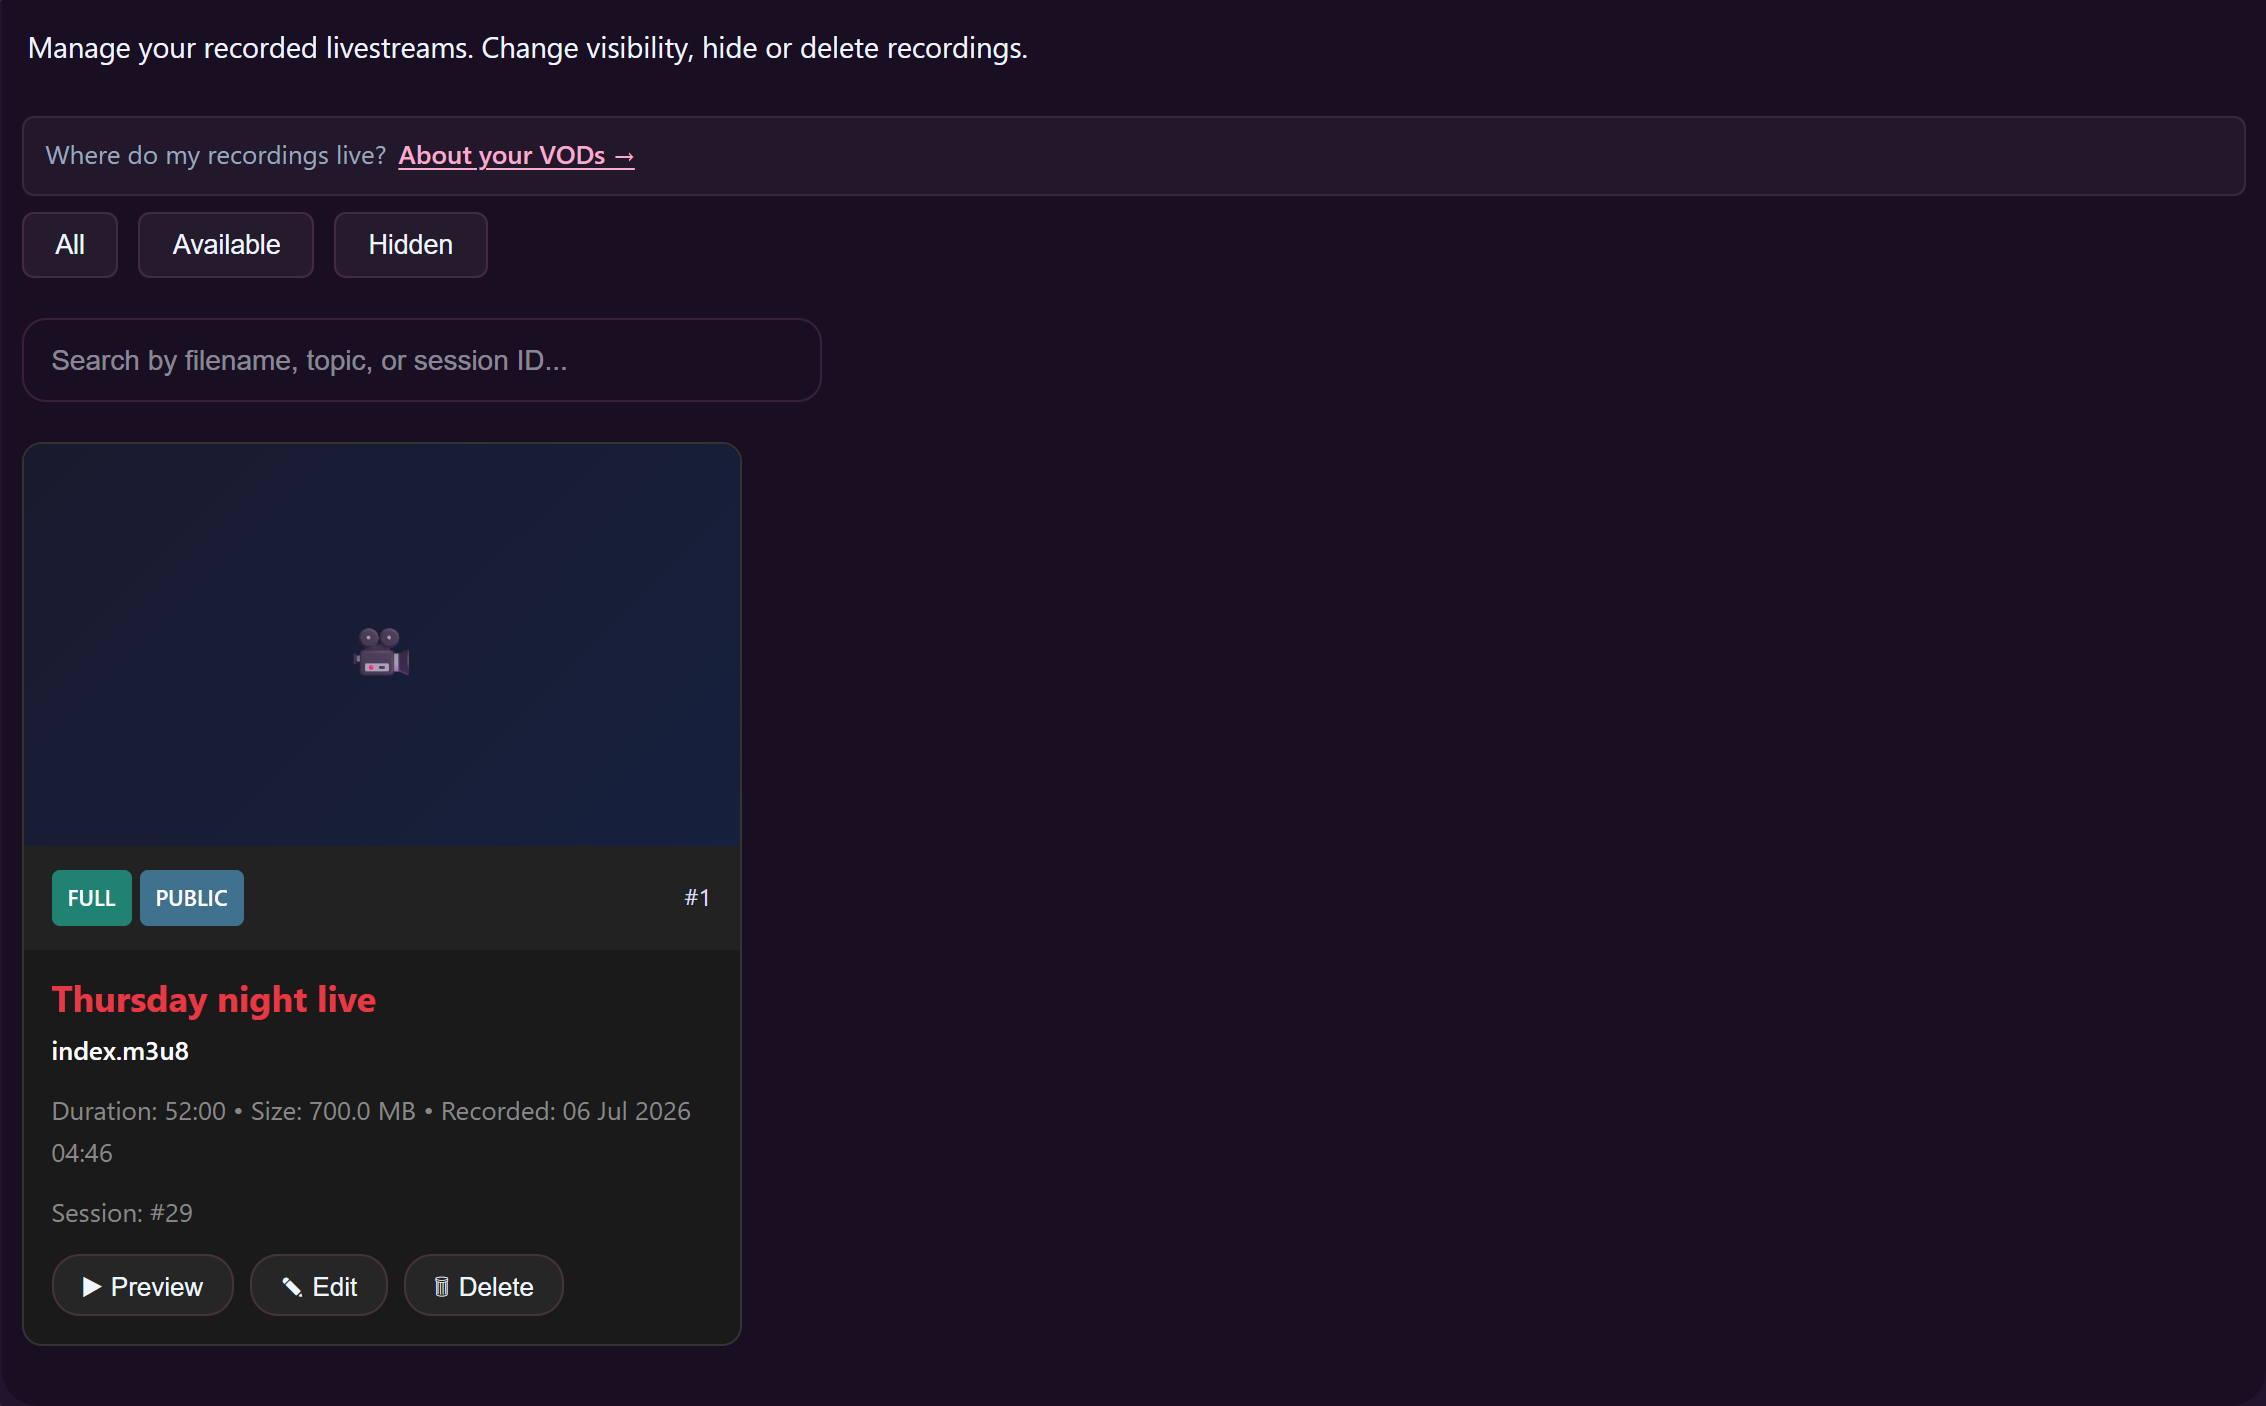
You can filter between All / Available / Hidden, and search by filename, session topic, or session ID.
3. Setting who can watch each VOD
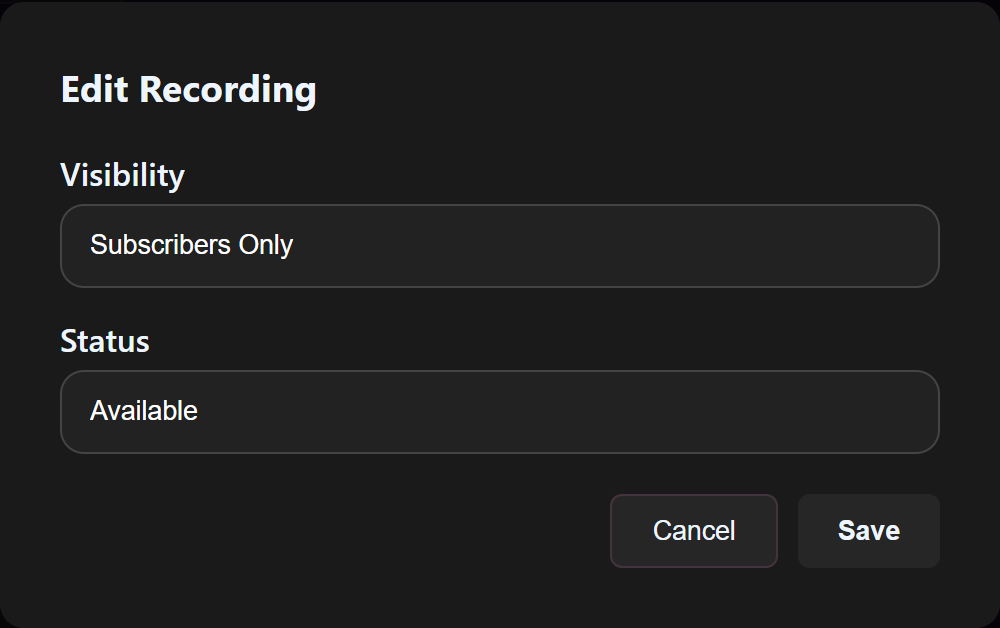
Click Edit on a VOD card to set its visibility:
- Public — anyone can watch on your store.
- Subscribers Only — visible to your subscribers in their My Library.
- Participants + Subscribers — the people who were in the original private/ticket show plus all your subscribers.
- Private Participant Only — only the specific viewer who was in the 1:1 private show with you.
- Ticket Holders Only — only the people who bought a ticket to that specific show.
The default depends on the segment type — privates default to participant-only, tickets default to ticket-holders, public/premium streams default to subscribers. You can change any of them at any time.
You can also flip a VOD between Available and Hidden without deleting it — useful if you want to pull something temporarily and put it back later.
4. Where customers see your recordings
Fans find your VODs in two places:
- Your store / profile — public VODs appear there directly.
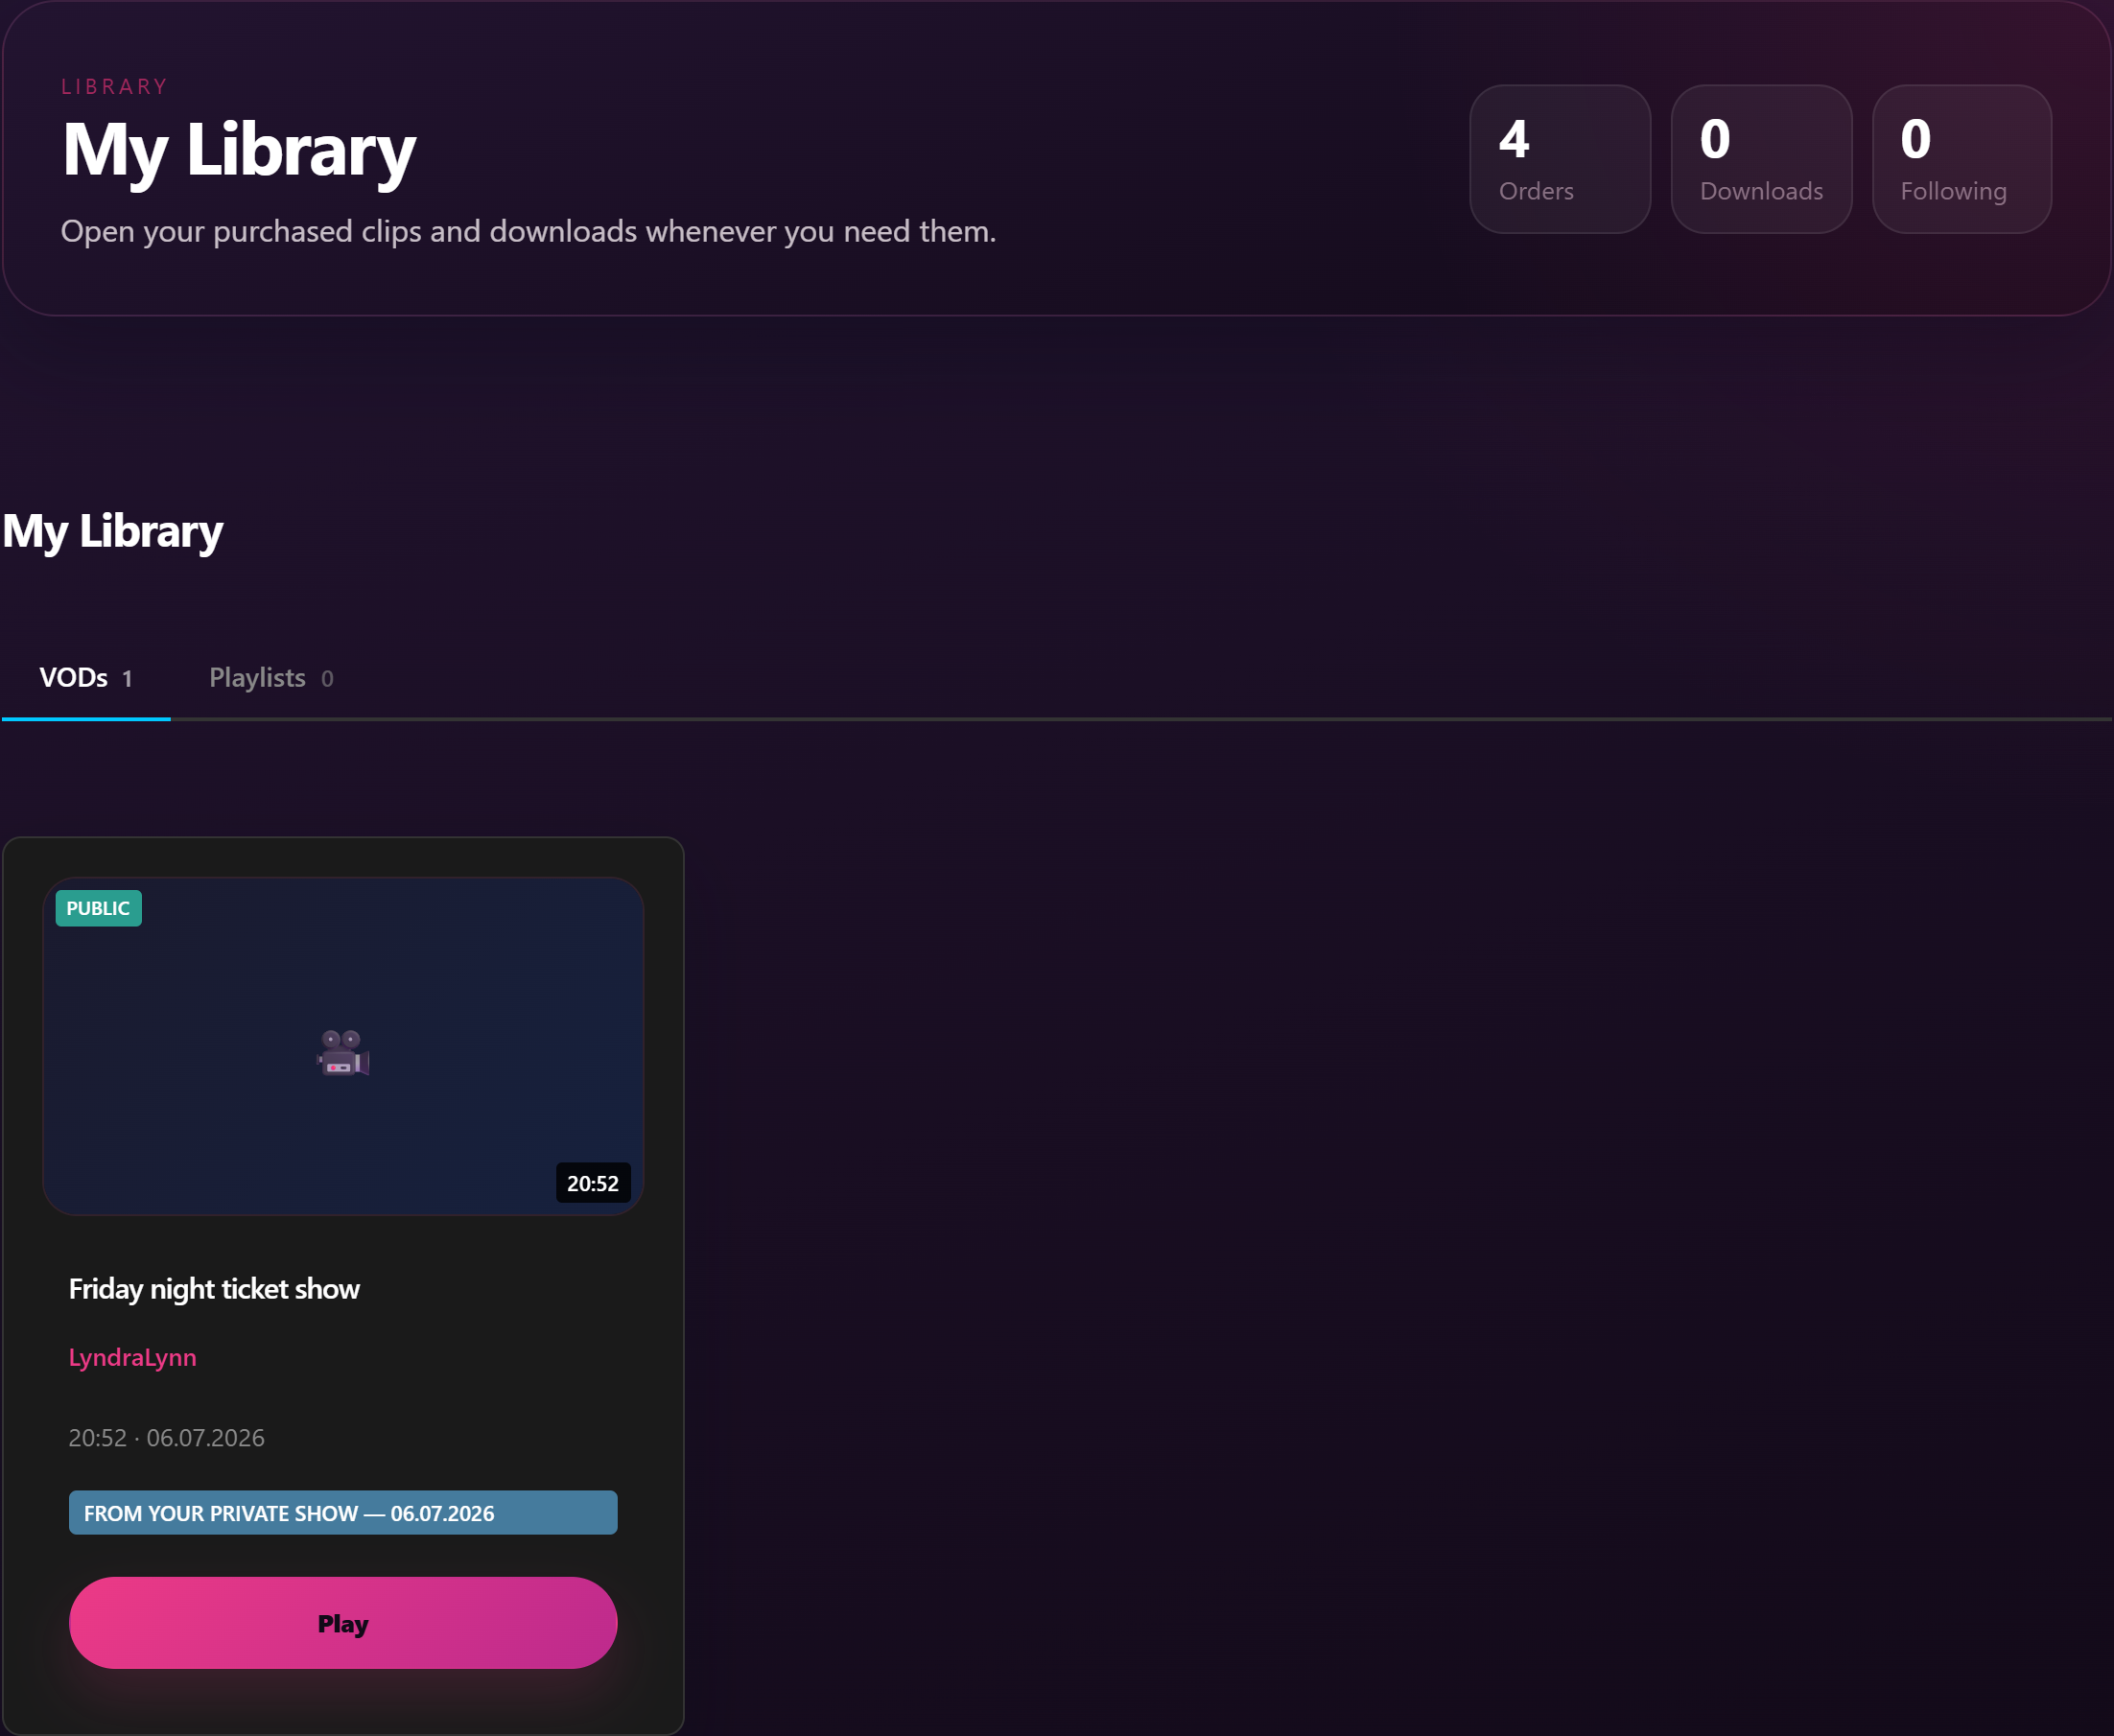
- My Library at /my-account/my-library/ — under the VODs tab. This is where each customer sees the VODs they personally have access to: their ticketed-show recordings, the privates they were in, and any subscribers-only VODs from creators they subscribe to.
Customers watch VODs in the browser — playback is streaming-only for VODs they have access to via subscription. (Customers who purchased a VOD as a one-off can also download it from My Library, the same way they can download a purchased clip.)
5. How long recordings are kept
Once a VOD is created, it goes through these tiers:
- Hot — full-quality, instantly streamable. New VODs land here.
- Cooling — once a VOD hasn’t been watched in a while, it’s marked Cooling. Still streamable, just flagged that it’s getting old.
- Cold candidate — about to be archived. The badge tooltip shows “Archiving soon” with a countdown.
- Cold — archived. Still kept, but takes a bit longer to spin up if someone watches it.
The transitions happen automatically based on how recently each VOD has been viewed. Paid clips (the kind you upload) are never auto-tiered — only stream recordings.
6. Publishing a VOD as a paid clip
Each VOD card has a Publish as clip button. Click it on any Hot or Cooling recording and the platform creates a draft clip and opens its edit page directly — title, price, tags and description all live on that page, alongside the trim and trailer tools specific to recordings.
On the edit page you’ll see the standard clip form (Title pre-filled from your session topic; Price defaulted to the €4.99 floor; Tags; Description; Categories — the Livestream VODs category is auto-assigned and can’t be removed; Sexuality). Below the form are three livestream-specific sections:
- Trim recording length — drag the start/end sliders or type times into the Start and End fields (mm:ss or h:mm:ss). Trim is optional; if you don’t trim, the full recording is sold. The order of operations is shown right next to the buttons: click Apply trim first to save your in/out points, then Render final cut to produce the trimmed clip. Render is the slow step — it can take a while for long clips; progress is shown on the page and you can come back when it’s done. While the render is in progress the clip is hidden from your storefront and the public catalogue. If you change your mind mid-render, a Cancel button on the Render Final Cut row stops the job so you can adjust the trim and re-render.
- Trailer generator — a short preview clip a fan sees before buying. Locked until you click Apply trim, then unlocks immediately (no waiting for the final cut to finish). Pick a trailer window inside your trim range; the trailer is produced separately.
- Source: livestream recording banner — one checkbox, Hide the original recording from my storefront. Tick it if you only want the paid clip on your store; leave it unchecked to keep both the recording and the clip live at the same time. The recording stays in your My Recordings list either way — the checkbox only controls public visibility.
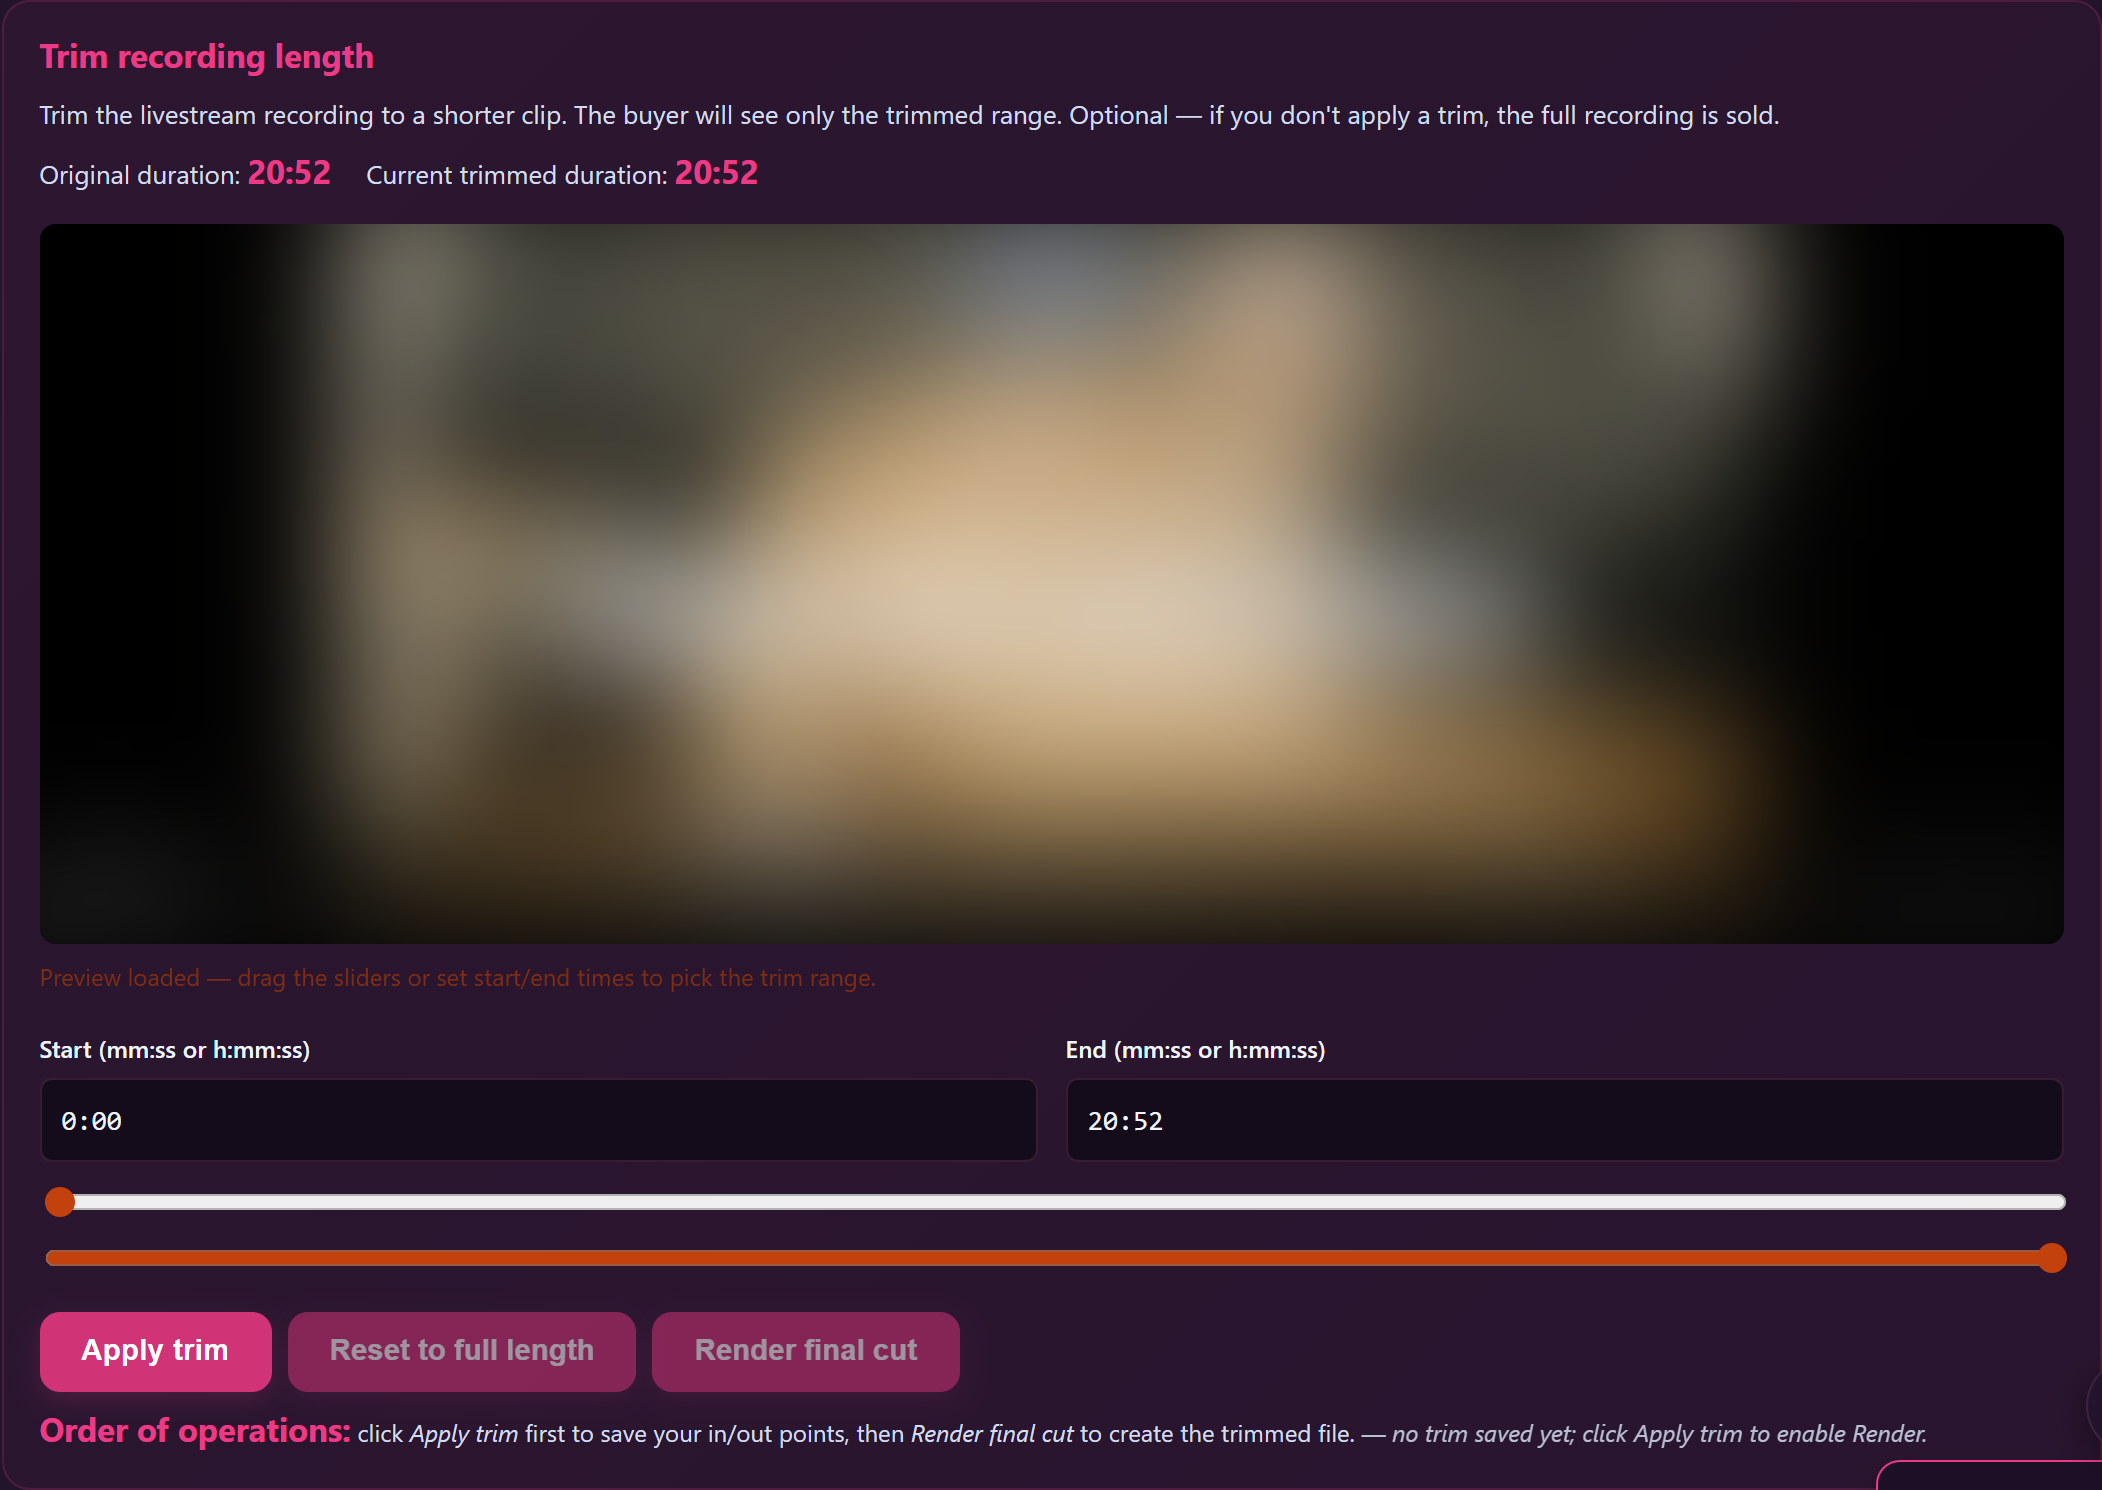

Two small extras that help if you work fast: after you click Apply trim you can hit Generate Trailer straight away — you don’t need to wait for Render final cut to be ready first. And once Render final cut finishes, the trailer tool switches to the new trimmed clip on its own, so any trailer you generate after that comes from the trimmed clip rather than the original recording.
Click Update clip and resubmit at the bottom to save and send the clip into moderation. The clip appears in Store Manager → Clips at status Pending, exactly like a direct upload. Once approved, it shows up alongside your direct uploads in your store, your subscriber library (if you have one), and the public clip catalogue.
You can publish the same recording multiple times — each click of Publish as clip creates its own independent clip, useful for listing the same show with different titles, prices, or tag sets across niches.
Cold and Cold-candidate recordings (older shows that haven’t been watched in a while) hide the button. Watch the recording once from your storefront to warm it up — the button reappears on the next page reload.
7. Deleting a recording
On any VOD card, click the Delete button to remove it permanently. Deletion is final — the file is removed from storage, ticket-holders / subscribers lose access, and any links break. If you’re not sure, hit Hide first; that pulls it from listings without losing the file.
Common questions
Q: I had Record shows On, but my last public stream isn’t in My Recordings.
Check that the toggle was On before you started the stream — toggling it during the show only affects the next stream. Also, very short streams (under about a minute) may not produce a VOD. If neither applies, open a support ticket with the session date and time.
Q: I had Record privates Off — does the viewer get a recording anyway?
No. With Record privates Off, no recording is produced. Nothing is stored, nothing is delivered to the viewer.
Q: My ticket-holders are asking where the recording is.
Check three things: (1) Record ticket shows was On for that session; (2) the VOD’s visibility is set to Ticket Holders Only or Participants + Subscribers; (3) the VOD’s status is Available, not Hidden. Once those are right, ticket-holders see it in their My Library → VODs.
Q: Can I download my own VODs?
Not from the browser UI. If you want a master file to edit, open a support ticket and we’ll arrange access.
Q: A subscriber says they can’t watch a subscribers-only VOD.
Confirm they’re actually subscribed to your store (and not just a customer with old purchases). If they are, check the VOD status is Available and visibility is Subscribers Only or wider. If everything looks right, ask them to refresh the page and clear cookies — playback access occasionally needs a reset on the customer’s browser side.
Q: How long do recordings stay?
Indefinitely, but they tier through Hot → Cooling → Cold candidate → Cold automatically based on how recently they’ve been watched. Cold doesn’t mean deleted; it just means slightly slower first-play. Paid clips you uploaded are never auto-tiered.
Q: Can I edit a VOD’s title or description?
Not on the recording card itself — that just shows the topic from the session. To give the recording a custom title (and a custom description, tags, price), click Publish as clip on the card and edit the new clip’s fields. The original recording stays as-is in My Recordings; the new paid clip carries your custom metadata.
Q: The trailer generator is locked — how do I unlock it?
Apply your trim first. The trailer generator unlocks the moment you click Apply trim in the Trim recording length section above (you don’t need to wait for the final cut to finish). Pick a trailer window inside your trim range and the trailer is produced separately.
Q: I deleted a VOD by mistake — can I recover it?
No. Deletion is final. Hide instead of Delete if you’re uncertain.
Need more help?
If a recording you expected didn’t appear, or a customer can’t access one they should, open a support ticket from your account with the session date, time, and the specific VOD ID (the #NNN shown on the card).